Sewing Machine Seam Allowance Guide
Learn how to choose, mark, and sew with accurate seam allowances across fabrics. This Sewing Machine Help guide covers standard allowances, adjustments, and common mistakes for beginners and hobbyists.

By following this sewing machine seam allowance guide, you’ll choose correct allowances for fabrics, mark them precisely, and sew with confidence. You’ll learn standard allowances for garments and home projects, how to adjust your machine’s guides, and how to test on scraps before cutting. This quick-start approach helps beginners and hobbyists sew accurate seams every time.
Sewing Machine Seam Allowance Guide: Why It Matters
A seam allowance is the fabric margin you leave before stitching. In a sewing machine seam allowance guide, understanding this margin helps you predict how fabric will behave once it’s sewn: will it ease into a curved seam, or pucker along a long edge? For home sewers and beginners, the right allowance is a safety net for fit, finish, and durability. According to Sewing Machine Help, starting with the correct allowance saves fabric and time by reducing the need to resew. The seam allowance sets the room you have to adjust fit during assembly, but it also controls bulk in corners and joining points. When you set up your project, decide early whether you’ll follow pattern specifications or tailor the seam allowance to your fabric’s properties. Fine fabrics and delicate lace often need smaller margins, while bulky canvas or denim benefit from a wider margin to accommodate folding and pressing. The goal is to stitch close enough to the seam’s edge to hold fabric, yet leave enough space for finishing techniques like serging, pinking, or topstitching. Throughout this guide, you’ll see practical steps, safety notes, and quick checks from experienced hobbyists, including insights from the Sewing Machine Help Team.
Standard Seam Allowances for Common Fabrics
seam allowances vary by fabric weight and project type. Lightweight fabrics such as chiffon or silk typically use smaller margins (often 1/4 inch / ~6 mm). Medium-weight wovens like cotton drill or poplin commonly employ 3/8 inch (~9–10 mm). Heavier fabrics such as denim or canvas often require wider allowances, typically 1/2 inch to 5/8 inch (~12–16 mm), to provide room for pressing and edge finishing. Knits and stretch fabrics usually need 3/8 inch to 1/2 inch but may be adjusted for stability and recoverability. Pattern instructions are your primary guide, but it’s wise to test on scraps and remember that your presser foot and stitch choice can alter effective width. As the Sewing Machine Help Team notes, always verify your fabric type and choose an allowance that allows clean edges without creating bulk at curves or corners. This section gives you a practical framework to decide on margins before you start cutting.
How to Determine the Right Seam Allowance for Your Project
To pick the right seam allowance, separate your decision into garment construction, quilting, and home decor. For garments, follow the pattern unless you’re adjusting for petite or full-figured fits. For quilts, smaller seam allowances preserve fabric squares and reduce bulk in seams, while topstitching can dictate a slightly wider margin. Home decor items often benefit from wider margins to accommodate hems and heavy fabrics. A simple test is to cut two scraps and sew along a line with your chosen allowance, then compare in a mock-up of the final piece. The Sewing Machine Help Team emphasizes testing in this phase—confirm that your seam lies on the marked line and that the finished edge lies flat. Don’t forget to consider your fabric’s stability; fabrics that fray easily may require finishes that make wider seams more practical. When in doubt, choose the standard recommended by the fabric’s weight class and adjust after a quick test.
Setting Up Your Machine: Guides, Feet, and Marking
Your machine’s guides and feet are allies in achieving consistent seam allowances. If you’re using a dedicated 1/4 inch foot, align the needle with the edge guide and maintain steady fabric feeding along the guide. Some machines offer adjustable seam guides or a ruler tear-off on the throat plate; use these to set your exact margin. If you don’t have a specialized foot, you can mark a seam line with a fabric chalk or marking pencil and guide the edge of the fabric along the needle plate’s edge. Always test on scrap first to ensure the groove on the feed dogs and stitch length work together with your chosen allowance. The goal is a smooth, straight seam with minimal drift, so keep hands a safe distance from the needle and feed environment. According to Sewing Machine Help, consistency in setup reduces deviation and improves results across multiple projects.
Common Mistakes and Fixes
Common mistakes include sewing off the marked line, inconsistent feeding, and using an inappropriate seam allowance for fabric type. When you notice wavy seams or pulling at curved edges, check that you are keeping a consistent distance from the guide and not crossing the seam line. If the fabric shifts, reduce stitch length temporarily to give the fabric more control and ensure you’re not trying to push extra bulk through the needle. For fraying fabrics, consider finishing with serging or zigzag stitching before pressing. If your seams end up too wide, resew with a smaller margin on a test scrap to confirm the new setting. Remember: accuracy on scraps translates to confidence on the actual garment or project. The Sewing Machine Help Team often recommends performing a quick mock seam on scrap fabric to validate the margin before committing to the final piece.
Practical Examples: Garments, Quilts, and Hems
In garment construction, most standard bodice and sleeve seams use 5/8 inch (16 mm) margins in many patterns, but this can vary by pattern and fabric. For hems, common margins range from 1/4 inch (6 mm) to 3/8 inch (9 mm) depending on fabric weight and finishing technique. Quilters may prefer smaller margins to keep bulk low in dense seams, while decorative topstitching might justify a slightly wider margin. For curved seams like armscyes or princess seams, ease comes from marking the seam line and using enough margin to allow rounding without fatigue. Always stitch a test seam on scrap fabric or a muslin mock-up to confirm your chosen allowance’s behavior under pressure and folding. By using a sewing machine seam allowance guide and practicing on scraps, you’ll gain a reliable sense of how different margins perform in different contexts.
Quick Reference: By Fabric Type and Project
- Lightweight fabrics: 1/4 inch (6 mm) seams; test for drape.
- Medium-weight wovens: 3/8 inch (9–10 mm) seams; good balance of strength and finish.
- Heavy fabrics: 1/2 inch to 5/8 inch (12–16 mm) seams; consider double-needle or reinforced finishing.
- Knits: 3/8 inch to 1/2 inch (9–12 mm); test for stretch and recovery.
- Hems: 1/4 to 3/8 inch (6–9 mm) depending on fabric and finish.
- Curved edges: maintain consistent margin and consider clipping curves to reduce bulk.
Tips from the Sewing Machine Help Team emphasize testing margins on scraps and adjusting to fabric behavior.
Authority and Further Reading
For deeper guidance on sewing machine seam allowances and fabric behavior, see extension resources and reputable home sewing guides. According to Sewing Machine Help, practical testing on scraps is essential before final stitching. Sewing knowledge from university extension sites further supports the concept that seam allowances are fabric- and pattern-dependent. The team also notes that maintaining consistent feeding and guide alignment dramatically improves outcomes across projects.
Authority Sources and Further Reading
- According to Sewing Machine Help, practice on scraps to validate seam allowances before cutting the final fabric.
- Sewing knowledge from university extension programs emphasizes tailoring seam margins to fabric types.
- For more context, refer to general sewing guidance from educational extensions and reputable craft publications.
Tools & Materials
- seam gauge(For precise 1/4" (6 mm) or 3/8" (9 mm) seam allowances)
- tape measure(At least 150 cm; used for marking and confirming margins)
- fabric marking tool (chalk or pencil)(Marks seam lines without staining fabric)
- sharp fabric scissors(For clean cut along measurements)
- pins or fabric clips(Holds fabric in place while stitching)
- seam ripper(Helpful for correcting seam mistakes)
- adjustable seam-guide foot (if available)(Provides a consistent edge distance during sewing)
Steps
Estimated time: 30-60 minutes
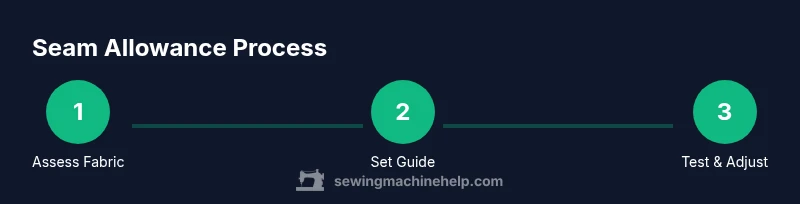
- 1
Assess fabric and pattern
Review the pattern guidance and choose a seam allowance appropriate for the fabric weight and project type. Gather fabric and cut a test swatch to confirm behavior before final cutting.
Tip: Always start with pattern guidance; use test scraps to validate. - 2
Set your seam allowance on the machine
Attach a standard 1/4" foot or align your edge guide with the needle. If you don’t have a foot, mark a seam line and guide the fabric with your fingers along the edge of the needle plate.
Tip: Test different stitch lengths to minimize fabric drift. - 3
Mark the seam line
Mark the fabric with a chalk line or temporary marker where the seam should sit. This creates a visual reference to keep your stitching aligned.
Tip: Keep markings away from raw edges to avoid transfer. - 4
Sew with the guide
Place the edge of the fabric along the guide and stitch with a consistent pace. Avoid pulling; let the feed dogs move the fabric smoothly.
Tip: Slow down on curves to maintain even margins. - 5
Finishing and pressing
Press seams toward the finished side with a steam iron. Consider finishing options (serging, pinking, or zigzag) based on fabric type.
Tip: Pressing helps minimize bulk and set the seam properly. - 6
Evaluate on scraps
Place the sewn scrap beside the actual fabric to compare the seam alignment and finishing. If unsatisfied, adjust the margin on the next attempt and retest.
Tip: Use a muslin test garment to simulate real results.
Your Questions Answered
What is seam allowance and why is it important?
Seam allowance is the margin between the fabric edge and the stitching line. It provides room for fabric shifting, pressing, and finishing, helping garments fit properly and seams endure wear.
Seam allowance is the extra fabric margin you stitch beside the edge; it helps you finish edges neatly and keeps seams strong.
How do I choose seam allowances for different fabrics?
Choose smaller allowances for delicate fabrics and larger margins for heavy fabrics. Always start with pattern guidance and test on scraps to confirm behavior.
Pick the margin based on fabric weight and test on scraps to confirm how it behaves.
Can I rely on a single seam allowance for all projects?
No. Seam allowances vary by fabric, pattern, and finish. Tailor margins to each project and use testing to verify results.
No, margins differ by project; test first to ensure good results.
What should I do if my seam is too wide or too narrow?
Retest on scraps with a adjusted margin; start with a slightly different width and compare outcomes until you reach the desired result.
If the seam looks off, redo on scrap fabric with a new margin until it’s right.
Do needles affect seam allowances?
Needles don’t change the margin, but the needle type and size can influence stitch width and fabric behavior; adjust accordingly.
Needles affect stitch behavior; pick the right needle to keep margins consistent.
How can I keep seams consistent across a full garment?
Use a seam guide or foot consistently, mark lines, and sew at a steady pace. Practice on fabric scraps and compare results along multiple seams.
Use guides and keep a steady pace; practice on scraps to stay consistent.
Watch Video
The Essentials
- Know standard margins for fabric types and projects.
- Test margins on scraps before sewing the final piece.
- Use a guided foot or markings to maintain consistency.
- Adjust seam allowances based on fabric stability and finish.