Sunny Sewing Machines: A Practical Home Guide for Beginners
Learn how to choose, set up, maintain, and troubleshoot Sunny sewing machines with clear steps, practical tips, and safety notes for beginners.

With this guide, you'll learn how to pick a Sunny Sewing Machine, set it up for first use, thread the machine, wind and fit bobbins, and perform routine maintenance. You'll also gain practical troubleshooting tips for common issues and safety checks to keep your projects running smoothly, by following step-by-step actions and clear diagrams to reinforce learning.
Understanding Sunny Sewing Machines
Sunny sewing machines are known for their friendly interfaces and reliable performance, which makes them a smart option for home sewists who are just starting out. This section explains what distinguishes Sunny models from other brands and why they’re practical for beginners. According to Sewing Machine Help, Sunny sewing machines are popular with beginner sewists for their simplicity and value. The design philosophy centers on keeping essential tasks straightforward: a clear threading path, intuitive stitch selection, and robust construction that holds up to everyday use. When you first examine a Sunny machine, you’ll notice a few dependable traits: a visible bobbin well, orderly tension dials, and a comfortable foot pedal that responds predictably. The goal here is to help you identify features that matter for a first machine, rather than overwhelm you with every bell and whistle on the market.
In practice, Sunny machines tend to deliver solid straight-stitch performance, a modest range of built-in stitches, and reliable mechanical controls instead of complicated digital menus. For common home projects—garment hems, repairs, and light quilting—the right Sunny model provides consistent results without a steep learning curve. When evaluating options, compare the number of built-in stitches, adjustable presser-foot pressure, free-arm access, and whether the machine includes a reliable automatic needle threader. Focusing on these core attributes will help you choose a Sunny that remains useful for years and grows with your skills. The result is a practical, approachable tool that turns beginners into confident stitchers.
Tools & Materials
- Sunny sewing machine user manual(Keep handy during setup and troubleshooting)
- Spare bobbins(Metal or clear plastic, choose neutral color)
- All-purpose sewing thread(Neutral color recommended for practice)
- Assorted sewing machine needles (sizes 14-16)(For woven fabrics; replace if bent)
- Bobbin winder or extra bobbins(Optional for faster winding)
- Lint brush and small screwdriver(For cleaning and adjustments)
- Fabric scraps for test stitching(Cotton or muslin preferred)
- Scissors, pins, and measuring tape(For fabric preparation)
- Power outlet and extension cord(Ensure grounded outlet)
Steps
Estimated time: 45-60 minutes
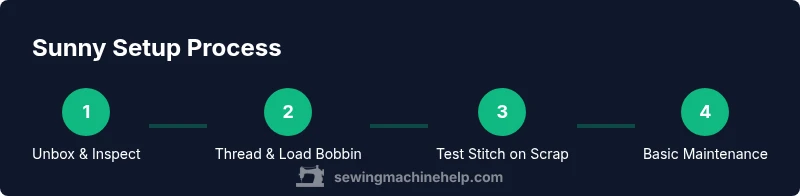
- 1
Unbox and assemble
Begin by unboxing the machine and confirming all components listed in the manual are present. Attach the accessories and the presser foot that matches your first test fabric. This initial setup reduces the chance of missing parts and ensures you can start with a clean slate. Always disconnect power before making any adjustments to avoid shocks or injuries.
Tip: Check the included accessories against the manual and lay them out before you start. - 2
Wind bobbin and load the bobbin
Wind a bobbin evenly and place it in the bobbin case according to the manual’s orientation. Load the bobbin with the thread running in the correct direction to avoid jams. A properly wound bobbin feeds smoothly and contributes to even stitching from the first test run.
Tip: Use medium tension when winding to prevent overfilling and tangling. - 3
Thread the machine and needle
Thread the upper path from the spool through guides to the take-up lever, then down to the needle. Ensure the needle is correctly inserted with the flat side facing the right. A clean thread path prevents lint buildup and skipped stitches.
Tip: Turn the handwheel toward you slowly to bring the take-up lever to its highest point before threading. - 4
Test stitch on scrap fabric
Set the stitch selector to straight stitch, lower the presser foot, and sew a short seam on scrap fabric. Check for even feed, consistent stitch length, and balanced top and bobbin threads. This confirms the setup before you begin a real project.
Tip: Start at a slow speed to observe movement and adjust tension if needed. - 5
Adjust tension and stitch length
If stitches appear loose or uneven, recheck both top thread and bobbin threading. Adjust stitch length for the fabric type you’ll sew. Testing on scrap fabric helps you dial in settings without risking your project.
Tip: Make small changes and test after each adjustment to avoid overcorrecting. - 6
Perform basic maintenance after first use
After testing, clean any lint from the bobbin area and beneath the needle plate. Store the machine in a dry, dust-free place and cover it to protect against debris. A quick post-use check helps maintain performance and safety.
Tip: Wipe the exterior with a soft cloth and avoid harsh cleaners that could damage plastics.
Your Questions Answered
What features should I prioritize in Sunny sewing machines for beginners?
Prioritize simple threading, an automatic needle threader, clear stitch indicators, a bright work light, and reliable manual controls. These features reduce frustration and speed up skill-building.
Start with simple threading, an automatic needle threader, clear stitch options, and good lighting for easy learning.
Can Sunny machines handle lightweight quilting?
Some Sunny models can support light quilting, but check throat space and motor capability. For frequent quilting, choose a model with a larger harp and steadier performance.
A few Sunny machines handle light quilting; if you plan heavy quilting, pick one with more space and a stronger motor.
How often should I service my Sunny sewing machine?
Follow the manual’s guidance and watch for signs of wear. A yearly check is common for regular use, with more frequent checks if you sew daily.
Service once a year if you sew regularly; more often if you use it daily.
Is an automatic needle threader worth it for beginners?
Yes. An automatic needle threader reduces eye strain and speeds up setup, especially for beginners who are learning the threading path.
Yes—it's usually worth it for beginners.
What should I do if stitches skip or bunch?
Recheck needle fitment, re-thread top and bobbin, and confirm fabric compatibility. Test on scrap fabric to confirm changes.
Try rethreading and testing on scrap fabric.
Where can I find reliable maintenance advice?
Consult the official Sunny manual and Sewing Machine Help resources for step-by-step care guidelines and safety notes.
See your manual and Sewing Machine Help for maintenance guidance.
Watch Video
The Essentials
- Choose a beginner-friendly Sunny model with simple threading.
- Thread and bobbin setup is essential for consistent stitches.
- Regular, light maintenance preserves performance and safety.
- Practice with scrap fabric before tackling new projects.