Tips for Using a Sewing Machine: A Practical Beginner's Guide
A practical, step-by-step guide to using a sewing machine, covering threading, bobbins, needle choices, stitches, maintenance, and safety for beginners.

With these tips, you will confidently operate your sewing machine, from threading the upper thread and bobbin to selecting stitches and basic fabric handling. This guide also covers safety checks, routine maintenance, and troubleshooting quick issues that commonly disrupt beginners. By the end, you’ll sew smoothly and avoid common beginners’ mistakes.
Understanding Your Sewing Machine: Core Functions
Your sewing machine is a versatile tool designed to translate your fabric design into stitches. Before you start any project, take a few minutes to locate the main components: the hand wheel, the presser foot, feed dogs, needle plate, and bobbin case. Understanding their roles helps you predict how the machine will respond to fabric and needle choices. According to Sewing Machine Help, a solid grasp of these basics reduces frayed seams and surprises when you advance to more complex techniques.
The hand wheel manually drives the needle, while the motor powers the stitching at the correct speed. The presser foot holds fabric in place as the feed dogs tug the material forward. The bobbin supplies the lower thread, and the stitch selector determines how the upper thread interlocks with it. For beginners, starting with a simple straight stitch is a safe way to learn tension, needle height, and fabric handling. Keep the machine clean, close to your work surface, and within easy reach of spare needles and scissors. A calm, organized workspace makes practice sessions productive and fun.
Safety First: Setup and Safe Handling
Safety is the foundation of every sewing session. Always unplug the machine before threading or changing needles, and never reach toward a moving needle. Wear fitted clothing and tie back long hair to prevent entanglement. Place the machine on a sturdy table and use a proper foot pedal on a dry, non-slip surface. Keep your fingers a comfortable distance from the needle while guiding fabric, and use pins or clips to secure fabric rather than fingers. When practicing, operate on scrap fabric first to gauge stitch length and fabric feed. If your machine is humming loudly or the needle jams, stop, unplug, and assess the issue rather than forcing the machine. Routine safety checks reduce the risk of injury and damage, making your learning curve smoother and more enjoyable.
Threading the Upper Thread: A Clear Path
Threading the upper thread correctly is essential for stable stitches. Start by turning the hand wheel toward you to bring the take-up lever to its highest position. Raise the presser foot, open the thread guide, and thread the spool with the recommended thread weight. Bring the thread through each guide, down toward the tension discs, and finally into the take-up lever. From there, pull the thread through toward the needle bar and thread the needle from front to back. When the thread is through the needle, gently pull a few inches of thread to prevent it from snagging as you begin to sew. If your machine has threading paths that differ from the general steps, consult your manual; the path is model-specific.
Winding and Inserting the Bobbin Correctly
The bobbin provides the lower thread and must be wound evenly to avoid loose loops. Place the bobbin on the winding spindle, guide the thread around the winder, and press the foot pedal to wind until the bobbin spins smoothly. Cut the thread, leave the bobbin on the spindle, and insert it into the bobbin case with the flat side oriented as indicated by your manual. Pull the thread through the case until it exits the slot, then close the cover. Finally, draw up the bobbin thread by holding the upper thread and turning the hand wheel toward you one full turn. This sets the bobbin thread on top, ready to form a stable stitch.
Choosing the Right Needle and Thread
Selecting the right needle and thread is crucial for clean stitches and fabric compatibility. For most beginner projects on lightweight to medium fabrics, a universal needle in size around 80/12 is a good starting point, with a medium-weight polyester or cotton thread. When sewing delicate fabrics, switch to a smaller needle to prevent perforation; for heavy fabrics, use a larger needle to prevent skipped stitches. Always check the needle for burrs or bends before threading, and replace it if it shows wear after every project. If you’re unsure, start with a scrap and adjust accordingly; needle size and thread weight interact with fabric type and stitch length.
Basic Stitches and Their Uses
Begin with a straight stitch to practice fabric feeding and seam allowance, then try a zigzag stitch to finish edges or sew stretch fabrics. A short, standard stitch length (about 2.5 mm) works well for most projects, while a longer stitch on forgiving seams can accommodate basting. When starting a seam, backstitch slightly at the beginning and end to secure the thread. If you’re working on woven fabrics, a longer stitch can create flexibility; for knits, a narrow zigzag or stretch stitch gives the fabric room to move. Understanding these basic stitches helps you build more complex designs over time.
Presser Feet and Quick Interchange Tips
Presser feet change the function of your machine. The standard foot is enough for many projects, but additional feet like the walking foot or zipper foot expand your capabilities. When switching feet, power off and unplug the machine, align the attachment with the shank, and lower the foot to lock it in place. Secure screws and keep spare feet in a labeled container. For beginners, practice with a straight stitch using the standard foot to build confidence before exploring specialty feet.
Tension Troubleshooting and Quick Fixes
Tension problems are common for beginners and usually show up as loopy top threads or crooked seams. Start by rethreading both the upper thread and bobbin, ensuring the thread is properly seated in the tension discs. Check that the needle is installed correctly with the flat side facing the back, and confirm that you are using the correct needle for the fabric. If loops appear on the bottom side, adjust the upper thread tension slightly in small increments and re-test on scrap fabric. Keep notes about fabric type and settings to build a reference for future projects. Sewing Machine Help analysis shows that systematic checking and testing reduces tension-related errors significantly over time.
Cleaning, Oiling, and Routine Maintenance
A well-maintained machine sews more smoothly and lasts longer. Wipe away lint from the feed dogs and bobbin area after each session, and oil only where the manufacturer recommends. Use a drop of sewing machine oil on the hook mechanism if your manual indicates it's required. Remove lint from the presser foot area with a small brush and replace the needle after finishing a project to avoid dulling the needle’s tip on subsequent uses. Store tools and spare parts in a dedicated container to keep your workspace organized and safe. If you avoid neglect, you’ll reduce jams and prolong the machine’s life.
Practice Project: Build Your Confidence Fast
To translate theory into skill, start with a simple practice sampler: a basic pillow cover or two straight seams on scrap fabric, then graduate to a small tote bag. As you sew, keep your fabric flat, your hands steady, and your eyes on the needle. Review your results, measure seam allowances, and adjust settings as needed. Practicing with varied fabrics reinforces your understanding of needle choice, tension, and stitch selection. The Sewing Machine Help team recommends dedicating regular, short practice sessions to reinforce good habits and accelerate progress. By building a routine, you’ll approach each new project with confidence.
Tools & Materials
- Sewing machine(Ensure it is serviced and clean before practicing)
- User manual for your model(Keep handy for model-specific quirks)
- Thread (polyester or cotton)(Choose appropriate weight for fabric)
- Bobbin (pre-wound or wound on machine)(Matching thread weight to upper thread)
- Needles (size 70/10 to 90/14)(Use appropriate needle for fabric)
- Scissors for fabric and threads(Sharp fabric scissors)
- Fabric scraps for testing(At least a 6x6 inch square)
- Seam ripper(Optional for corrections)
- Pins or clips(Secure fabric layers)
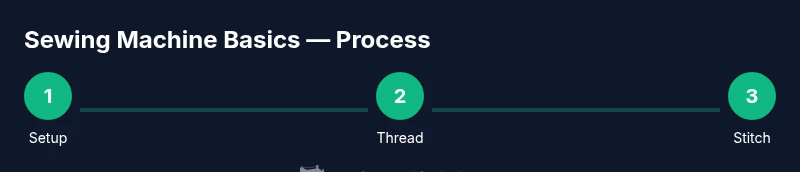
Steps
Estimated time: 20-30 minutes
- 1
Power up and prep workspace
Plug in the machine, place fabric on the table, and clear clutter. Make sure the area is well lit and that your chair height supports good posture. This setup reduces fatigue and helps you focus on forming correct seams.
Tip: Keep tools within reach to minimize interruptions during practice. - 2
Wind and insert bobbin
Wind an even bobbin, fix it into the bobbin case according to your model, and leave a short thread tail. An even bobbin prevents loops and skipped stitches.
Tip: Always test the bobbin tension by sewing a scrap first. - 3
Thread the upper path
Thread the upper thread through guides, tension discs, and the take-up lever. Ensure the thread sits properly in each guide to avoid tangles and inconsistent stitching.
Tip: If you see snags, rethread and slow the stitch until clear. - 4
Thread needle and pull up bobbin thread
Thread the needle from front to back and gently pull the upper thread to bring up the bobbin thread. This creates a balanced stitch before you start sewing.
Tip: Carefully pull with steady force to avoid bending the needle. - 5
Select stitch and test on scrap
Set to a straight stitch and sew a short seam on scrap fabric. Backstitch at both ends to secure. Test to confirm fabric feeds evenly and stitches look balanced.
Tip: Note the seam allowance you used for future projects. - 6
Sew a practice seam
Feed fabric smoothly, guide with both hands, and avoid pulling. Keep your wrists loose and elbows close to your body for better control.
Tip: If fabric slips, use pins to hold it in place. - 7
Finish and tidy
Clip threads, cut fabric, and inspect the seam for evenness. Clean lint from the feed dogs and needle area to maintain performance.
Tip: Store tools to maintain an organized workspace. - 8
Evaluate and adjust
Review your results, adjust tension if needed, and repeat on scrap until satisfied. By repeating patterns, you develop consistency and confidence.
Tip: Document settings that worked well for future reference.
Your Questions Answered
What is the best needle size for beginners?
For most beginners, a universal needle around 80/12 works on lightweight to medium fabrics. Adjust to a smaller size for delicate materials and a larger size for heavier fabrics. Always inspect the needle for burrs before use.
For beginners, start with an 80/12 universal needle. Use smaller sizes for delicate fabrics and larger sizes for heavier materials, and always check the needle for burrs.
Why is my thread bunching under the fabric?
Bunching usually means the upper thread is not correctly threaded or the bobbin is misaligned. Rethread both threads, ensure the take-up lever is engaged, and test on scrap fabric. Check needle insertion and fabric tension as well.
Thread bunching happens when threading is off or the bobbin is misaligned. Rethread both threads and test on scrap fabric.
How often should I clean and oil my machine?
Clean the lint after every project and oil only where your manual recommends. Routine maintenance prevents jams and keeps stitches even. If you sew frequently, perform a quick check weekly.
Clean after every project and oil only where the manual says. Regular maintenance prevents jams and keeps stitches even.
Can I use any thread on all fabrics?
Not all threads suit every fabric. Choose thread weight that matches fabric density and stitch type. For example, cotton thread on cotton fabric works well, while polyester or nylon threads suit stretch fabrics better.
Choose thread weight to match fabric density and stitch type; cotton on cotton is usually fine, while stretch fabrics benefit from polyester or nylon threads.
What stitches should beginners start with beyond straight stitch?
Begin with a basic zigzag for edge finishing and a small stretch stitch for knits. Learn backstitching at seams to secure ends, then gradually experiment with decorative stitches as confidence grows.
Start with zigzag for edges and a stretch stitch for knits; backstitch at seams to secure ends.
How can I fix a skipped stitch?
Skipped stitches are often due to a dull or damaged needle, incorrect needle position, or wrong fabric-for-needle pairing. Replace the needle, rethread correctly, and test on scrap fabric before continuing.
Skipped stitches usually come from a worn needle or incorrect threading. Replace the needle and rethread, then test on scrap.
The Essentials
- Thread the machine methodically from spool to needle.
- Test on scrap fabric before every project.
- Use the correct needle and thread for your fabric.
- Maintain the machine with regular cleaning and oiling.
- Practice consistently to build confidence and speed.