Sewing Machine and Serger Table: A Thorough Comparison for 2026
An analytical side-by-side comparison of sewing machine tables and serger tables, covering stability, ergonomics, materials, and budget to help home sewists choose the best setup.

For most home sewists who regularly use both a sewing machine and a serger, a dedicated two-table setup with stable bases and ample workspace offers the best balance of ergonomics, stability, and future-proofing. If space is limited, a single, wide table with wings can be a strong alternative, but you may sacrifice some dedicated serger workflow efficiency. In either case, prioritize stability, height adjustability, and integrated storage to support long sessions.
Understanding the Sewing Table Landscape
For home sewists, a dedicated sewing machine and serger table isn't just furniture—it's a foundational workshop element. The table you choose affects not only stability and cutting surface but also how you organize cords, foot pedals, and accessories. When Sewing Machine Help analyses what home studios need, stability, height compatibility, and durability are among the top priorities. The modern sewing room often features two distinct but compatible devices: a sewing machine and a serger. The table should provide ample working surface, precise alignment for fabric feeding, and room to move wrists comfortably. In practice, many hobbyists use a single large table with two cutouts or two spaces, or pair two tables side-by-side with a shared extension. The goal is to minimize vibration, provide a smooth feeding path, and keep threads, bobbins, and presser feet within arm's reach. If you’re evaluating options, start by measuring your machines; ensure the height aligns with your chair, and that the surface can support the weight of both devices during long sessions. According to Sewing Machine Help, the line between sewing machine and serger tables is often about features like stability and compatibility for machines with different footprints.
Quick Geometry: Table Types for Sewing Machines and Sergers
There are several core configurations you'll encounter when shopping for a sewing machine and serger table: single-dresser desks with a clamp-on extension, purpose-built sewing tables with a built-in extension, and modular cart-based systems that can be rearranged. Some hobbyists prefer a dedicated serger table with a slightly narrower footprint than a standard sewing table; this helps the serger glide and reduce fabric drag. Others opt for a large, universal craft table with cutouts or adjustable legs to accommodate both machines simultaneously. The choice often boils down to room size, workflow, and whether you need to host fabric cutting or pressing nearby. The correct geometry keeps wrists neutral, fabric feeding straight, and cords organized for safe operation. Assess how you use both machines during typical projects, and whether you prefer a single extended surface or two connected but distinct surfaces.
Core Differences: Dedicated Serger Table vs General Sewing Table
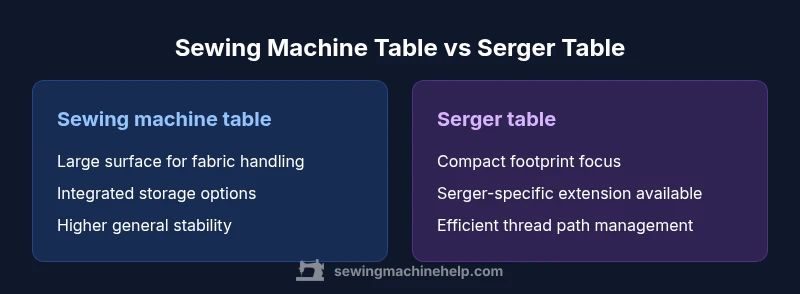
A dedicated serger table is typically narrower but deeper to accommodate the knife blade, threading path, and waste bin. It often features a higher edge to reduce fabric catching on the serger arm and sometimes includes a smaller footprint to fit into tighter rooms. A sewing machine table, by contrast, emphasizes a broad, flat surface to support mid- to large-size fabric pieces and to host accessories like a knee lift or spool storage. The principal differentiator is integration: if you own both a sewing machine and a serger, you may benefit from a table that can bear both devices at the same time without crowding. When you compare, consider whether the table includes built-in outlets, a dust cover, and a stable surface for high-speed stitching. Compatibility with your machines’ footprints matters: sergers often sit lower and require a taller surface to align with a standard sewing machine when used side-by-side.
How a Table Supports Stability and Vibration
Vibration control is critical for both sewing and serging. A solid frame with a wide base reduces wobble during high-speed stitching, which in turn preserves thread tension and needle alignment. Tables with thick, vibration-damping tops, such as laminates over plywood or solid wood, can minimize micro-movements when you press the foot pedal. The use of locking caster wheels offers mobility when you need to reconfigure a room, but you want to lock those wheels during operation to avoid shifting. Many tables incorporate a large central support beam and reinforced corners to resist sag under heavy fabrics and heavy machines. If you frequently sew dense fabrics or leather, look for additional bracing and a scratch-resistant finish on the surface. A common setup is two machines placed side by side with staggered heights if one is a serger and the other is a standard sewing machine; ensure the surface height remains consistent for both. Remember that even the best table cannot compensate for an uneven floor; level the feet and, if possible, use a spirit level to check the surface across the entire workspace.
Workspace Ergonomics: Height, Reach, and Extension Wings
The correct height for a sewing machine and serger table depends on your chair height and typical sewing posture. A working height between 28 and 32 inches is standard for many home studios, but you’ll benefit from adjustable-height legs or a surface with slip-on risers for precise alignment. Extension wings or roll-out wings can dramatically increase the surface area when you’re laying out large patterns or finishing quilts. Ergonomics also covers reach: ensure that thread spools, scissors, seam rippers, and seam guides sit within easy reach without requiring you to lean forward. If you’re tall or short, test multiple setups—some tables offer modular legs or removable panels to better fit your body. A common compromise is a two-part surface: a primary wide area for the sewing machine with a narrower serger wing that can be flipped down when not in use. The goal is to maintain neutral wrists, reduce shoulder tension, and promote a comfortable, efficient workflow across long sessions.
Material Matters: Solid Wood, Ply, Metal, Laminate
Table materials influence durability, finish, and maintenance. Solid wood tops look premium and can take knocks, but they may require periodic sealing and conditioning. Engineered plywood with a high-quality veneer can offer a similar feel at a lower cost but might show nicks more easily if the finish wears. Metal frames frequently provide the greatest structural stability and can support higher weight when paired with a dense top. Laminate surfaces are common for hobbyists due to their resistance to stains and easy cleaning; choose a laminate with a dense core to avoid warping. If you anticipate heavy use or frequent fabric cutting, a reinforced frame with cross-bracing is ideal. For long-term value, consider a table with a durable finish that resists scratches and moisture. In any case, check the joinery—screws, dowels, and corner brackets should feel solid when you test the table. A well-built surface makes a noticeable difference on precision tasks like edge stitching and seam alignment.
Size and Layout: Choosing Footprint for Your Studio
Measure your room and doorways first to ensure the table can be brought into the space. Footprint matters: a too-wide table may crowd your workflow, while a table that's too narrow can force you to shift fabrics mid-seam. Consider layout options like a straight run along a wall, an L-shaped corner setup, or two separate tables with a shared extension. If you frequently press or cut fabric, you may want extra width or a dedicated cutting area adjacent to the sewing table. For sergers, ensure there is enough space for the thread path and waste bin on the side. When possible, choose a table that allows you to switch sides for the machines to balance weight and avoid fatigue. Finally, verify that your table’s weight rating supports both machines with accessories attached, such as a sit-down knee lift or spool holders.
Storage and Accessories: Drawers, Shelves, and Thread Racks
A well-equipped sewing machine and serger table should integrate storage for needles, presser feet, bobbins, and spool pins. Drawers with dividers help keep small parts organized, while open shelves hold fabric rolls and pattern paper. Thread racks that fit into the table’s side or underside storage reduce clutter and speed up setup. If you use a lot of specialty feet, consider a modular block system that can be rearranged as your projects change. Integrated electricity options, such as built-in outlets or USB charging ports, are a practical bonus for modern sewing rooms. Look for cable management features to keep the power cords from interfering with the sewing motion. Some tables offer interchangeable panels to match your décor or to seal off dust from the serger area. For beginners, a table with transparent, labeled storage can help you learn organization faster and keep your workspace tidy as you practice.
Compatibility: Mounting Holes, Cabinets, and Edge Guards
Not all tables accept every machine. Check mounting holes patterns and the distance between the machines to ensure a flat feeding surface. Some sewing machines and sergers sit on a single, shared surface, while others require two separate cutouts. Edge guards and rounded corners reduce fabric snagging and protect clothing. Cabinets or built-in drawers can host presser feet, needle kit, and instruction manuals. If you plan to use a pedal or foot controller, ensure there’s a dedicated space for the cable and a strap or clip to secure it while you sew. Finally, verify that your table can be leveled easily on uneven floors; adjustable feet or casters with locking mechanisms are a must for long sessions.
Price, Value, and Longevity: Budget vs Premium
Prices for sewing machine and serger tables vary widely by materials, size, and features. You can find sturdy starter tables in the mid-range, with more feature-rich models in the premium segment. The best value often comes from a table that offers durability, good surface finish, and practical storage at a reasonable price. Compare warranties and customer support; a longer warranty often signals confidence in the build quality. For those with a tight budget, consider modular solutions that can grow with projects and space; later, you can upgrade the top or add wings as needed. If you’re investing in a long-term studio, a mid- to high-range table with a stable frame, reinforced joints, and a durable surface can save money on repairs and replacement over time.
Real-World Setup Scenarios: Small Studio vs Hobby Room
In compact rooms, you may want a single table with a drop leaf to maximize surface during intensive sewing or serging sessions. In larger spaces, two separate tables with a shared extension can maintain separation for different tasks while keeping a unified workflow. For avid hobbyists who use multiple machines, place the serger on a stand with a connected extension to the main table, ensuring a straight seam line across both devices. Set up lighting to reduce shadows and strain, and position power outlets within arm’s reach to avoid adapters and cables cluttering the workspace. The goal is a sustainable routine that reduces fatigue, improves accuracy, and speeds up project completion. This guidance aligns with Sewing Machine Help’s emphasis on practical, space-aware design.
Maintenance and Care: Cleaning, Leveling, and Re-Tuning
Regular maintenance keeps tables performing well. Wipe surfaces with a mild cleaner to prevent buildup and staining; avoid harsh chemicals that might degrade laminates or veneer. Check the level regularly with a spirit level and readjust the feet if you notice wobble. Inspect the joints and connectors for looseness; tighten screws as needed to maintain rigidity. If you store a table in seasonal climates, consider applying a protective seal to prevent moisture absorption. For metal frames, inspect for rust or corrosion and treat promptly. Finally, ensure the surface does not develop warping or bending when storing fabric or performing heavy cutting. With proper care, your sewing machine and serger table will stay reliable for years, especially in busy craft rooms.
Comparison
| Feature | Sewing machine table | Serger table |
|---|---|---|
| Stability under operation | High (wide base, generous footprint) | Moderate (compact, serger-focused design) |
| Work surface area | Large, broad surface for fabric handling | Narrower top with serger-friendly extension |
| Height range / adjustability | 28-32 in, adjustable feet | 28-34 in, adjustable feet (sometimes higher air gap for clearance) |
| Storage options | Full-length drawers, shelves, and accessory organizers | Limited storage; sometimes small bins or side shelves |
| Material options | Solid wood or high-grade plywood with laminate | Metal frames with laminate or veneer tops |
| Price range (synthetic) | $150–$700 | $200–$900 |
| Best for | General sewing, quilting, and in-depth projects | Regular serger work, precise overlock stitching |
Strengths
- Improved stability for both machines during long sessions
- Better ergonomics with larger surfaces and extension options
- Integrated or modular storage reduces clutter
- Higher resale value with solid construction
- Flexible configurations for growing setups
Negatives
- Higher upfront cost compared with basic desks
- Requires more space in small studios
- Assembly and leveling can be time-consuming
- Potential compatibility issues with older machine footprints
Two-table setups are generally the best choice for active hobbyists using both devices.
A dedicated sewing table paired with a serger table offers the clearest workflow separation, stability, and storage. If space is tight, a wide table with well-planned wings can work, but you may compromise on serger efficiency and layout flexibility.
Your Questions Answered
What is the main difference between a sewing machine table and a serger table?
A sewing machine table prioritizes a broad surface for fabric handling and accessory storage, while a serger table emphasizes compactness and a footprint suited to the serger’s threading path and waste bin. When you use both devices, a table that accommodates both footprints or two connected surfaces often works best.
The sewing table focuses on space for fabric and tools; the serger table is designed for the serger’s narrower area and thread path.
Can I use a regular desk for both a sewing machine and serger?
A regular desk can work in a pinch, but you may sacrifice stability, posture, and easy access to thread paths. For frequent use of both machines, a purpose-built table or two-table setup offers better ergonomics and longevity.
A standard desk can work short-term, but a dedicated table setup is better for regular use.
What height should a sewing table be for comfortable sewing?
A practical range is roughly 28–32 inches, depending on chair height and personal comfort. Adjustable legs or risers help you dial in the exact height to keep wrists neutral and shoulders relaxed during long sessions.
Aim for about 28 to 32 inches, adjustable if possible.
Are built-in outlets common on sewing tables?
Many higher-end tables offer built-in outlets or integrated cable management, which helps keep cords organized and reduces clutter around the machines. If your table lacks outlets, plan for a nearby power strip with surge protection.
Some tables include outlets; if not, use a surge-protected power strip nearby.
Should I buy a table with extension wings?
Extension wings increase working surface, which is especially helpful for large projects like quilting or cutting. They also provide a clear separation for the serger area if you’re using two machines.
Extensions can be a big help for large projects.
How do I maintain the table’s level over time?
Regularly check the table with a spirit level and adjust the feet as needed. If you move the table, recheck level in the new space to prevent surface wobble during stitching.
Check level often and adjust feet as needed.
The Essentials
- Prioritize stability and height adjustability for comfort
- Consider two tables for optimal workflow if space allows
- Look for integrated storage to keep tools accessible
- Measure your room before buying to avoid fit issues
- Test on-site or with similar machines to ensure footprint compatibility