Brother Innovis Embroidery Machine: A Complete How-To Guide
Learn to set up, thread, hoop, load designs, and start your first embroidery project on the Brother Innovis. Practical guidance for beginners from Sewing Machine Help to build confidence and achieve clean, professional results.

This guide shows you how to use a Brother Innovis embroidery machine, from setup to your first stitch-out. You’ll learn threading, hooping, loading designs, and basic maintenance. Expect step-by-step instructions, model comparisons, and practical tips for beginners.
Understanding the Brother Innovis embroidery machine family
The Brother Innovis line represents a family of machines designed to bring computerized embroidery into the home studio. While models differ in features, most share a user-friendly touchscreen, built-in embroidery designs, and the ability to import custom designs via USB or memory card. As the Sewing Machine Help team notes, these machines aim to balance ease of use with capable embroidery performance, making them popular among hobbyists and beginners who want reliable results without a steep learning curve.
When you’re selecting a model, consider how the embroidery area, compatibility with stabilizers, and available hoop sizes align with your typical projects. You’ll also encounter differences in on-board designs, software integration, and upgrade paths. This guide emphasizes practical decisions you can make before you stitch a single design, so you feel confident starting your first projects.
For reliability and real-world guidance, Sewing Machine Help analysis shows that users value straightforward threading, easy hooping, and clear on-screen prompts. This isn’t just about features; it’s about a smooth workflow from fabric preparation to finished embroidery.
Key features to evaluate for embroidery work
Modern Brother Innovis machines commonly include a large color touchscreen, multiple font options for monograms, and a library of built-in designs. Look for automatic needle threaders, programmable color stops, and memory capacity that supports your design library. A stable embroidery unit and a robust hooping system help maintain accuracy across designs and fabrics. Consider whether you’ll need wireless connectivity or USB import of designs for easier workflow.
A practical rule of thumb: prioritize a machine with clear stitch quality, consistent tension, and simple design transfer. While exact specs vary, the core goal is that your setup, hooping, and thread management feel predictable rather than fiddly. For home sewists, reliability often trumps flashy features.
Getting started: unboxing, setup, and initial threading
Begin by recognizing a clean, well-lit workspace and organizing essential tools. Power on the machine and perform any required firmware updates if available. Threading order matters for embroidery, so follow the manual’s sequence precisely: top thread through guides, through the tension discs, and into the needle. Install the bobbin correctly and ensure thread winds smoothly without tangles. A smooth threading path reduces skipped stitches and keeps tension balanced, which is essential for beginners.
We recommend starting with scrap fabric to verify tension before loading a real project. This saves fabric waste and helps you understand how changes in stabilizer, fabric, or thread affect results. Remember to test stitch with a simple pattern to confirm alignment and hooping accuracy before proceeding to your first design.
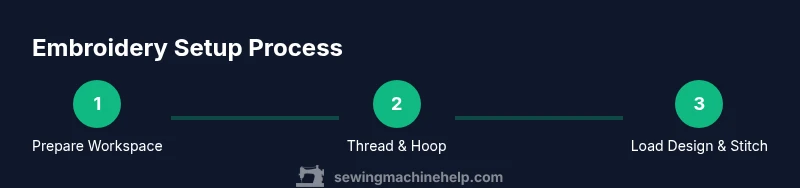
Loading designs and hooping correctly
Embroidery accuracy hinges on stable hooping and precise design placement. Use the hoop recommended for your fabric weight and design size, and properly secure stabilizers to prevent fabric movement during stitching. When loading designs, ensure files are compatible with the machine’s memory or USB import format. Position the hoop squarely in the machine slot and align the design to your marks on the hoop. Buttonholes, monograms, and applique require careful hooping to avoid distortion.
A steady workflow—hoop, thread, load design, verify on-screen placement, then start—reduces errors and speeds up your process. If your first attempt isn’t perfect, adjust tension, re-hoop, and re-test on scrap fabric before continuing.
Maintenance, care, and troubleshooting basics
Regular maintenance extends the life of your embroidery machine. Clean lint and dust from the bobbin area and thread paths, inspect the needle for burrs or dullness, and replace it promptly if needed. Use high-quality embroidery thread and stabilizers to minimize lint build-up and thread breakage. When you encounter issues, check bobbin tension, re-thread, and verify fabric stabilization. Keeping a small toolkit handy—scissors, tweezers, seam ripper, and a brush—helps you address common snags without slowing your project down.
From the Sewing Machine Help perspective, a predictable routine and careful material selection often prevent most troubleshooting calls. Build a habit of running a test design after any major change (new thread color, stabilizer type, or fabric weight) to ensure consistent results.
Safety, tips, and learning path for beginners
Always power off the machine before changing needles or bobbins. Work in a well-ventilated area when using solvents near fabrics, and keep fingers away from moving parts when the needle is in motion. Use proper lighting to inspect stitches closely, and wear eye protection if cutting threads close to the needle area.
As you progress, keep a learning log of what works with different fabrics and stabilizers. This habit helps you quickly tailor settings for future projects and reduces trial-and-error time. Remember that embroidery is both a craft and a technical skill—patience, practice, and a careful workflow are your best allies.
Authority sources and further learning
- OSHA Safety Guidelines for Sewing Machines: https://www.osha.gov
- Consumer Product Safety Commission: Sewing machines and home safety: https://www.cpsc.gov
- Sewing machine history and basics (Britannica): https://www.britannica.com/technology/sewing-machine
Tools & Materials
- Brother Innov-is embroidery machine(Model used for setup, embroidery, and practice runs)
- Embroidery hoop appropriate for fabric weight(Choose hoop size matching common projects)
- Stabilizer (tear-away or cut-away)(Essential to stabilize fabric during embroidery)
- Fabric scissors(For trimming threads and stabilizer scraps)
- Quality embroidery thread (various colors)(High-quality thread reduces lint and breakage)
- Bobbin case and spare bobbins(Keep spares with the same thread type)
- Power supply and foot pedal(Ensure stable power; keep pedal accessible)
- USB drive or memory card (if applicable)(Used for loading designs on some models)
- Tweezer and small brush(Assist with threading and debris removal)
Steps
Estimated time: 60-150 minutes
- 1
Prep your workspace and materials
Clear a clean, well-lit area and lay out all tools in reach. Inspect the machine and ensure it’s powered off before handling any parts. Gather stabilizers, fabric, and a scrap swatch for test stitching.
Tip: Having everything within arm’s reach reduces interruptions and keeps you focused. - 2
Power on and update firmware
Turn on the machine and check for firmware updates if available. Updates can improve stability and compatibility with newer designs. Take notes of your current settings in case you need to revert.
Tip: A quick update now prevents future compatibility issues with designs. - 3
Thread the machine in proper order
Follow the manufacturer’s threading path: top thread through guides and tension discs, then to the needle; install the bobbin and wind it correctly. A balanced thread path reduces skipped stitches and thread breaks.
Tip: Test thread on a scrap sample before stitching a real project. - 4
Hoop fabric with stabilizer
Place stabilizer under the fabric and align with the hoop. Tighten evenly to prevent fabric shifting. Ensure there’s no slack that could cause puckering during stitching.
Tip: Check for fabric distortion before you begin stitching. - 5
Load your design and position the hoop
Import or select your design, verify the stitch area fits the hoop, and align the center marks on the hoop with on-screen guides. Double-check color stops and start point.
Tip: Silence auto-start until you’re satisfied with placement. - 6
Run a test stitch and monitor
Begin stitching on scrap fabric or a test piece. Watch for thread breaks, improper tension, or misalignment. Stop if you notice any issue and adjust before continuing to the final fabric.
Tip: Use a slow-speed setting for the first pass to confirm alignment. - 7
Finish, trim, and clean up
Remove the hoop, cut jump stitches, and trim threads. Unhoop carefully, remove stabilizer remnants, and store tools properly for the next project.
Tip: Save the fabric remnants for future reference on similar designs.
Your Questions Answered
Can I use third-party designs with Brother Innovis embroidery machines?
Yes, you can use third-party designs if they are compatible with your machine’s format. Check file types and transfer methods, and test on scrap fabric to verify proper stitch-out.
Yes, you can use third-party designs as long as they’re compatible with your machine. Test on scrap fabric first.
Is the embroidery area large enough for most hobby projects?
Most hobby projects fit within a standard hoop size. If you plan larger designs, consider models with broader embroidery areas or multiple hoop options.
For most hobby projects, a standard hoop works well; for larger designs you may need a bigger hoop or a specific model.
Do I need special software to create designs for Brother Innovis?
Basic designs can be used with built-in designs or USB transfers. Advanced users may prefer design software for customization, but many models support direct import without extra software.
If you want advanced customization, design software helps; otherwise, built-in designs and USB transfer are sufficient.
What should I do if stitches skip or break?
Check threading path, re-thread if necessary, inspect needle for damage, and verify fabric stabilization. If issues persist, test with scrap fabric to isolate the cause.
If stitches skip, re-thread and test with scrap fabric to locate the issue.
Can I embroider on stretchy or delicate fabrics?
Yes, but use light stabilizers and test on scrap before proceeding. Sometimes, a stabilizer type or smaller hoop yields better results on delicate fabrics.
You can, but choose the right stabilizer and test first to avoid puckering.
Watch Video
The Essentials
- Master hooping for precise designs
- Thread correctly to prevent skipped stitches
- Test on scrap fabric before final projects
- Use quality stabilizers and threads
- Maintain a regular cleaning routine to extend machine life