Sewing Machine 3D Warehouse: A Practical Guide for Home Sewists
Discover how a sewing machine 3D warehouse helps home sewists locate, customize, and print replacement parts and accessories—reducing downtime and expanding repair options.

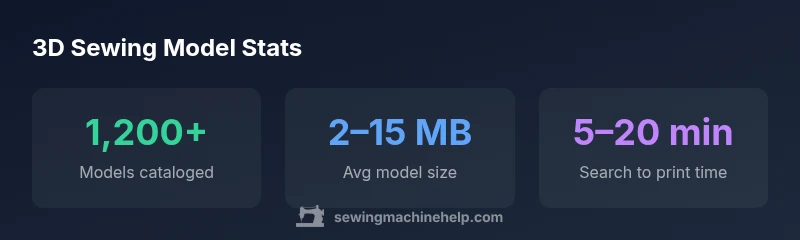
A sewing machine 3D warehouse is an online library of 3D printable parts, accessories, and templates specifically designed for sewing machines. It lets home sewists locate compatible replacement components, customize knobs or covers, and print parts on demand, speeding repairs and reducing downtime. By offering cataloged models, licensing clarity, and printer-ready formats, these warehouses empower hobbyists to extend machine life and tailor gear to personal projects.
What is a sewing machine 3D warehouse
A sewing machine 3D warehouse is a specialized repository of 3D printable parts, templates, and accessories designed to work with household and vintage sewing machines. Unlike generic 3D model libraries, these warehouses curate models by machine brand, model number, and compatibility notes. For beginners, they provide a straightforward gateway to replacement knobs, covers, guides, and brackets that can be printed at home or through a local print service. For advanced users, the warehouse becomes a toolkit for customization—printing upgraded handles, jigs, or lightweight mounting brackets tailored to a specific workflow. From the user perspective, the value lies in quick access, standardized formats, and clear licensing terms that help you avoid printing designs you’re not allowed to use. The Sewing Machine Help team sees this as a practical bridge between classic machinery and modern fabrication.
Why home sewists should care about 3D models for machines
For many hobbyists, repairs are slowed by unavailable or discontinued parts. A sewing machine 3D warehouse can dramatically reduce downtime by offering on-demand replacements that fit the original dimensions and mounting points. This is especially useful for older or rare models where factory parts have become scarce. Additionally, 3D models enable customization—such as grip-friendly knobs or dust covers that fit your exact sewing space. However, it’s important to balance convenience with safety: printed parts must be strong enough for the job and printed with materials that tolerate heat and mechanical stress. The Sewing Machine Help Analysis, 2026, highlights how community-sourced models paired with verification steps can deliver reliable results while preserving machine safety.
Licensing, safety, and compatibility: what to check
Not all 3D models are created equal. Licensing determines whether you can print, modify, or redistribute a design. Look for clear licensing terms (e.g., CC licenses or publisher-specific terms) and, when in doubt, contact the designer for permission. Safety is critical: avoid printing high-stress components like load-bearing gears or drive pulleys without proven strength tests. Compatibility means verifying thread size, screw hole alignment, and mounting patterns. Cross-check the model’s egress from the print bed and post-processing requirements. Sewing Machine Help emphasizes verifying dimensions against your actual machine model, then printing a small test piece before committing to a full print.
How to evaluate models and licenses: a quick guide
Start with the machine brand and model in the warehouse search. Read the model description for compatibility notes and required materials. Check the licensing field to see what you can do with the file. If license terms are vague, look for an official statement or reach out to the designer. Review user comments and print history to gauge real-world performance. Finally, print a test piece at a low infill and measure fit precisely before printing production parts. These steps help ensure that your printed parts will function safely and reliably.
Getting started: search, verify, print, test
Begin with a broad search using your sewing machine’s brand and model. Narrow results by filtering for the part you need (knob, cover, bracket). Open the model page and review dimensions, mounting points, and material recommendations. If the license allows modification, consider adapting the design to your printer’s tolerances. Print a small prototype first, then assemble and test in a controlled environment. With practice, you’ll build a personal library of dependable parts that can be produced on demand.
Materials, printers, and finishing tips
PLA and PETG are common for non-load-bearing parts, while more robust parts may require higher-strength materials like Nylon or reinforced composites. Ensure your printer’s nozzle temperature, bed adhesion, and layer height are tuned for the chosen material. Post-processing steps—such as deburring edges, smoothing surfaces, or applying a protective coating—can improve fit and longevity. If you’re printing in a shared space, label printed parts with model numbers and print dates to help track wear and replacement intervals.
Common pitfalls and how to avoid them
- Printing the wrong model: always verify the exact machine model and part number.
- Inadequate material strength: avoid high-stress parts with low-impact materials.
- Poor tolerances: adjust printer calibration and re-measure critical dimensions.
- Silent licensing issues: assume parts are not free to reuse; verify permissions before printing or sharing.
- Ignoring safety: test in a controlled setting and avoid mounting printed parts in places that could fail during operation.
Real-world scenarios: quick case studies
A hobbyist with an old singer model could replace a brittle plastic gear with a printed substitute sourced from a Sewing Machine 3D Warehouse, reducing repair cost and downtime. A quilter customizing a fabric-guiding bracket prints a lighter-weight mounting plate to improve stitch alignment. In each case, users start with a model, confirm license compatibility, print a test piece, and then move to a full print if the test is successful.
The road ahead: trends to watch in 2026
Expect increasing catalogs with more machine-specific models, tighter licensing around printed parts, and improved materials for higher-stress components. As printers become more accessible, the line between DIY repair and professional repair will blur, with 3D warehouses acting as a bridge. Community reviews and standardized test prints will become more important to ensure safety and reliability.
Comparison of model types in sewing machine 3D warehouses
| Model Type | Typical Use | File Type |
|---|---|---|
| Removable cover shells | Cosmetic upgrades and dust protection | STL |
| Replacement knobs | Functional adjustments and ergonomics | OBJ |
| Mounting brackets | Support and attachment hardware | STL/OBJ |
Your Questions Answered
What exactly is a sewing machine 3D warehouse?
A sewing machine 3D warehouse is a specialized online library of printable parts and templates for sewing machines. It groups models by machine brand and compatibility, helping you locate replacement parts and customization options. Always check licensing and test fit before printing.
A sewing machine 3D warehouse is a library of printable parts for sewing machines. Look for the right model and license, then test fit before printing.
Are 3D printed parts safe for sewing machines?
Printed parts can be safe if you select appropriate materials and test for fit and strength. Avoid high-stress components unless the model comes with validated strength data and a proven print profile. Always start with non-critical components to gauge performance.
Printed parts are safe if you use the right materials and test them first on non-critical parts.
What printers and materials work best for sewing-machine parts?
For non-load-bearing parts, PLA or PETG are common. More demanding components may require nylon, polycarbonate, or reinforced composites. Ensure your printer is calibrated, and match material properties to the part’s function and heat exposure.
PLA or PETG works for many parts; use stronger materials for load-bearing components and calibrate your printer.
How do I verify model licenses and permissions?
Check the model page for the license term and any usage restrictions. If the terms are unclear, contact the designer or repository moderator. Respect attribution and avoid sharing prints beyond the license scope.
Read the license on the model page and contact the designer if in doubt.
Can I modify models to fit my machine?
Many models are open to modification under permissive licenses. If modification is allowed, document changes and re-test the part. When licenses restrict edits, use the unmodified file or seek permission.
Modifications are allowed with the right license; otherwise, use the original file.
“3D model libraries can dramatically shorten downtime for sewing machines when users verify licensing and test prints on low-risk parts first.”
The Essentials
- Audit model licenses before printing.
- Verify compatibility with your machine’s exact model.
- Test prints on low-risk parts before full production.
- Choose materials suitable for heat and stress.
- Document your prints for future repairs.