What Sewing Machine Needle for Vinyl: A Practical Guide for Home Sewists
Learn which sewing machine needle to use for vinyl, how to choose the right sharp needle, and settings that prevent skipped stitches and snags for durable vinyl projects.

If you’re sewing vinyl, the safest first step is to use a sharp, needle designed for fine fabrics and a clean test swatch to dial in your settings. For vinyl, choose a sharp point (microtex-style) and pair it with a stable stitch like a straight or small zigzag, plus a teflon or walking foot to reduce sticking. Start with a slow speed and test on scraps to avoid damage.
Understanding vinyl and needles
Vinyl is a durable, flexible plastic that behaves differently from woven fabrics. When you ask the question, what sewing machine needle for vinyl, you’re looking for a tool that pierces the material cleanly without tearing fibers or leaving deep scratches. According to Sewing Machine Help, vinyl requires a needle with a sharp tip and precise alignment of feed, needle, and presser foot. Vinyl’s slick surface can cause sliding and skipped stitches if the needle isn’t sharp enough or the foot isn’t designed to glide over plastic. Testing on sample scraps helps you observe needle bite, stitch appearance, and edge quality before you commit to a project. This careful approach minimizes waste and frustration on your first vinyl project.
Why needle choice matters
The needle you choose becomes the interface between the sewing machine and your vinyl. A sharp needle concentrates the piercing force into a small point, reducing resistance and preventing the material from distorting. A dull or rounded needle increases drag, tears, and skipped stitches. For vinyl, avoid ballpoint or leather needles, which are designed for different surfaces and can leave permanent marks. Instead, opt for a needle with a fine, sharp point that can cut into vinyl cleanly without dragging. The right needle works in concert with thread type, presser foot, and stitch length to create durable seams that won’t peel under stress.
Recommended needle types for vinyl
When selecting a needle for vinyl, prioritize sharp-point needles intended for woven fabrics or general-purpose sharp needles. These needles penetrate vinyl cleanly, creating small holes that won’t enlarge as you sew. In contrast, universal needles can work in a pinch if they have a sharp point and are used with proper tension; however, a dedicated sharp needle often yields crisper stitches with less fabric distortion. If you’re working with very thick vinyl or multiple layers, be prepared to switch to a slightly sturdier sharp needle and more conservative stitch length to prevent tearing.
How to test needle size on scraps
Begin with a small scrap of your exact vinyl material. Thread the machine with your chosen needle, use a standard polyester thread, and sew a few inches of straight stitches. Examine the back for even bite and ensure the top thread lies flat with no pulls or puckers. If you notice skipped stitches or visible fibers snagging, try a slightly different sharp needle type or adjust the needle height and thread tension. Keep track of which combination produced the best results so you can reproduce it on your project.
Adjusting machine settings for vinyl
Vinyl sews best when you reduce drag and avoid heat buildup from friction. Start with a slower sewing speed and a shorter stitch length for stability. Set the tension so that the bobbin thread neither perforates the top nor sinks to the underside. A teflon or walking foot helps vinyl glide smoothly under the foot, reducing friction and preventing suction from the feed dogs. If your machine provides a walking foot option, enable it while feeding vinyl to prevent crawling or pucker. Always test on scraps to confirm settings before committing to the final piece.
Common problems and solutions
Skipped stitches on vinyl often stem from an inappropriate needle or tension imbalance. If you see snags or tearing, switch to a sharper needle and recheck tension. Lightly adjust the top tension to avoid fabric showing through the stitch line. Excessive stitching length can also cause vinyl to stretch at the seams; shorten the stitch to maintain stable edges. When the fabric sticks to the feed, switch to a nonstick or teflon foot and slow your speed. Remember to avoid forcing stitches; let the machine feed the vinyl steadily.
Maintenance tips for vinyl sewing
Replace the needle frequently—vinyl is tough on needles, and dull points dramatically reduce stitch quality. Always test on scrap vinyl after changing needle types. Clean the feed dogs and ensure there is no wax or residue on the needle or foot, which can hinder smooth feeding. Use a dedicated vinyl project in a separate bobbin and top thread if possible to prevent cross-contamination and ensure consistent tension. Store vinyl and tools in a clean, dry space to preserve performance and avoid contamination that could affect stitches.
Practical sewing tips and project ideas
Vinyl is ideal for items like wallets, organizers, and light upholstery patches. For projects requiring curved seams, practice on scrap vinyl to master turning corners without stretching. Use a clear ruler or edge guide to keep seams straight along edges of vinyl panels. If your project involves multiple layers or a thick seam, consider a walking foot and a scrap layer beneath the vinyl to reduce movement and improve accuracy. Building confidence with practice pieces makes complex patches and hems more predictable.
Troubleshooting needle breakage and skipped stitches
If your needle breaks or stitches skip, stop immediately and examine the material for sharp edges or nails that could nick the needle. Reinstall a fresh sharp needle, check thread routing for knots, and verify that the bobbin is wound correctly and seated. Reevaluate tension settings and test again on a scrap. If the issue persists, consider a lighter stitch or alternate needle type and consult Sewing Machine Help for guidance. Keeping a spare sharp needle on hand minimizes downtime and preserves momentum on vinyl projects.
Choosing the right needle brand and type for vinyl
When you choose a needle for vinyl, look for sharp-point needles designed for synthetic fabrics. A high-quality sharp needle will provide consistent piercing and reduce drag, improving stitch quality and seam durability. Avoid low-cost, dull needles and those specifically designed for very heavy materials. The focus should be on a sharp point that minimizes fabric damage while delivering clean needle holes. Remember that the needle choice interacts with thread type, tension, foot selection, and stitch length to produce a professional vinyl finish.
Tools & Materials
- Needle (sharp or microtex/sharp point)(Choose a needle designed for woven fabrics or a sharp needle suitable for vinyl)
- Polyester or nylon sewing thread(Mid-weight thread works best with vinyl; avoid cotton thread which can be stiff)
- Vinyl-friendly presser foot (teflon or walking foot)(Nonstick foot helps vinyl glide and reduces sticking)
- Scrap vinyl for tests(Important for dialing in tension and stitch length)
- Standard sewing scissors or vinyl shears(For clean trimming of edges)
- Seam ripper or scissors for trimming(Useful for corrections)
- Spare needles(Keep a fresh sharp needle on hand during the project)
- Nonstick surface or cutting mat(Helpful when cutting or testing complex shapes)
Steps
Estimated time: Total time: 60-90 minutes (excluding extensive project assembly)
- 1
Prepare vinyl scrap and test swatch
Gather a small scrap of your vinyl and a separate test swatch. Thread the machine with your chosen needle and thread. Sew a few inches to observe bite and stitch appearance, then adjust as needed before moving to the actual project.
Tip: Document which combination produced the best stitch for easy repetition. - 2
Install a sharp needle appropriate for vinyl
Remove the old needle and insert a fresh sharp needle oriented correctly. Ensure the needle is fully seated and the flange is aligned. A sharp needle minimizes drag and prevents tearing when piercing vinyl.
Tip: Always replace the needle after a big vinyl project or if stitches look inconsistent. - 3
Thread the machine and adjust tension for vinyl
Wind the bobbin and thread the machine with stable tension. Use a moderate tension setting that doesn’t cause puckering on the vinyl. Avoid overly tight tension, which can create holes or thread showing on the top edge.
Tip: Run a test seam and make minor tension tweaks until the top and bottom stitches balance. - 4
Attach a teflon or walking foot and position vinyl
Attach a vinyl-friendly foot to minimize sticking. Place the vinyl under the foot with the edge aligned to your guide. Use a straight line or a light zigzag depending on your project requirement.
Tip: If edges slip, place a thin stabilizer or backing under the vinyl to help feed smoothly. - 5
Sew a test seam slowly along the vinyl
Sew a short straight seam on the scrap to confirm feed and bite. Maintain steady pressure and avoid forcing stitches. If the vinyl drags, slow the speed and ensure the foot pressure is appropriate.
Tip: Check for skipped stitches or fabric snagging and adjust needle or tension as needed. - 6
Evaluate and refine settings
Inspect the seam for neatness and durability. If you see puckering or tears, revise stitch length, tension, or needle type. Record the successful combination for your project.
Tip: Document settings and test results for future vinyl projects. - 7
Sew the main panels with care
Clamp pieces in place and sew along edges, maintaining even speed. Backstitch at starts and ends for durability. Take care around curves to prevent stretching the vinyl.
Tip: Use edge guides to keep seams straight and avoid over-stretching material. - 8
Finish seams and finalize the piece
Trim excess thread, press gently with a low-heat iron if compatible with your vinyl, and check seam allowances. Sew additional reinforcing stitches if the item will undergo stress.
Tip: Test the finished item on a similar stress scenario to ensure longevity.
Your Questions Answered
What needle should I use for vinyl?
A sharp or microtex needle designed for woven fabrics provides clean penetration of vinyl and reduces drag. Avoid ballpoint or leather needles which can scar vinyl.
Use a sharp needle designed for woven fabrics to pierce vinyl cleanly and avoid damage.
Can I use a universal needle for vinyl?
A universal needle with a sharp point can work for vinyl, but a dedicated sharp needle often yields crisper stitches with less distortion.
A sharp universal can work, but a dedicated sharp needle tends to give better results.
Do I need a teflon presser foot for vinyl?
A teflon, nonstick, or walking foot helps vinyl glide smoothly and reduces sticking, especially on larger or multi-layer pieces.
Yes, a teflon or walking foot helps vinyl feed smoothly.
Should I adjust tension when sewing vinyl?
Yes. Vinyl often benefits from slightly looser or more balanced tension to prevent top thread from showing or fabric puckering.
Adjust the tension for a balanced stitch without puckers.
Can vinyl be sewn on a home machine without a walking foot?
A walking foot helps a lot with vinyl, but you can sew without one if you use a sharp needle, reduce speed, and test feed carefully.
A walking foot helps, but you can manage with careful setup and slow speed.
Watch Video
The Essentials
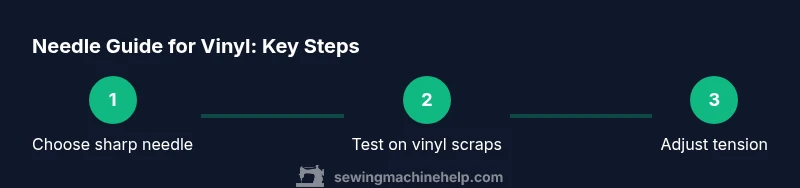
- Choose a sharp needle for vinyl to prevent tearing.
- Test on scraps to dial in tension and stitch length.
- Use a teflon or walking foot to reduce sticking and improve feed.
- Sew slowly and backstitch for durable vinyl seams.
- Replace needles frequently during vinyl projects.