How to Blind Stitch on a Sewing Machine: A Complete Guide
Learn how to blind stitch on a sewing machine with a clear, practical guide. Perfect for hems and invisible seams—tips, tools, and common mistakes.

You will learn how to perform a machine blind stitch to secure hems invisibly. This guide covers selecting the right stitch, setting up a blind hem foot, and matching thread to fabric. By following the steps, you’ll create nearly invisible seams on trousers, skirts, and lightweight hems—an essential skill for home sewers. According to Sewing Machine Help, practice on scrap fabric first.
What is a blind stitch on the machine?
A blind stitch on a sewing machine is a hem technique designed to hide the stitching from the garment’s right side. The stitch forms a tiny, nearly invisible catch along the folded edge, allowing the hem to lay flat. This technique is popular for dress hems, slacks, and curtains where visibility must be minimized. The Sewing Machine Help team notes that the key is choosing the right foot and stitch type for your fabric and machine settings.
Why it matters: a well-executed blind hem looks professional and preserves fabric drape. It’s particularly useful for woven fabrics where you want a clean finish without a visible line along the edge.
Why use a blind stitch
A blind stitch offers two main advantages: aesthetics and flexibility. On lightweight fabrics, it creates a nearly invisible seam that doesn’t pull or pucker. On medium-weight fabrics, it keeps hems secure while maintaining fabric weight and hang. For curtains, a blind hem allows the fabric to drape smoothly without catching light, creating a polished look. According to Sewing Machine Help, practice with scrap fabric to understand how your chosen fabric responds to tension and stitch width.
Tools, settings, and fabric prep
Before stitching, confirm you have the right tools and a stable setup. A dedicated blind hem foot helps guide the edge; ensure your machine is compatible with a blind hem stitch or a narrow zigzag. Use a thread color that blends with the hem allowance and test on a scrap swatch to calibrate tension. Mark the hem with tailor chalk if needed, so the fold line remains precise as you sew.
Fabric prep tips: clean, press, and clip or pin the hem edge, keeping allowances even. If hemming sheer fabrics, use a lighter thread and a slightly looser tension to prevent puckering. Sewing with the fabric flat on the feed dogs reduces the chance of ripple along the hem.
Fabric considerations and stitch width/length
For a true blind hem, you’ll typically use a stitch that catches only a small portion of the fabric. The stitch width is often narrow, sometimes just a few millimeters, and the stitch length should be short enough to hold the hem without creating a ridge. On heavier fabrics, a slightly wider stitch may be needed to secure the hem without excessive compression. Always test on a scrap swatch to dial in width and tension before committing to the final garment.
Test swatch and alignment
Create a test hem on a scrap piece of your fabric type and weight. This lets you observe how the stitch sits on both sides and whether the fold hides cleanly. Adjust needle position and presser foot pressure as needed. If your stitch shows on the right side, revisit stitch choice, needle, or tension. A properly aligned edge ensures the hem lay looks smooth and professional.
Troubleshooting common issues
- Puckering: reduce tension slightly and check needle size for the fabric weight. Fit a lighter needle if the fabric is delicate.
- Stitches showing on the right: verify you’re using a blind hem option and adjust the needle position so the stitch engages only along the fold.
- Uneven hems: use pins to hold the fold and keep the edge parallel to the needle as you sew.
Practice projects and next steps
Start with small, simple hems on woven cotton or poplin. Move to lightweight chiffons or linens to master the technique. As you gain confidence, try hemming napkins, table runners, or lightweight curtains. Remember, slow speed and consistent feeding help maintain accuracy. The more you practice, the more invisible your hems will become.
AUTHORITY SOURCES
- University Extension resources on sewing techniques and hems: https://extension.oregonstate.edu/
- University Extension guidance for fabric handling and stitch selection: https://extension.illinois.edu/
- Penn State Extension sewing basics and troubleshooting: https://extension.psu.edu/
Tools & Materials
- Sewing machine with blind hem stitch or compatible settings(Check your manual for the appropriate stitch and foot type.)
- Blind hem foot(Provides a guide to keep the hem edge aligned.)
- Matching thread(Choose a color that blends with the fabric hem.)
- Fabric(Test fabrics first on scrap swatches.)
- Pins or clips(Holds hem edge in place while stitching.)
- Scissors(Sharp fabric scissors for trimming seams.)
- Needle (size appropriate for fabric weight)(Use a needle suitable for the fabric (e.g., 70/10 for lightweight fabrics).)
- Fabric marker or chalk(For marking the fold line if needed.)
Steps
Estimated time: 25-35 minutes
- 1
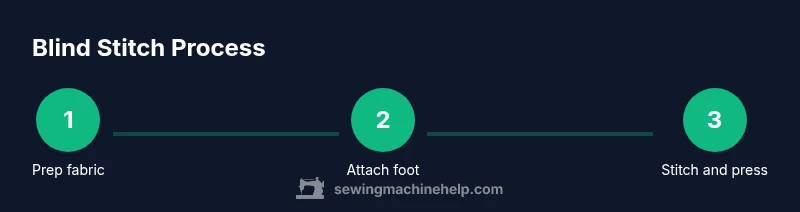
Prepare fabric and thread
Select the correct blind hem stitch or narrow zigzag. Thread the machine with a matching top thread and a bobbin that complements the fabric color. Test on a scrap swatch to confirm the alignment of the fold and stitching.
Tip: Always test on scrap fabric before committing to the final garment. - 2
Attach and align the hem foot
Install the blind hem foot if you have one. Position the needle close to but not on the fold line so the stitch will anchor into the fold without showing on the right side.
Tip: Use the foot's guide to keep the edge aligned as you sew. - 3
Mark and pin the hem
Mark the fold line and lightly pin along the edge to hold everything in place. Ensure the fabric lies flat and the hem allowance is even all around.
Tip: Pin parallel to the hem edge to minimize movement while sewing. - 4
Stitch with steady feed
Slow, even speed is crucial. Let the machine feed the fabric while you guide the edge with your non-dominant hand.
Tip: Don’t pull; allow the feed dogs to move the fabric. - 5
Check alignment and press
Stop midway to check the stitch placement. Press the hem to set the stitches and remove pins.
Tip: A quick press helps the fabric settle and shows if adjustments are needed. - 6
Trim and finalize
Trim any excess thread and give the hem a final press. Inspect both sides of the fabric—front should be nearly invisible, back may show a tiny zigzag catch.
Tip: If the right side shows, re-test with a different stitch setting or needle size.
Your Questions Answered
What fabrics are best for blind hemming with a machine?
Blind hemming works best on lightweight to mid-weight woven fabrics like cottons, linens, and light blends. For delicate fabrics, test tension and stitch width on a scrap swatch. Heavy fabrics may require alternative hems or a different foot.
Best fabrics are lightweight to mid-weight woven fabrics; test on a scrap to be sure.
Can I blind stitch with any sewing machine?
Most modern machines have a blind hem stitch or a compatible zigzag option. If yours doesn’t, you can sometimes mimic the effect with a narrow zigzag and careful needle placement. Check your manual for specific capabilities.
Most machines can do a blind hem with a dedicated stitch or a narrow zigzag; consult your manual.
How do I adjust tension for a blind stitch?
Front loops or visible stitches usually indicate tension imbalance. Start with a slightly looser top thread and test on scrap fabric, adjusting until the hem sits cleanly on the right side.
Try loosening the top thread a little and testing on a scrap to hide the stitch.
Why is the stitch showing on the right side?
This typically means the wrong stitch type or stitch width was chosen, or the hem is not aligned with the needle. Re-check fabric weight, needle size, and the fold line before re-stitching.
If you see the stitch, double-check the stitch type, width, and fold alignment.
Is blind stitching suitable for stretchy fabrics?
Blind hemming can work on some stretch fabrics with careful tension and a compatible stitch, but it may not be as invisible as on woven fabrics. Consider testing and, if needed, choosing a different hemming method.
It can work on some stretch fabrics with testing; otherwise, use a different method.
How can I finish a blind stitch quickly for many hems?
For multiple hems, lock in the steps by preparing all hems on scrap, then sew in one continuous workflow with consistent speed and foot guidance.
Prepare your hems on scrap first, then sew in a steady, repeatable flow.
Watch Video
The Essentials
- Practice on scrap fabric before final hems
- Use the blind hem foot and proper stitch type
- Keep fabric taut but not stretched while sewing
- Test tension and needle size for each fabric weight