Can You Embroider with a Sewing Machine? A Practical Guide
Learn how to embroider with a standard sewing machine, including setup, stabilizers, stitches, and beginner-friendly projects for confident home stitching.

Yes. You can embroider with a regular sewing machine by using the right foot, stabilizers, and threads. Start with simple designs and practice free-motion stitching or decorative stitches. Many machines accept an open-toe or darning foot that provides visibility. With patience and proper setup, you can achieve professional-looking embroidery right at home.
Can You Embroider with a Sewing Machine? How It Works
According to Sewing Machine Help, modern home sewing machines can handle embroidery tasks when equipped with the right foot and stabilizers. The Sewing Machine Help team found that most machines can perform decorative embroidery using free-motion or built-in stitches, making embroidery accessible to hobbyists. The key is to adapt your machine with a suitable foot (often an open-toe or darning foot), add stable fabrics and stabilizers, and select stitches that complement the design. This approach lets you translate simple motifs into polished, machine-stitched embroidery without purchasing a specialized embroidery machine.
In practice, embroidery on a regular machine often relies on free-motion stitching or paused stitch sequences where you guide the fabric rather than letting the machine follow a programmed path. Beginners typically start with straight or zigzag stitches, move to basic shapes, and gradually progress to denser fills or lettering. With the right setup and a patient approach, you’ll unlock a broad range of creative outcomes.
Essential Tools and Materials for Embroidering on a Sewing Machine
Before you stitch, gather the essential gear to support clean, consistent results. You’ll want a stable workspace, the correct needle and foot, and fabric-friendly stabilizers. Choosing rayon or polyester embroidery threads can give a smooth sheen, while contrasting or matching threads help your design pop on the fabric. For beginners, tear-away stabilizers are forgiving, but cut-away stabilizers offer more support for dense fills. Always test your setup on a scrap piece to avoid surprises on the final project.
Key considerations:
- Ensure your machine can accommodate the embroidery foot and stabilizers you plan to use.
- Use a sharp, proper needle size for embroidery (often 75/11 or 80/12) and a compatible bobbin thread.
- Pick stabilizers based on fabric weight and stitch density; lighter fabrics benefit from a stabilizer, while heavier fabrics may need heavier stabilizers.
- Keep a thread snips, fabric marker, and spray adhesive handy for pattern alignment and clean finishes.
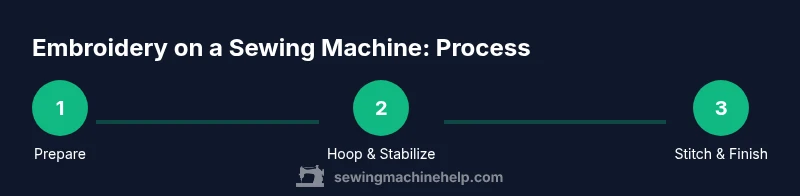
Getting Started: Basic Setup for Embroidery on a Regular Sewing Machine
To begin, confirm your machine’s capabilities and attach the appropriate embroidery or free-motion/darning foot. Install a sharp embroidery needle, thread with a compatible top thread (polyester or rayon recommended), and wind a bobbin with matching or coordinating thread. Layer your fabric with a stabilizer suited to the chosen design and fabric weight. Hoop the fabric securely, leaving only gentle drum-tight pressure to avoid puckering. Finally, set your stitch length to a shorter setting for stability and test on scrap fabric before proceeding to the final piece.
Step-By-Step: From Pattern to Finished Stitch
Transfer your design to fabric using a light mark or heat-away transfer. Choose a hoop size that matches your design’s area, and attach the stabilizer to the fabric. Load the thread color and select a stitch style appropriate for the design (backstitch or simple satin stitches for outlines, dense fills for shapes). Sew slowly, guiding the fabric with even pressure. When complete, carefully remove the stabilizer and press the fabric from the wrong side to minimize distortion.
Troubleshooting Common Issues: Tension, Threads, and Fabric
Tension is the most common nemesis in machine embroidery on home machines. If stitches look loose on top or show loops on the underside, adjust top thread tension or rethread, ensuring the thread passes cleanly through all guides. Check bobbin tension if lower-looping persists, and verify the bobbin is wound evenly. Fabric puckering indicates either too much tension or insufficient stabilizer. Exchange stabilizers or loosen the presser foot pressure as needed, and always test on scrap fabric first.
Finishing and Care: Pressing, Stabilizer Removal, and Longevity
Once embroidery is complete, remove tear-away stabilizers or cut-away stabilizers with care, avoiding fraying threads. Press the finished piece from the back with a low heat setting or using a pressing cloth to protect the stitches. Store embroidered items flat to prevent distortion, and wash with gentle cycles that won’t stress the stitching. Regular maintenance—cleaning the bobbin area, oiling per manufacturer guidance, and checking needle wear—extends the life of your machine and the quality of your embroidery projects.
Practice Projects and Next Steps
Start with small, simple motifs such as initials on a hand towel, a single leaf on a tote bag, or a border pattern on a napkin. As confidence grows, combine multiple stitches to build texture, or experiment with monograms and small decorative panels. Keep a design journal noting tensions, threads, stabilizers, and fabric types to refine your setup. With steady practice, you’ll be able to plan larger projects like embroidered pillow covers or custom clothing details.
Tools & Materials
- Sewing machine with standard stitch options and free-motion capability(Must support embroidery foot or allow free motion with a darning foot)
- Embroidery/Free-motion foot (open-toe preferred)(Provides visibility and control for stitched lines)
- Embroidery needles (size 75/11 or 80/12)(Sharp for delicate fabrics; avoid ballpoint used for knits)
- Top thread in embroidery weight (rayon or polyester)(Choose color that complements or contrasts with fabric)
- Bobbin thread (same brand/weight as top)(Pre-wind and test tension with bobbin threads)
- Stabilizers (tear-away and/or cut-away)(Fabric weight dependent; lighter fabrics may need tear-away)
- Embroidery hoop compatible with machine(Ensure hoop grips fabric without distortion)
- Fabric markers or transfer paper(For pattern transfer and alignment)
- Scissors, tweezers, and seam ripper(For trimming threads and stabilizers)
- Spray adhesive or temporary spray glue (optional)(Helps hold stabilizer in place on tricky fabrics)
Steps
Estimated time: 60-90 minutes
- 1
Gather supplies and set up workspace
Collect all tools, thread colors, stabilizers, and fabric. Clear a flat, well-lit area and set up a stable surface for hooping. This reduces misfeeds and ensures consistent stitching.
Tip: Place a scrap fabric under your hoop during setup to catch any missed stitches early. - 2
Hoop fabric with stabilizer
Select a stabilizer matching fabric weight and design density. Hoop the fabric securely to prevent shifting, leaving little slack. A taut hoop yields crisper lines and fewer puckers.
Tip: If fabric shifts, re-hoop and re-check tension before stitching. - 3
Attach embroidery foot and thread
Install the open-toe foot, thread machine with thread colors, and wind a compatible bobbin. Rethread if the thread path looks crowded; a neat threading path reduces snagging and tension issues.
Tip: Run a quick test stitch on scrap fabric to confirm smooth operation. - 4
Load design and choose stitch
Select a design method you’re comfortable with—free-motion guide or built-in stitches. Insert the design and choose a stitch type appropriate for outlines or fills. Use slow speed for accuracy.
Tip: Begin with a simple outline before attempting dense fills. - 5
Test stitch and adjust tension
Stitch a small sample on scrap fabric. Check top and bobbin tension, adjust as needed, and confirm that the stitch lies flat on the fabric. Correct tension early to avoid ruined projects.
Tip: If loops appear on the underside, tighten the top thread slightly. - 6
Finish, remove stabilizer, and press
Remove stabilizer according to type, trim threads, and press from the back with a damp cloth or pressing fabric. Allow to cool flat to prevent distortion.
Tip: Always test on a scrap before finishing the actual piece.
Your Questions Answered
Can I embroider on any sewing machine, or do I need a special model?
Most home machines can embroider with the right foot and stabilizers, but some features (like built-in embroidery fonts or larger hoops) are restricted to specialized models. If your machine supports free-motion stitching and compatible feet, you can start experimenting.
Most home machines can embroider with the right attachments; some exceptions may apply if you need large hoops or built-in embroidery features.
Do I really need a dedicated embroidery module?
Not necessarily. A regular sewing machine with a free-motion/darning foot and suitable stabilizers can handle many embroidery tasks. A dedicated embroidery module or machine will simplify complex designs and digitized patterns, but beginners can start with basics.
A dedicated module isn’t mandatory for beginners, but it helps with advanced designs.
What stabilizers should I use for light fabrics?
Light fabrics benefit from tear-away stabilizers to prevent fabric distortion without adding too much stiffness. For fabrics with stretch, a wash-away or cut-away stabilizer can provide better support while remaining comfortable to handle.
Tear-away for light fabrics; cut-away or wash-away for stretchy materials.
Can I embroider without a hoop?
Hooping stabilizes fabric and prevents movement. Embroidering without a hoop is possible for very small details or with free-motion stitching, but it’s much harder to control and yields inconsistent results.
Hooped fabric gives the best results; avoid freehand embroidery without hooping for beginners.
How do I fix thread snarls or bird’s-nest on the back?
Check needle size, re-thread sensors and guides, and re-thread both top and bobbin. Snarls often come from incorrect tensions or loose threads. Test on scrap to confirm tension is balanced.
Re-thread needles and verify tension; test on scrap fabric first.
What stitches work best for beginners?
Begin with simple straight stitches, backstitch outlines, and satin stitches for small shapes. As you gain confidence, try decorative fills and looped stitches to create texture without overcomplicating the setup.
Start with straight, backstitch outlines, then add satin stitches as you improve.
Are there fabrics to avoid when starting out?
Very stretchy jerseys and bulky knits can be challenging; start with woven fabrics like cotton or linen. If you work with knits, use a walking foot and stretch-compatible stabilizers to maintain control.
Begin with woven fabrics; if you work with knits, use a walking foot and special stabilizers.
Watch Video
The Essentials
- Yes, embroidery is possible on most home machines with the right gear.
- Stabilizers and the correct foot are critical for clean results.
- Start with simple designs and build confidence through practice.
- Test, adjust tension, and finish with proper pressing to seal the work.