How Sewing Machines Work: A Step-by-Step Guide for Beginners
Learn how a sewing machine operates from needle to bobbin with a clear, step-by-step explanation. Perfect for home sewers and beginners seeking practical understanding of threading, stitches, and maintenance.

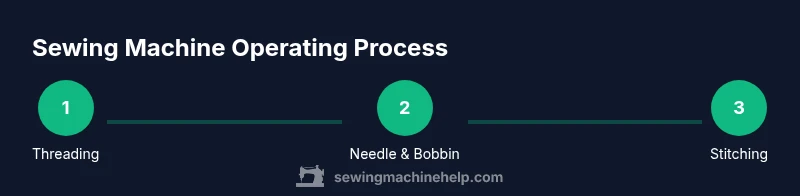
According to Sewing Machine Help, a sewing machine works by coordinating the needle, bobbin, and thread path to form stitches. This quick answer explains the step-by-step sequence and the core components you’ll encounter when you learn how a machine operates. By understanding the flow from spool to finished seam, you’ll set a foundation for repairs and routine use.
How does a sewing machine work step by step
In its essence, a sewing machine coordinates the upper thread, the needle, and the bobbin to form secure stitches as fabric moves beneath the presser foot. According to Sewing Machine Help, the core flow starts with a wound spool feeding thread through guides, down to the needle, and toward the bobbin area where the loop is created and locked. The phrase how does a sewing machine work step by step is a handy mental map that helps beginners connect motor action to a finished seam. The machine's timing is key: the take-up lever must rise and fall in harmony with needle movement, the bobbin must feed smoothly, and the feed dogs must advance fabric at a steady pace. As you learn, you’ll notice that every stitch depends on precise synchronization of these parts.
Core Components: Needle, Bobbin, and Shuttle
Three main parts drive every stitch: the needle (upper thread), the bobbin (lower thread), and the shuttle that catches the bobbin thread to interlock with the upper thread. The needle travels up and down, delivering the upper thread into the needle plate area. The bobbin sits in its case, rotating as the machine runs; the shuttle hooks around the bobbin thread to create a lock stitch. The presser foot presses the fabric down, while the feed dogs underneath push fabric forward in controlled steps. Modern machines also rely on a belt and pulley system powered by an electric motor to produce smooth, repeatable motion. When something goes wrong—like a bent needle, lint buildup, or a misthreaded path—the stitch quality suffers quickly. Regular checks help prevent issues before they derail a project.
The Stitch Formation Process: Take-Up Lever to Bobbin
Stitches are formed through a precise sequence. The take-up lever pulls the upper thread taut and moves the thread downward through guides toward the needle. As the needle descends, the bobbin rotates and the shuttle hook catches the upper thread loop, intertwining it with the bobbin thread to create a secure lock. The needle's motion also carries the fabric into the path of the feed dogs, which grip and advance the fabric between stitches. When the needle rises, the take-up lever returns to its peak, drawing more thread into the path for the next stitch. This cycle repeats hundreds or thousands of times per minute, depending on speed settings. A strong understanding of this cycle helps you diagnose skipped stitches, thread nests, or irregular tension.
Threading Path and Tension: Why Tension Matters
Thread tension balances the upper and lower threads so they interlock neatly in each stitch. If the upper thread is too tight, fabrics may pucker; if it’s too loose, you’ll see loose loops on the underside. The threading path from spool to needle includes guides, the take-up lever, and tension discs, all of which must be clean and free of lint. Bobbin tension also matters; too tight or too loose will disrupt stitch quality. Most modern machines offer adjustable tension via a dial or digital control. Always thread the machine exactly as the manual shows, and verify that the bobbin is wound evenly. Then test on scrap fabric to dial in the right balance before starting an actual project.
Common Stitch Types and Variations
Beyond the straight stitch, most machines offer a zigzag option and several utility stitches. The straight stitch is the default choice for seams and topstitching, delivering a clean, durable line. Zigzag stitches allow finishing edges on knit fabrics or stretch materials and can provide decorative effects. Many machines include backstitch or lockstitch features to finish seams securely. When selecting stitch type, consider fabric weight, thread choice, and needle size. Practicing on scrap fabric helps you match stitch length and width to your project, and keeps your main fabric safe while you learn.
Maintenance, Safety, and Troubleshooting Basics
Keep the machine clean and properly oiled according to the manual. Regularly remove lint from the bobbin area, check needle condition, and replace worn needles promptly. Always unplug before threading or changing accessories, and keep hair, jewelry, and loose clothing away from moving parts. If you encounter skipped stitches, thread nests, or unusual noises, re-thread the machine, re-check tension settings, and test on scrap fabric. A quick check of the bobbin case alignment and a light cleaning can often solve many common problems without professional service.
First Project: A Simple Tote Bag to Practice the Mechanics
This practical project gives you a chance to apply what you’ve learned about the take-up lever, tension, and feed dogs. Start with a simple straight seam on sturdy fabric; sew a few basic seams, then practice turning corners with careful needle placement. Use scrap fabric to test different stitch lengths and widths, and write down the settings that work best. This hands-on approach cements your understanding of how a sewing machine works step by step and builds confidence for more complex projects. The Sewing Machine Help approach encourages keeping notes on tension, stitch type, and fabric behavior so you can reproduce successful results on future projects.
Tools & Materials
- Sewing machine(Power off when threading or changing parts)
- Owner's manual(Keep handy for model-specific steps)
- All-purpose sewing thread(Choose weight suitable for fabric)
- Assorted sewing machine needles(Include sizes 70/10, 80/12, 90/14)
- Bobbin set(Factory or compatible bobbins)
- Sewing machine oil(Only if the manual recommends oiling)
- Lint brush(For cleaning the bobbin area)
- Scissors(Fabric scissors)
- Seam ripper(For quick fixes)
- Pins(To hold fabric as you sew)
- Scrap fabric(Practice material)
Steps
Estimated time: 20-30 minutes
- 1
Turn on the machine
Power on the machine, check basic settings (straight stitch default), and confirm the presser foot is raised. This prepares a clean threading path and helps prevent thread jam when you begin.
Tip: Always start with the presser foot up before threading or adjusting the needle. - 2
Wind and insert bobbin
Wind the bobbin evenly, place it in the bobbin case, and snap it into the machine. Ensure the bobbin turns smoothly and sits correctly to avoid tension problems.
Tip: Use the recommended bobbin type for your model and avoid over-winding. - 3
Thread the upper path
Follow the threading path from the spool through guides to the take-up lever and down toward the needle. A clean path reduces tangles and ensures consistent tension.
Tip: Refer to the machine’s diagram if you’re unsure; take your time to route each guide. - 4
Thread the needle
Pass the thread through the needle eye from front to back and pull to remove slack. A well-threaded needle decreasesSkipped stitches and thread breakage.
Tip: If needed, use a needle threader or bright light to see clearly. - 5
Raise take-up lever and select stitch
Raise the take-up lever to its highest position, then set the stitch to straight. This primes the machine for a clean, simple seam.
Tip: Test on scrap fabric first to confirm tension before sewing your project. - 6
Position fabric and lower presser foot
Align the fabric edge with the needle, lower the presser foot, and gently lower feed dogs into engagement. This establishes a stable starting point.
Tip: Pin the edge if needed to prevent shifting; keep seam allowance consistent. - 7
Sew a test seam
Gently press the foot pedal and guide the fabric with both hands, maintaining even speed. Stop to inspect the stitch quality and adjust if necessary.
Tip: Keep your fingers a safe distance from the needle and use scrap fabric for practice. - 8
Finish and perform quick maintenance
Finish the seam, remove fabric, turn off the machine, and clean any lint from the bobbin area. Oil only if the manual calls for it and as a final check.
Tip: Document any tension or stitch changes for future projects.
Your Questions Answered
What is the basic mechanism of a sewing machine?
A sewing machine uses a needle carrying the upper thread, a bobbin carrying the lower thread, and a shuttle to interlock the threads. The machine coordinates these parts with the take-up lever, tension discs, and feed dogs to form stitches.
It uses a needle and bobbin with a shuttle to lock threads, controlled by timing and tension.
How do you thread a sewing machine?
Follow the machine’s threading path from the spool through guides to the needle, with the take-up lever in the highest position. Ensure the bobbin is correctly seated and wound.
Thread from the spool through the guides to the needle, with the take-up lever up.
What is the difference between straight stitch and zigzag stitch?
Straight stitch forms a single line for seams; zigzag stitches finish edges and accommodate stretchy fabrics. Each stitch uses different width and length settings.
Straight is for seams; zigzag edges and stretch fabrics.
Why is the thread bunching under the fabric?
Bunching usually means the upper thread or bobbin thread is misthreaded or tension is off. Re-thread both paths and test on scrap fabric.
Bunching often means there’s a threading or tension problem.
Why does thread keep breaking?
Thread breaks are commonly caused by a damaged needle, wrong needle for the fabric, or excessive tension. Check needle type, replace if bent, and rethread.
Thread keeps breaking usually due to needle or tension issues.
How often should I oil my sewing machine?
Oil isn't required for most modern machines. Follow your manual; only oil if the manufacturer instructs and in the specified locations.
Oil as directed in the manual; many machines don’t need routine oiling.
Watch Video
The Essentials
- Master the thread path from spool to needle to bobbin.
- Recognize how stitch formation works and timing.
- Practice on scrap fabric to dial in tension and stitch length.
- Care for the machine to maintain consistent performance.