Mastering Presser Feet on Your Brother Sewing Machine
Learn how to identify, attach, and maintain presser feet for a Brother sewing machine. Practical tips for different fabrics, troubleshooting, and compatibility to improve stitch quality and extend foot life.

Master presser feet on a Brother sewing machine by identifying compatible feet, correctly attaching them, and adjusting foot pressure for various fabrics. This guide covers common feet types, safe removal and installation, basic maintenance, and quick fixes for jammed or misaligned feet. Whether you’re sewing denim, silk, or upholstery, you’ll gain confidence with the right feet.
Understanding Brother foot sewing machine foot systems
For home sewists, a clear understanding of how presser feet attach to a brother foot sewing machine is foundational. Brother machines generally use snap-on feet that press onto a standard shank, but some models rely on tiny screws or special adapters. The key is compatibility: feet labeled for Brother, or those designed for low-shank, snap-on systems, will fit most modern machines without modification. According to Sewing Machine Help, always verify your model’s foot connection type in the manual before purchasing new feet. This upfront check saves time and prevents broken feet or bent posts. When you see a kit described as “Brother-compatible,” confirm it specifically lists your model family (e.g., DX, SE, or N-series) rather than a generic claim. Ground rules: compatible feet improve stitch quality, reduce fabric slippage, and minimize wear on the foot and needle. A solid footing in foot compatibility is the first step to reliable results.
Whether you’re working with a beginner-friendly Brother entry model or a high-spec unit, the presser foot system governs how fabric is held, fed, and sewn. The right foot allows you to feed fabric smoothly, maintain even stitch length, and achieve professional-looking seams. In this article, we’ll cover common feet you’ll encounter, how to attach them safely, and practical troubleshooting. Remember to keep your machine manual handy as you work through different feet and settings.
Tools & Materials
- Presser feet assortment (snap-on)(Include universal feet such as all-purpose, Zipper, Buttonhole, walking foot, and narrow hem. Verify compatibility with your Brother model’s snap-on shank.)
- Presser foot screwdriver(Small screwdriver for feet plate screws or set-screw feet when needed.)
- Machine manual or model compatibility chart(Have your exact Brother model number ready to check feet compatibility.)
- Cleaning brush(Soft brush to remove lint from foot sockets and shuttle area.)
- Microfiber cloth(For wiping feet and shank surfaces without leaving fibers.)
- Needle-nose pliers or tweezers(Helpful for removing stubborn lint or material stuck in feet.)
- Thread snips(Sharp scissors to trim thread when changing feet.)
- Extra needles (size 80/12, 90/14)(Useful when testing new feet with different fabrics.)
- Sewing machine oil (if required by manual)(Only use oil if your manual recommends lubrication near the foot area.)
Steps
Estimated time: 20-40 minutes
- 1
Gather feet and required tools
Lay out your presser feet assortment and the machine manual. Confirm your Brother model uses a snap-on foot system. Organize your workspace with good lighting and a scrap fabric for tests.
Tip: Keep feet in a labeled tray to prevent cross-contamination between fabrics. - 2
Power down and raise the needle
Turn off and unplug the machine. Raise the needle to its highest position to ensure there’s no risk of sudden movement when you remove or attach feet.
Tip: If your machine has a speed control, set it to the lowest setting during foot changes. - 3
Detach the current presser foot
Press or lift the foot-release lever to unclamp the current foot. Gently pull the foot straight off the shank if it’s a snap-on foot.
Tip: If the foot feels stuck, double-check that you are releasing the correct lug or screw on your model. - 4
Attach a new presser foot securely
Align the new foot with the shank and press down until it clicks in place (snap-on). If using a screw-on foot, tighten the set-screw with the screwdriver.
Tip: Always test the foot by lowering and raising it before stitching to confirm it’s securely mounted. - 5
Do a fabric test on scrap
Place a scrap piece under the foot and run a short seam to verify that the feed, stitch, and foot height work with the chosen fabric.
Tip: If fabric shifts or skips stitches, recheck foot compatibility and tension. - 6
Adjust presser foot pressure for fabric
If your machine allows foot-pressure adjustment, set it according to fabric type: heavier fabrics may need more pressure, while delicate fabrics need less to prevent pinching.
Tip: Start with a low pressure for delicate fabrics and increase gradually as needed. - 7
Switch feet for specific tasks
When you switch to a specialty foot (zipper, walking foot, or buttonhole foot), re-test on scrap and adjust stitch length or tension as necessary.
Tip: Keep a dedicated station for feet used most often to speed up setups. - 8
Clean and store feet properly
Wipe feet with a microfiber cloth to remove lint. Store in a covered container to prevent dust and corrosion.
Tip: Label storage bins so you can quickly find the right foot later.
Your Questions Answered
What feet are compatible with my Brother sewing machine?
Most Brother machines use snap-on feet that fit a standard low-shank shank. Always check your model’s manual or model family designation to verify compatibility before purchasing feet.
Most Brother machines use snap-on feet, so start by checking your model’s manual to confirm which feet fit.
Can I use third-party presser feet with Brother machines?
Yes, many third-party feet are compatible if they are designed for the same shank type (low-shank or snap-on). Always verify compatibility with your model and test on scrap fabric.
You can use compatible third-party feet, but test first on scrap to ensure good performance.
Do I need special tools to change feet on a Brother machine?
In most cases, a small screwdriver for set-screws and the machine manual are enough. Snap-on feet typically require no tools beyond a gentle press to snap on.
Usually you just snap on the feet; keep a small screwdriver handy for screw-on feet.
Why is the stitch skipping when using a different foot?
Skipping stitches can happen if the foot height or needle position is incompatible with the needle and thread combo. Refit the foot, adjust tension, and test on scrap fabric.
If stitches skip, recheck the foot, tension, and needle size for the fabric.
How do I prevent fabric from slipping with the presser foot?
Ensure the fabric is aligned with the feed dogs and use the correct foot for the task (e.g., walking foot for slippery fabrics). Test on scrap first.
Use the right foot for the fabric and test on scrap to prevent slipping.
Is there a difference between snap-on and screw-on feet?
Snap-on feet are quick to change and common on many Brother models. Screw-on feet require tightening with a screwdriver and are used on some specialty feet.
Snap-on feet are fast to switch; screw-on feet stay secure but take a moment longer to change.
Watch Video
The Essentials
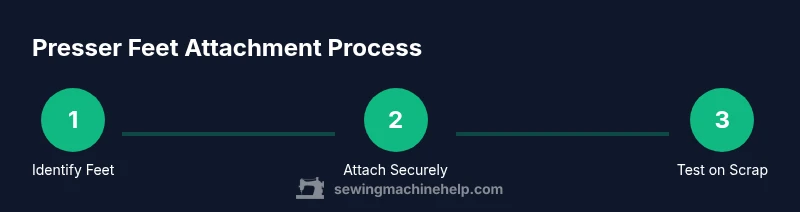
- Identify feet compatibility before buying
- Attach feet securely and test on scrap fabric
- Adjust foot pressure per fabric type
- Use proper storage to prevent dust and corrosion
- Maintain a quick-start checklist for fast setups