How to Repair and Use a Vintage Singer Featherweight Sewing Machine
A practical, step-by-step guide for repairing and maintaining a vintage singer featherweight sewing machine, with threading, oiling, belt checks, and care tips for home sewists and beginners.

With this guide, you will safely diagnose, service, and restore a vintage Singer Featherweight sewing machine to sewing-ready condition. You'll learn essential steps for threading, oiling, belt inspection, and light maintenance. Designed for home sewists and beginners, this guide helps you achieve reliable results from a beloved vintage machine. Follow the steps closely and record adjustments as you go.
Why the vintage singer featherweight sewing machine remains a classic
The vintage singer featherweight sewing machine is cherished for its compact, portable design and robust metal construction. When cared for properly, these machines offer decades of reliable stitching and become faithful companions for many sewing projects. According to Sewing Machine Help, their lightweight yet sturdy build makes them a favorite among home sewists who want a machine that is easy to move and dependable for daily sewing tasks. This guide helps you appreciate the engineering behind the Featherweight and provides practical steps to keep it running smoothly while preserving its value and charm.
Model variants and identifying features
The featherweight line includes several models, with the 221 often cited as the classic postwar champion and the 222 variant offering additional stitch options. Key identifying features include the compact body, a slanted needle bar on certain variants, and a simple, user-friendly threading path. When you first encounter a vintage Singer Featherweight, take a clear photo of the front, side, and underside to note any unique decals or serial numbers. Understanding the model can help you locate the correct replacement parts and service techniques, and it can guide your maintenance schedule without overcommitting to parts that aren’t needed.
Setup and workspace preparation
Before you touch the machine, set up a clean, well-lit workspace with a sturdy table and a non-slip mat. Remove any loose clothing or jewelry that could snag moving parts, and unplug the machine to prevent accidental starts. Gather your tools and supplies ahead of time and lay them out in order of use. A tidy, organized space reduces the risk of dropped screws or lost components and makes the restoration process more enjoyable. A routine wipe-down with a soft cloth helps remove dust and lint that can accumulate in the moving gears.
Threading and bobbin basics
Threading a Featherweight correctly is essential for smooth stitches. Start by placing a spool of thread on the spool pin, guiding it through the thread guides toward the needle, and ensuring the thread is seated in the tension disc properly. Load the bobbin with the correct orientation so the thread unwinds smoothly as you sew. Practice guiding the upper thread and bobbin thread to the needle with gentle tension, and perform a test stitch on scrap fabric to verify even stitches. If you notice bird-nest threads on the underside, recheck the bobbin installation and the thread path.
Oil and lubrication routine for the drive mechanism
Lubrication reduces friction and wear in the Featherweight’s gear train and moving parts. Use a light sewing machine oil and apply sparingly to the recommended points as described in your model’s manual or a reputable service guide. Avoid over-oiling, which can attract dust and lint, leading to buildup. After oiling, run the machine briefly by hand or at low speed to distribute the oil and remove excess with a lint-free cloth. Regular oiling—after every few hours of sewing or monthly in normal use—helps keep the gears quiet and efficient.
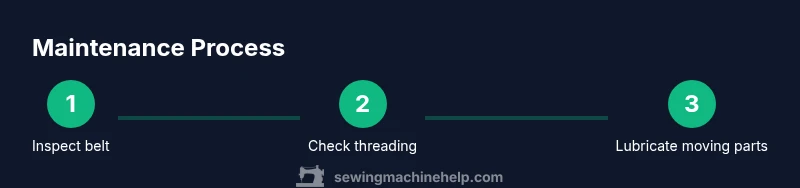
Belt inspection and drive system checks
The drive belt is critical for consistent stitch timing and machine speed. Inspect the belt for cracks, glazing, or fraying. If the belt is stretched or shows signs of wear, replace it with a correct-size belt designed for Featherweight models. When reinstalling, make sure the belt seating aligns with the pulley grooves and does not slip. A properly tensioned belt ensures stable stitches and extends the life of the motor and pulley system.
Troubleshooting common issues and preventive care
Common issues include skipped stitches, inconsistent tension, and jammed shuttle assemblies. Start by inspecting the threading path for misroutes, rethreading from scratch if needed. Clean lint from the shuttle area and ensure the bobbin case moves freely. For persistent problems, consult the model-specific manual or a service guide to verify tension and timing. Establish a regular cleaning schedule and perform light maintenance after every 6–8 hours of sewing to prevent buildup that leads to jams.
Long-term care and restoration options
Preserving a vintage Singer Featherweight involves regular cleaning, careful oiling, and choosing quality replacement parts when needed. If you encounter severe wear in the gear train or need precision timing restoration, seek a professional service with experience in Featherweight machines. Document any repairs and maintain a simple maintenance log to track what was serviced and when. Keeping the original decals and finishes intact can enhance resale value and appreciation for the machine’s history.
Quick-start checklist after restoration
- Unplug and inspect exterior for dust and lint.
- Thread and bobbin correctly, then run a test stitch on scrap fabric.
- Oil the indicated points with a light sewing oil and wipe away excess.
- Check belt condition and tension; replace if worn.
- Sew a small seam to confirm straight stitches and proper tension. If issues persist, revisit threading and tension steps before seeking professional help.
Tools & Materials
- Screwdrivers set (precision, small Phillips and flat-head)(Magnetic tip preferred; include a set of small measurements.)
- Soft brush or lint brush(For removing lint from the shuttle area and gears.)
- Lint-free cloths(For cleaning and oil removal; avoid fibers that shed.)
- Sewing machine oil (light)(Apply sparingly to moving parts only.)
- Replacement drive belt (correct Featherweight size)(Ensure compatibility with your model and pulley system.)
- Tweezers or hemostats(For thread removal and precise placement in tight areas.)
- Small flashlight or headlamp(Helpful for inspecting tight spaces.)
- Sewing machine manual or model guide(Useful for model-specific threading paths and oiling points.)
- Masking tape or small containers(Label screws during disassembly to avoid mix-ups.)
- Soft cloth or neoprene mat(Protect the machine surface during maintenance.)
Steps
Estimated time: 60-90 minutes
- 1
Power off and prep workspace
Unplug the machine and clear the work area. Set the machine on a stable, non-slip surface and gather your tools. This limits accidents and helps you work efficiently.
Tip: Wear eye protection if you’re working with small screws. - 2
Identify model and inspect exterior
Check model number and condition of decals. Photograph the machine before disassembly to aid reassembly. Note any missing parts or obvious damage.
Tip: Serial numbers can guide you to the correct parts. - 3
Open access for threading and shuttle area
Remove covers to access the needle bar, shuttle, and bobbin housing. Clear any lint with a lint brush and inspect for corrosion or wear.
Tip: Do not force parts; use gentle prying if needed. - 4
Thread path setup for upper thread
Route the upper thread through guides toward the needle following the model-specific path. Ensure the thread sits properly in the tension discs.
Tip: If tension seems uneven, re-seat thread through guides. - 5
Wind and load bobbin correctly
Wind thread evenly on the bobbin and insert it into the bobbin case with the correct orientation. Ensure the bobbin turns clockwise as it feeds.
Tip: Test bobbin rotation with a gentle pull on the thread tail. - 6
Oil the drive points
Apply a small amount of light sewing oil to the designated gears and moving parts. Wipe away any excess to prevent lint attraction.
Tip: Avoid oiling seals or rubber components not designed for oil. - 7
Inspect/replace drive belt
Check the belt for cracks, glazing, or fraying. Replace if worn and re-seat along pulleys.
Tip: Test belt tension by turning the handwheel; it should move smoothly. - 8
Test stitch and adjust timing
Thread a scrap fabric and run a test stitch. If stitches skip or misalign, revisit threading, tension, and timing settings.
Tip: Record any adjustments for future reference.
Your Questions Answered
Can I use modern lubricant on a vintage Singer Featherweight?
Only use light sewing machine oil designed for precision gears. Avoid household oils or heavy lubricants that can gum up the mechanism. Always follow your model's manual for oiling points.
Use light sewing machine oil on the Featherweight and avoid heavy or household oils.
Are replacement parts hard to find for the Featherweight?
Parts are available from specialty suppliers and online communities. Verify compatibility with your exact model before purchasing and consider NOS parts for authenticity.
Replacement parts are available from specialty suppliers; check compatibility before buying.
Is it safe to sew heavy fabrics on a Featherweight?
The Featherweight excels with lighter to medium-weight fabrics. For heavy materials, adjust stitch settings and test on scrap fabric to avoid undue strain on the motor.
It handles light to medium fabrics best; test on scrap for heavy fabrics.
What causes jammed stitches and how can I prevent it?
Jams are usually due to lint buildup, misthreading, or timing drift. Regular cleaning, correct threading, and timely parts inspection prevent many jams.
A jam often comes from lint, misthreading, or timing drift; keep it clean and properly threaded.
How often should I service a Featherweight machine?
Regular light maintenance should occur after every few sewing sessions, with a thorough check and cleaning every 6–12 months depending on use and environment.
Do light maintenance often; do a deeper service a few times a year based on use.
Watch Video
The Essentials
- Know the model and identify features before starting.
- Threading, bobbin loading, and oiling are the core maintenance steps.
- Regular care preserves performance and value of the Featherweight.
- Use the right replacement belt and avoid over-oiling.
- Document repairs for future reference and resale value.