How to Use the Singer Free Motion Foot on Your Machine
A practical guide to using the Singer free motion foot for embroidery and quilting. Learn installation, setup, tips, and troubleshooting to achieve smooth, controlled stitchwork with your sewing machine.

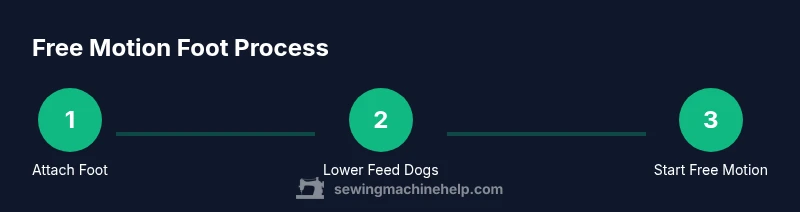
The Singer free motion foot enables you to sew with full fabric control for embroidery, stippling, and freehand quilting on compatible machines. It replaces the standard presser foot, lowers feed dogs, and creates an open needle gap for smooth, unrestricted stitching. Install the foot, lower feed dogs, thread correctly, and guide fabric with light, even pressure.
What is the singer sewing machine free motion foot?
The singer sewing machine free motion foot is a dedicated presser foot designed to unlock freehand embroidery, quilting, and machine-based doodling. According to Sewing Machine Help, this foot replaces your standard foot to enable controlled, stitch-by-stitch movement while you guide the fabric with your hands. The key advantage is the open needle gap and a generous toe that gives you visibility and room to maneuver threads and fabric. When used correctly, it turns a regular sewing session into a versatile stitching studio, allowing you to create dense stippling, decorative motifs, or smooth, uninterrupted embroidery without the feed dogs pulling the fabric. Keeping tension balanced and practicing on scrap fabrics will build your confidence quickly.
For home sewists, hobbyists, and beginners, understanding the role of the foot helps you decide when free motion is appropriate. While it’s commonly marketed for embroidery, many stitch types benefit from the freedom this tool provides, including freehand quilting on small quilt tops and discrete garment embellishments. The important takeaway is that the free motion foot is not a gimmick; it is a practical upgrade that expands what your Singer machine can do with hands-on control. Sewing Machine Help’s analysis shows that most models with a compatible low-shank foot will respond positively to this accessory when used with care and practice.
Compatibility and installation: is it right for your machine?
Not every Singer model ships with a free motion foot, and compatibility largely depends on the presser foot shank type (most common: low shank). Before buying or attaching one, verify that your machine supports the foot style and that the screw height aligns with your needle plate. The Singer free motion foot typically fits machines that accept standard low-shank feet, but some mid- or high-shank variants may require an adapter. Check your model’s manual to confirm fit, or consult your dealer. For home sewers, this means you can usually adopt free motion techniques without upgrading the machine, as long as the shank matches and you can lower the feed dogs as needed. Once you’ve confirmed compatibility, attach the foot by aligning the bar with the presser foot holder and securing it with the screw if required. The next step is to lower the feed dogs (or select “drop feed” on the machine) to allow for free-guided stitching. When the foot is correctly seated, test by stitching on scrap fabric to ensure there’s no binding and that visibility through the needle area is clear.
Tools & Materials
- Free motion foot compatible with Singer machines (low shank)(Ensure compatibility with your machine's shank and model.)
- Small screwdriver (if your model uses screws to secure feet)(Used to attach the foot if your machine requires it.)
- Practice fabric (cotton or muslin)(At least 12x12 inches for testing.)
- All-purpose sewing thread(Choose a weight that matches your fabric.)
- Spool pin and bobbin with thread(Ready for bobbin winding and top thread.)
- Scissors or thread snips(For trimming tails and threads.)
- Needle appropriate for fabric(Use a sharp needle; consider size 70/10–90/14 for denims.)
- Optional: teflon/non-stick foot for slick fabrics(Helpful for vinyl, leather, or slippery materials.)
Steps
Estimated time: 25-45 minutes
- 1
Prepare the machine and workspace
Power off the machine and remove any existing foot. Clear the work area and thread the machine as you normally would for standard sewing. This setup ensures you don’t snag any fabric while you’re learning free motion control.
Tip: Always unplug the machine before changing feet to prevent accidental start. - 2
Remove the current presser foot
Loosen the foot screw or snap the foot off depending on your model. Keep the screw handy in case you need it for reattachment. This step frees the needle area for full motion control.
Tip: Keep track of small screws so they don’t roll away. - 3
Attach the free motion foot
Align the free motion foot with the presser foot holder and secure it with the screw or snap mechanism. Ensure the foot is level and flush against the throat plate to avoid binding.
Tip: Double-check that the foot is tightened, but not overtightened to avoid stripping threads. - 4
Lower the feed dogs and set stitch length
Use the feed dog drop lever or setting to lower feed dogs. Set the stitch length to 0 or 1 for many free motion applications so the fabric doesn’t advance automatically.
Tip: Test on scrap fabric to verify that the stitch does not progress—your fabric should move only when guided. - 5
Thread the machine and prepare fabric
Thread the top and bobbin as you would for straight stitches. Attach your fabric with a firm hold and position your hands on either side of the needle. Maintain gentle, consistent pressure as you guide the fabric.
Tip: Keep your wrists relaxed and use both hands to control fabric flow. - 6
Begin with simple straight lines and curves
Start with slow, short strokes to get a feel for the motion. Move your hands in smooth, continuous curves and practice maintaining even stitch length.
Tip: Don’t rush—free motion requires deliberate, controlled movement. - 7
Advance to basic motifs and stippling
Try basic shapes: circles, waves, or meanders. Increase your speed gradually as you gain confidence while keeping your motion steady and your hands relaxed.
Tip: If fabric lifts, lower your feed dogs further or adjust fabric tension. - 8
Evaluate, adjust, and clean up
Inspect your stitches for consistent tension and avoid loops. Re-thread if needed, and store the foot and tools properly after finishing.
Tip: Keeping a clean workspace reduces tangled threads and missed stitches.
Your Questions Answered
What is a free motion foot used for on a Singer machine?
A free motion foot allows you to freely guide fabric for embroidery, stippling, and quilting. It creates an unobstructed stitch area and enables precise control when working by hand.
A free motion foot lets you guide the fabric by hand for embroidery and quilting, giving you more control over stitches.
Is a free motion foot compatible with all Singer models?
Compatibility depends on your model's presser foot shank (most Singer models use a low shank foot). Check your manual or call your dealer to confirm fit before purchasing.
Check your model’s shank type to confirm compatibility with the free motion foot.
Do I need to lower feed dogs to use free motion stitching?
Yes. Lowering the feed dogs prevents automatic fabric advancement, enabling you to guide the fabric yourself for free motion work.
Lower the feed dogs so you can control the fabric manually.
What stitch should I use for free motion work?
Most free motion work uses a straight stitch with a length set to 0 or a very short length. This reduces fabric movement and gives cleaner results.
Use a straight stitch with length near zero, then guide fabric slowly.
Why is my thread looping or bunching when using free motion?
Tension or thread path issues often cause loops. Re-thread the machine, check bobbin tension, and ensure the thread feeds smoothly with the chosen fabric.
Check threading tensions and re-thread if loops appear.
Watch Video
The Essentials
- Attach the correct free motion foot for your machine
- Lower feed dogs and set stitch length to 0 or 1
- Guide fabric with both hands for consistent motion
- Practice on a scrap fabric before working on final projects