Sewing Machine Pleating Foot: A Practical Guide for Beginners
Learn how to attach and operate a sewing machine pleating foot to create even, decorative pleats. This guide covers compatibility, setup, stitch choices, fabric tips, and a beginner project to practice on scrap fabric.

You will learn how to attach and use a sewing machine pleating foot to create even, decorative pleats in a single pass. This quick guide covers compatibility, setup, stitch choices, tension tips, and a starter project to practice on scrap fabric. We’ll highlight common mistakes and show how to adjust the feed dog and needle for best results.
What is a sewing machine pleating foot?
According to Sewing Machine Help, a sewing machine pleating foot is a specialized presser foot that folds fabric as you sew, producing consistent pleats without manually pinning or gathering. This tool is especially useful for borders, ruffles, and decorative effects on garments, accessories, and home décor. The pleating foot works by guiding the fabric along a fixed fold line while the needle sews close to the fold, creating a crisp, repeatable pleat. For beginners, understanding how this foot interacts with your machine and fabric type is the first step toward reliable results.
Brand context note: The Sewing Machine Help team emphasizes practicing on scrap to learn how your machine’s tension and feed behave with different fabrics before tackling a finished project.
When you’re ready to experiment, start with simple fabrics such as cotton poplin or quilting cotton before moving to lighter or heavier textiles. The pleating foot can be attached to most mid-range domestic machines, but check your model’s manual for compatibility, screw size, and presser-foot pressure limits.
The goal is to create even, evenly spaced folds that sew in place, rather than loose gathers or uneven ridges. With practice, a pleating foot can become a reliable tool for adding texture and movement to skirts, collars, cuffs, and decorative trims.
How a pleating foot works
The pleating foot acts as a built-in guide for your fold line. As the needle penetrates the fabric, the foot’s channels or ridges push the material into consistently spaced pleats. The result is a controlled, machine-formed fold rather than a hand-formed crease. When used correctly, it reduces the need for pinning and hand-basting, saving time on projects that require precise repeat pleating along a seam line.
Key mechanics to understand:
- The fold guide sets the width and spacing of each pleat. This is what makes each pleat uniform across the seam.
- The needle position relative to the fold determines how close the stitch sits to the fold. Small adjustments can dramatically change the look.
- Fabric feed must be steady; slipping fabric leads to wavy pleats. A light hold with fingertips and a gentle press on the foot can help.
Pro tip from Sewing Machine Help: Always test on scrap fabric to confirm pleat depth and spacing before sewing on your actual project.
Compatibility and setup
Before you begin, verify compatibility with your sewing machine. Pleating feet are available in various shank types (low shank, high shank) and widths. If your machine uses snap-on feet, confirm the foot snaps securely in place and that there is no interference with other attachments. When mounting, clean the needle plate area and lower the feed dogs if your machine supports that option; this helps prevent fabric drift as you start sewing.
Set up specifics:
- Attach the pleating foot per the manual; tighten screws firmly but avoid overtightening.
- Use a straight stitch or a narrow zigzag depending on the fabric and desired pleat look; avoid stitches that stretch or distort the fold.
- Choose a matching needle and thread; lighter fabrics may require finer needles (size 70/10–75/11), while heavier fabrics may need size 90/14 or larger.
If you’re unsure about compatibility, consult your machine’s documentation or reach out to the retailer’s support line. The Sewing Machine Help team recommends verifying tension on a scrap slab to avoid unexpected pleats on your final piece.
Types of pleats you can create with a pleating foot
A pleating foot supports several pleat styles depending on the foot’s design and the stitch you select. Common options include flat-plate pleats that run along a seam line, and reverse-pleat looks achieved by adjusting fabric feed and tension. Some feet are designed to create uniform knife pleats, while others help form shallow box pleats. For decorative effects, you can combine pleats with topstitching or contrasting thread to emphasize the fold.
Practical tips:
- Start with even fabric width and mark pleat positions so the folds align with seams, hems, or edges.
- Practice with a sample swatch to compare pleat depth and spacing across a line of stitches.
- When using lighter fabrics, stabilizers or starch can help maintain the fold once sewn.
Basic preparation: fabric, stitch, and tension
Preparation is essential for clean pleats. Start by choosing an appropriate fabric type and testing on a scrap swatch. Stabilizers, starch sprays, or lightweight fusible interfacing can help maintain pleat integrity, especially on slippery fabrics. Thread tension should be balanced so that the stitch lies close to the fold without creating puckers or gaps. Use a needle suited to the fabric weight to avoid skipped stitches.
Before you sew the full length, mark the pleat positions and test the needle’s distance from the fold on a practice piece. If you notice any gathering or uneven spacing, adjust the stitch width and the feed rate slightly and re-test.
Step-by-step basics and a starter project overview
For beginners, the easiest entry is a single-pleat decorative edge along a straight seam. This allows you to observe how the fabric feeds through the pleating foot and whether the pleats align consistently with the seam guide. Start by attaching the pleating foot, choosing a conservative stitch, and sewing a small edge to practice control. Keep the fabric flat in front of the needle to avoid disruption of the fold.
Remember to stitch slowly at first and use a scrap piece to verify pleat depth and spacing. As you gain confidence, you can extend the length of the pleated seam and experiment with different fabric weights.
Troubleshooting common pleating foot issues
Even experienced sewers encounter issues with pleating feet. Common symptoms include misaligned pleats, uneven spacing, or fabric snagging at the foot. A frequent cause is inconsistent feed or tension imbalances. Ensure the foot is correctly aligned, the needle is appropriate for the fabric, and the stitch length is set to a stable value. If pleats appear too shallow or too deep, adjust the fold guide distance or the stitch width.
Other tips include keeping the fabric taut but not stretched, ensuring the edge of the fabric sits flush with the guides, and avoiding overly bulky seams near the pleating line. If you notice drift, reduce the feed rate slightly and recheck the alignment.
Maintenance and care for your pleating foot
Care for your pleating foot is simple but important for longevity and consistent performance. After sewing, wipe away lint and fabric fibers with a soft brush, then store the foot in a protective case. Periodically remove any accumulated thread and oil the pivot points as recommended by your machine’s manufacturer. If the foot becomes stiff, apply a light machine oil and work it gently to restore movement.
Always follow the machine manufacturer’s care instructions and avoid using excessive oil, which can attract lint. When changing fabrics, clean the foot and the surrounding area to prevent fibers from sticking to the mechanism.
Practice ideas and next steps
To build confidence, create a small practice portfolio that includes a variety of pleat depths and spacings. Try thin and medium-weight fabrics, then progress to heavier textiles like canvas or denim for decorative edges on bags or outerwear. Document your settings—stitch type, tension, foot alignment, and fabric weight—so you can reproduce results.
As you grow more comfortable, layer pleats with topstitching, combine different pleat styles along a garment edge, and apply the techniques to home décor items such as pillow edges or curtain trims. The more you practice, the more consistent your pleats will become across larger projects.
Tools & Materials
- Pleating foot compatible with your machine(Check shank type (low/high) and compatibility with your model)
- Scrap fabric for practice(Cotton or polyester cotton blends work well for 初學者)
- Chalk or fabric marker(Mark pleat positions clearly before sewing)
- Stabilizer or starch spray(Useful for slippery fabrics to hold folds)
- Sewing machine oil(Light oil for maintenance if recommended by the manufacturer)
- Sharp scissors or thread snips(For clean trimming after sewing)
- Extra bobbins and matching thread(Have a spare set for different weights)
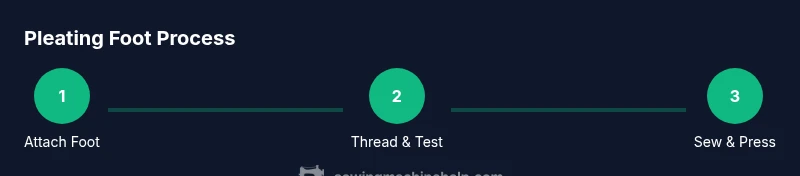
Steps
Estimated time: 30-45 minutes
- 1
Attach pleating foot and prepare machine
Power off the machine and remove the current foot. Attach the pleating foot securely, ensuring it locks into place. Lower the presser foot pressure if your machine allows it, so the fabric feeds evenly. This initial setup is critical to avoid misalignment from the start.
Tip: Always verify a snug fit and test on scrap fabric before sewing the first pleat. - 2
Thread and stitch selection
Thread the machine with a stable bobbin and top thread suitable for the fabric weight. Choose a straight stitch or a very narrow zigzag, depending on whether you want fixed pleats or slightly flexible folds. Set a short stitch length that helps the pleats hold without distorting.
Tip: Test different stitch types on scrap to see which gives cleaner folds. - 3
Mark pleat positions
Using chalk or a fabric marker, mark the pleat centers or fold lines at regular intervals along the seam line. Consistent marks are essential for even pleats across the edge of your project.
Tip: Mark on the wrong side to keep visible marks from showing on the right side. - 4
Sew a test strip of pleats
Place a scrap piece under the foot and sew a short length of pleated edge to observe the fold alignment. Adjust the pleat depth by moving the fabric guide or altering stitch proximity to the fold.
Tip: Make a few quick adjustments and retest until folds sit evenly. - 5
Sew actual pleats
With confidence, sew along the chosen edge, maintaining gentle, even pressure and letting the foot fold the fabric per your marks. Stop periodically to check the alignment and adjust if necessary.
Tip: If pleats drift, slow down and recheck the edge guide.” - 6
Finish and press
Trim any excess length and press the pleats with a warm iron or press cloth to set the crease. If needed, apply a light stabilizer to preserve the pleat after washing.
Tip: Let the fabric cool before handling to prevent distortion.
Your Questions Answered
What is a sewing machine pleating foot?
A pleating foot is a presser foot designed to fold fabric into evenly spaced pleats as you sew. It guides the fabric along a fold line, producing consistent folds with less manual effort.
A pleating foot folds fabric evenly as you sew, making consistent pleats without pinning.
What fabrics work best with a pleating foot?
Medium-weight fabrics like cotton blends, linen, and light wool are reliable. Lightweight fabrics may require stabilizers, while very heavy fabrics can be challenging and may need a stronger needle and slower speed.
Medium-weight fabrics are best to start; stabilizers help with lighter textiles.
Can I use a pleating foot on any sewing machine?
Pleating feet come in various shank types. Check your machine’s foot type and compatibility before purchasing. If in doubt, ask the retailer or check the manual.
Check your machine’s foot type to ensure compatibility before buying.
How do I choose pleat size and spacing?
Decide based on fabric width and the final look you want. Use the foot’s fold guide as a starting point and adjust through practice on scrap material to achieve the desired depth and spacing.
Start with a small, even depth and adjust after testing on scrap.
Do I need to adjust tension when using a pleating foot?
Yes. Start with a balanced tension and test on scrap. If pleats ripple or look loose, tighten the upper tension slightly or adjust the stitch length.
Tension matters—test on scrap and adjust gradually.
Watch Video
The Essentials
- Attach the pleating foot securely and test on scrap
- Choose stitch type and tension appropriate for fabric weight
- Mark pleat positions for consistent results
- Practice on scraps before working on the final project
- Press pleats to set the folds and maintain shape