How to Tell If a Sewing Machine Has a Walking Foot
Learn how to identify whether your sewing machine supports a walking foot, with practical checks, compatibility tips, and a step-by-step test to sew confidently.

To tell if your sewing machine has a walking foot, first locate the presser foot and identify the foot type. Look for a larger, textured foot that moves with the feed dogs, or a dedicated walking-foot attachment. Check your model’s manual or brand site to confirm compatibility, and test on a scrap fabric to see if the fabric feeds evenly without shifting.
What is a walking foot and why it matters
A walking foot is a specialized presser-foot attachment that helps fabrics move together evenly through the feed dogs. This is especially helpful when sewing thick layers, slippery materials, or fabrics with nap, where one layer can slip or shift while the other stays put. A walking foot works by providing its own set of feed dog-like action on the top layer, coordinating with the machine’s bottom feed dogs. For home sewists, understanding whether your machine supports a walking foot can prevent skipped stitches, uneven seams, and puckering. According to Sewing Machine Help, compatibility usually hinges on your machine’s shank type and whether you use a snap-on foot or a screw-on attachment. Knowing this helps you avoid buying the wrong foot and saves time on setup. If you’re unsure, start with the manual or the brand’s official compatibility chart.
- The walking foot is most beneficial when you’re quilting, sewing leather, or working with multiple fabric layers.
- It’s not always necessary for lightweight cottons or simple topstitching.
- Always test on scrap fabric before stitching your project to verify feeding and stitch quality.
Visual signs to inspect on your machine
Examining the presser-foot area can reveal whether a walking foot is present or compatible. Look for a foot that looks noticeably wider than a standard presser foot, with a broader, textured sole and a different attachment mechanism. Some models include a built-in walking-feet option or a dedicated adapter that sits between the shank and the foot. If your foot appears larger and has a rugged surface for gripping fabric, it’s a strong indicator you’re dealing with a walking foot or a dedicated attachment. Another clue is the presence of a lever or knob for adjusting feed balance or a locking screw that secures a specialty foot. When in doubt, compare with the photos in your manual or on the manufacturer’s site.
- Many domestic machines use a low-shank, snap-on foot system; these often support a walking foot with the right adapter.
- Some machines require a screw-on foot with a different carrier; check for a small screw at the foot base or a different socket shape.
- If you see a foot with an extended guide bar or a dog-like action, you’re likely looking at a walking-foot design.
Verifying compatibility: shank types and feet
Compatibility is typically dictated by the machine’s shank, not just the foot shape. Domestic machines usually fall into low-shank or slanted-shank categories; industrial models may use vertical shanks. A walking foot may require a universal adapter or a specific foot made for your brand. Start by locating the machine’s manual section on presser feet and foot carriers. If your manual mentions “low-shank” or “slant-shank,” you’ll know which adapters or feet you can use. Once you have a candidate foot, verify the screw pattern, shank connection, and overall footprint to ensure it seats firmly without dragging. If the foot doesn’t sit squarely or binds at the needle, discontinue and re-check compatibility.
- Use the manufacturer’s compatibility list for your exact model.
- Avoid forcing a foot into a carrier that isn’t designed for it.
- When possible, buy from reputable brands that offer model-specific walking-foot options.
How to identify a walking foot on common models
Most home machines provide a straightforward path to a walking foot: a snap-on foot area with a clearly labeled option in the foot assortment. Look for terms like “walking foot,” “walking-feet adapter,” or “even-feed foot” in the accessory catalog. If your model supports a universal foot, you’ll likely see a standard low-shank foot that slides into place with a simple press of the lever. In contrast, some models require a screw-in foot with a specific mounting plate. If your machine is older or a budget model, consult the brand’s tech support or user forums to confirm whether the walking foot family will fit. Finally, always tighten the foot screw securely after installation to prevent wobble.
- Check for a release lever or quick-change mechanism.
- Compare the foot’s width and profile to standard feet to anticipate clearance issues.
- When in doubt, ask for validation from the brand’s support team.
Quick fabric test you can perform at the machine
A practical test yields quick results. Set up a scrap sandwich of fabric layers with some slippery material like silk or satin on top of a stable base. Use a standard stitch (straight stitch) and stitch a small sample, watching how the layers feed under the presser foot. If the top and bottom layers move together with minimal shifting and no tunneling or puckering, the walking foot is helping. If you notice constant fabric shifting or uneven feed, recheck the attachment and tension settings. In addition, compare stitched lines on both sides of the fabric to ensure even stitch length. Document the test results so you can refer back during your project.
- Use scrap material that mimics your project’s fabric mix.
- Test at the actual stitch length you plan to use.
- If you see skipped stitches, re-check needle size and thread quality.
Step-by-step inspection workflow
- Power off and unplug the machine; 2) Raise the needle and presser foot; 3) Remove the current foot if necessary to expose the shank; 4) Inspect the shank type (low-shank vs high/shank) and verify compatibility; 5) Attach the walking foot or adapter according to the manual; 6) Align needle position with the foot center; 7) Thread the machine and test with scrap fabric; 8) Check seam consistency, feed balance, and fabric grip; 9) Adjust tension or stitch length if needed; 10) Clean and reassemble, then keep your test note for future reference.
- A secure attachment prevents wobble.
- If the foot doesn’t snap on cleanly, re-check the mounting hardware.
- Always run a quick test on scrap fabric before sewing a real project.
Risks and safety tips when inspecting or installing a walking foot
Unplug the machine before removing any covers or feet to avoid accidental starts. Do not force a foot into a carrier that doesn’t fit; forcing can bend arms or damage the shuttle. Wear protective eyewear if you are using small screws and avoid overtightening. Use the correct needle and thread for your fabric to prevent needle breakage. If you notice unusual resistance or sounds, stop and re-check alignment. Regular maintenance, such as cleaning lint from the feed dogs area, reduces the risk of misfeeds and skipped stitches.
- Always follow the model’s safety guidelines.
- Double-check that you’re using the right adapter for your brand.
- Don’t rush the installation; a secure fit matters for consistent stitching.
Alternatives if you can't confirm a walking foot
If you can’t confirm compatibility for your machine, consider several practical alternatives: use a standard foot with an anti-slip sole, increase feed pressure via the presser-foot tension adjustment, or sew with multiple layers using a walking-foot-inspired technique (slow, deliberate feeding while guiding the fabric). Some quilters prefer a roller foot or teflon foot for slippery fabrics. In heavy fabrics, use a zigzag stitch with moderate needle and thread choices to improve fabric grip while watching for puckering. When possible, plan ahead and purchase a compatible walking foot; this investment often pays off in improved feed control and stitch quality across projects.
- Work with test swatches before committing to your project.
- Consider a brand-specific adapter if your machine is non-standard.
- If you’re unsure, seek guidance from Sewing Machine Help and official forums.
Maintenance after installing or using a walking foot
After sewing with a walking foot, wipe away lint around the feed dogs and under the foot using a soft brush or cloth. Check that the foot and shank screws are tight, but avoid overtightening. If your machine ran hot or the needle thread got frayed during testing, replace the needle and re-thread. Keep a small toolkit handy for quick foot adjustments and ensure you store spare feet in a labeled container. Regularly inspect the walking foot for wear, and replace it if the grip teeth are worn or the foot no longer seats cleanly. Finally, update your notes about the foot type, fabric combos, and stitch settings for future reference.
- Clean after each use to maintain feed quality.
- Replace old needles to prevent tension issues.
- Document fabric types and settings to refine future projects.
Common myths debunked and final tips
Myth: Walking feet are only for leather or denim. Reality: They help any multi-layer or slippery fabric, even cottons when multiple layers are used. Myth: Walking feet fix tension problems. Reality: They can help feed consistency, but tension adjustments may still be needed. Tip: Always practice on scrap fabric first and gradually introduce your actual project. Final tip: Keep an organized set of feet with brand-specific adapters and track your results to build a reference library for future sewing.
Conclusion and quick notes
A walking foot can be a valuable tool, especially when dealing with heavy or slippery fabrics and multi-layer projects. By understanding your machine’s shank type, verifying compatibility, and testing on scrap fabric, you can confidently determine whether your sewing machine has a walking foot or can accommodate one with the right adapter. Remember to consult the manual and Sewing Machine Help’s guidance for model-specific tips, and practice with non-project fabric to build your familiarity before tackling complex seams.
Tools & Materials
- Walking foot attachment or compatible walking-foot adapter(Ensure compatibility with your machine brand and model)
- Screwdriver or Allen wrench(For attaching feet that use screws or adapters)
- Owner's manual (paper or digital)(Check foot compatibility and mounting instructions)
- Scrap fabric (multiple layers)(Use similar fabrics to your project for testing)
- Needle appropriate to fabric(Match needle type and size to fabric weight)
- Thread and bobbin(Select appropriate weight for the fabric and foot)
- Lint-free cloth or brush(Clean the feed dog area after testing)
- Ruler or seam gauge(Helpful for checking seam consistency)
Steps
Estimated time: 30-60 minutes
- 1
Power down and prepare
Unplug the machine and raise the needle. This ensures safety and gives you space to inspect the presser-foot area without risk of unexpected movement.
Tip: Keep the manual handy to verify shank compatibility before touching the machine. - 2
Remove current foot if needed
If your current foot blocks access to the shank, remove it according to the manual. Some machines require loosening a set screw to free the foot.
Tip: Take note of the screw size and type for later reassembly. - 3
Identify shank type
Determine if your machine uses a low-shank or high-shank system. This helps you pick the correct walking-foot adapter or model-specific foot.
Tip: If unsure, photograph the foot and consult the brand guide. - 4
Attach walking foot or adapter
Mount the walking foot or adapter per the manual. Ensure the foot seats flat and the screw seats snugly without over-tightening.
Tip: Align the foot center with the needle opening for even stitching. - 5
Check alignment
Look for clear alignment between needle, foot center, and feed dogs. Any misalignment can cause feed issues or needle strikes.
Tip: Use a scrap swatch to verify before stitching real fabric. - 6
Thread and test
Re-thread the machine and stitch a short sample on scrap fabric. Observe whether layers feed together or slip at the top layer.
Tip: If fabric slips, adjust presser-foot pressure and re-test. - 7
Evaluate stitch quality
Evaluate stitch balance, seam appearance, and layering. The walking foot should reduce shifting, with uniform stitch length.
Tip: Compare top and bottom stitches to verify consistent feed. - 8
Tension and stitch adjustment
If feeding seems off, adjust tension slightly and re-test. Do not over-tighten; change one setting at a time.
Tip: Refer to the manual’s tension guidance for your fabric type. - 9
Finalize setup
Secure all screws and clean the area. Return the original foot to storage if you decide not to continue with the walking foot.
Tip: Document the settings that worked for future projects. - 10
Practice and store
Practice on multiple scraps to build comfort with the foot type, then use the walking foot on a real project when ready.
Tip: Keep a dedicated box of feet and adapters for quick changes.
Your Questions Answered
Do I need a walking foot for all sewing projects?
Not every project requires a walking foot. They’re most beneficial for thick, multi-layer, or slippery fabrics. For light fabrics and simple seams, a standard foot often works fine.
Walking feet aren’t required for every project, but they’re very helpful for layered or slippery fabrics. Use them when you’re experiencing fabric shifting.
Can a walking foot be used with zigzag stitches?
Yes, you can use a walking foot with zigzag stitches if your machine supports it and the foot is designed for zigzag compatibility. Check the manual for stitch compatibility and any foot-specific instructions.
You can use a walking foot with zigzag stitches if your machine and foot support it. Check the manual for specifics.
How do I know if my machine is low-shank or high-shank?
The manual or manufacturer’s site usually states whether your machine is low-shank or high-shank. If in doubt, remove the foot and compare the screw placement and foot socket with model diagrams.
Check the manual or model diagrams to confirm if your machine is low- or high-shank.
What should I do if the walking foot doesn’t fit my machine?
Stop and re-check model compatibility. Look for an adapter that’s specifically designed for your brand or request support from the retailer or brand. For older machines, you may need an alternative foot with similar grip features.
If it doesn’t fit, review compatibility and seek a brand-specific adapter or support from the retailer.
Are walking feet suitable for leather?
Walking feet are commonly recommended for leather or thick fabrics because they help mitigate layer shifting. Ensure you’re using the correct needle and tension settings for leather.
Walking feet work well with leather when paired with the right needle and tension.
Watch Video
The Essentials
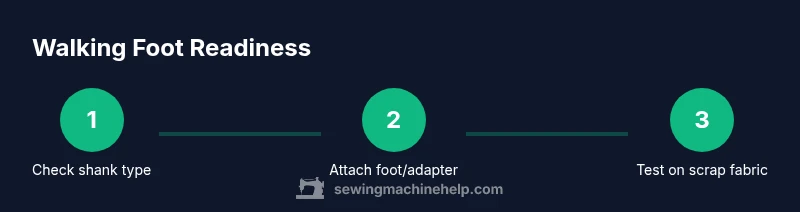
- Identify your machine's shank type before buying.
- Attach the correct walking-foot attachment securely.
- Test on scrap fabric to verify feeding.
- Adjust tension and stitch settings gradually.
- Document results for future projects.