Replacement Pedal for Sewing Machine: A Practical Guide
Learn how to select and install a replacement pedal for your sewing machine with a practical, safety-focused, step-by-step approach from Sewing Machine Help. Covers compatibility, tools, testing, and maintenance.

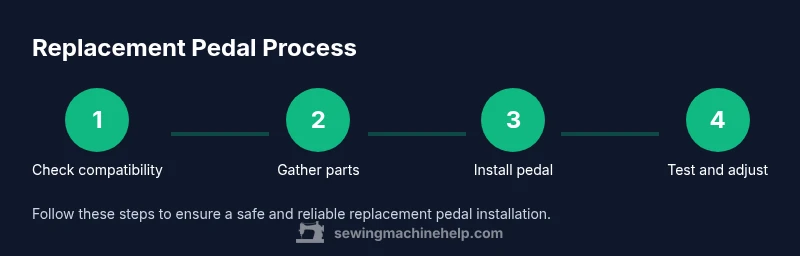
Goal: safely replace a worn or malfunctioning foot pedal on a sewing machine. You’ll confirm compatibility, gather the right tools, disconnect power, install the replacement pedal, and test the machine to ensure smooth operation. Expect about 30 minutes of hands-on work with common tools. This quick answer points you to a complete step-by-step guide from Sewing Machine Help.
Why replacement pedal for sewing machine matters
A properly functioning foot pedal gives you precise speed control and steadier stitches. When the pedal sticks, hums, or stops responding, you may press harder or adjust speed in ways you didn’t intend, increasing the risk of skipped stitches or fabric damage. For home sewists and beginners, a worn or faulty pedal is a common maintenance issue that can often be solved by replacement rather than buying a new machine. According to Sewing Machine Help, understanding the pedal’s role helps you diagnose related issues quickly and avoid unnecessary repairs.
The replacement pedal for sewing machine should match your machine’s electrical interface, plug type, and cord length to ensure safe operation. Start by locating the model number on the machine or in the user manual, then confirm compatibility with the pedal you plan to buy. Some machines use a standard 1/4-inch jack, while others rely on a proprietary connector or an inline harness. If your machine includes electronic speed control or a reverse-stitch feature tied to the pedal, verify that the replacement pedal supports the same functions. Mismatched pedals can cause unpredictable speed, poor throttle response, or electrical noise. Once you’ve confirmed fit and function, you’re ready to move to the installation steps to restore smooth, reliable control.
Compatibility and choosing the right replacement pedal
Not all replacement pedals are interchangeable. Start by checking the machine’s make and model, voltage, connector type, and whether the pedal includes a built-in speed controller. Based on Sewing Machine Help analysis, most compatibility issues arise from connector mismatches or voltage differences rather than aesthetics. Use the model number to search for pedals labeled for your brand or for a universal model that explicitly lists your machine family. If you own a vintage or low-voltage unit, you may need an adapter or a pedal with a similar resistance profile. Compare cord length and mounting style; some pedals plug into a dedicated pedal socket, while others attach to the power supply or a shared machine power cord. When in doubt, consult the manual or contact the manufacturer’s support line to confirm compatibility before purchasing. The goal is to obtain a replacement pedal that preserves safe voltage, proper connector, and consistent throttle response for reliable sewing.
Tools, parts, and preparation
Before you begin, assemble a small toolkit and the replacement pedal. The essential items include the replacement pedal for sewing machine, a small screwdriver set, and needle-nose pliers. Optional but helpful items include a multimeter to check continuity, electrical tape to tidy wires, and photos of the existing wiring for reference. Keep a clean workspace and good lighting, and lay out the old pedal next to the new one to compare connectors and cable routing. If your machine uses a detachable pedal cable, you may need to cut or unlatch the connector; consult the manual to avoid damaging housings or pins. Finally, unplug the machine from power and remove any accessories from your workspace to prevent knockovers during the replacement.
Safety considerations and common mistakes
Safety first: always unplug the machine and remove the plug from the power strip before touching any electrical components. Do not pull on wires or use excessive force to disconnect connectors; use the proper release clips or pins. Verify that your hands are dry and that your workspace is free of liquids. When replacing, avoid tangling cables or creating sharp bends that could damage the cord. If you encounter a nonstandard connector or damaged insulation, stop and seek guidance from a qualified technician. A common mistake is assuming the new pedal is compatible without confirming the connector type and voltage rating; double-check these details to prevent electrical faults or motor damage.
Installation overview and testing
After confirming compatibility and gathering tools, follow a straightforward sequence: (1) disconnect the old pedal’s cable, (2) connect the new pedal’s cable to the same socket, and (3) mount the pedal, verifying that the cord routes safely to avoid stepping on it. Then plug in the machine and test at a low speed with scrap fabric. If the pedal responds sluggishly or erratically, recheck the connector seating and cable routing. If available, adjust any potentiometer or settings according to the pedal and machine documentation to ensure a smooth throttle response. With the right pedal and careful setup, you should regain precise sewing control and consistent stitch timing.
Tools & Materials
- replacement pedal for sewing machine(Must match machine model/connector type and voltage rating)
- screwdriver set (Phillips and flathead)(Small screws on pedal housing; choose compact drivers)
- needle-nose pliers(For releasing connectors and guiding wires)
- multimeter (optional)(Check continuity and voltage if wiring is uncertain)
- electrical tape(Insulate exposed conductors if needed)
- safety gloves (optional)(Protect hands when manipulating wiring)
- owner’s manual or wiring diagram (optional)(Helpful for identifying pins and color codes)
Steps
Estimated time: 30-60 minutes
- 1
Identify compatibility
Start by locating your sewing machine’s model number and checking the pedal connector type. Compare this information with the replacement pedal’s specs to confirm a proper fit, voltage rating, and cord length. If the connector type differs, you may need an adapter or a pedal designed for your machine family.
Tip: Take a photo of the connectors before removing the pedal to reference during reassembly. - 2
Gather tools and parts
Assemble the essential tools and the replacement pedal, making sure the pedal matches your machine’s model family. Lay out items neatly and double-check the cord routing to plan the installation path. Optional items like a multimeter can help you verify electrical continuity if you’re unsure about wiring.
Tip: Arrange parts in order of use to speed up the process. - 3
Power down and unplug
Unplug the machine from the wall outlet and remove any accessories from the workspace. This eliminates the risk of electric shock and accidental startup while you work. Wait a minute after unplugging to ensure capacitors discharge if present.
Tip: Keep the plug nearby in a safe place to avoid fishing for it while working. - 4
Access the pedal housing
Open the area where the pedal connects, often under the machine or behind a small access panel. Remove any screws securing the pedal cover, and gently lift to expose the pedal cable and connector. Use a flashlight if needed to see pins clearly.
Tip: Note the cable path to avoid pinching wires during reassembly. - 5
Disconnect the old pedal
Carefully disconnect the pedal’s cable from the machine harness, noting pin orientation or color-coding. If pins are stubborn, use needle-nose pliers to release locking tabs without pulling on wires. Avoid pulling on the cable itself; grip the connector firmly instead.
Tip: Label the old pedal connector and its corresponding jack to help mapping for the new pedal. - 6
Connect the new pedal
Attach the new pedal’s cable to the machine using the same connector, ensuring a snug, straight seating of pins. Reposition the pedal housing as needed and secure screws. Confirm that the cord exits in a safe, non-tensioned path.
Tip: Before fastening screws, test-fit the connectors by hand to verify correct alignment. - 7
Test, adjust, and finalize
Plug the machine back in and perform a controlled test at a low speed with scrap fabric. Observe throttle response and ensure there are no unusual sounds or vibrations. If necessary, consult the pedal’s manual for any adjustment options like sensitivity or speed ramp.
Tip: Document any changes you make so you can revert if needed.
Your Questions Answered
How do I know if my pedal is compatible with my sewing machine?
Check the model number and brand; verify the connector type and voltage rating in the manual or on the machine label. If a pedal is labeled for your brand family or for universal use, it’s likely compatible. When in doubt, contact the manufacturer or a repair professional.
Check the model number and connector type in your manual. If unsure, contact support.
Can I use a generic replacement pedal from a different brand?
Generic pedals may fit physically but might not provide proper speed control, safety features, or voltage compatibility. Always verify compatibility, device rating, and wiring before connecting.
Generic pedals can work sometimes, but you should verify compatibility before buying.
What issues might occur after replacing the pedal?
You might see no response, erratic speed, buzzing, or a fuse trip if wiring or connector mapping is incorrect. Recheck connections and ensure the correct pedal for your model.
If the pedal acts up, double-check the wiring and connector match.
Is it necessary to service the motor after pedal replacement?
Typically no, unless you notice motor or controller symptoms. Pedal replacement itself does not require motor service, but inspect wiring if unusual behavior occurs.
Usually not, but check wiring if you see abnormal behavior.
What safety steps should I follow when replacing the pedal?
Unplug the machine, keep liquids away, wear protective gear, and avoid forcing connectors. Work in a dry area and ensure the workspace is organized to prevent accidents.
Unplug, dry hands, and use proper tools. Don’t force connectors.
Where can I buy a replacement pedal for sewing machine?
Check official brand parts stores and authorized dealers, and compare compatibility before purchase. Look for listings that specify your machine family to avoid mismatches.
Shop official parts stores and verify compatibility before buying.
Watch Video
The Essentials
- Confirm pedal compatibility before purchasing.
- Unplug the machine before starting any work.
- Test at low speed to verify throttle response.
- Ensure connector type and voltage match the machine.