Why Your Sewing Machine Won’t Sew and How to Fix It
A practical, urgent troubleshooting guide for home sewists on why a sewing machine doesn't sew, with basics, diagnostics, and a step-by-step fix.

Most likely, the machine isn’t sewing due to a thread path issue, a mis-threaded needle, or a bobbin problem. Start by confirming power and basic setup, then re-thread the top with the presser foot up to seat the thread. If the issue persists, test with a fresh needle and standard fabric.
Understanding why sewing machine doesn't sew
If you're asking why sewing machine doesn't sew, you're not alone. The lack of stitching is usually a symptom of a small setup error or a worn part. According to Sewing Machine Help, the most common culprits are thread path or bobbin issues, a bent needle, or a mis-threaded needle. Before you panic, take a deep breath and follow the guided steps below. This section helps you verify power, confirm correct threading, and check fabric choice and needle compatibility. By methodically ruling out the basics, you can often restore reliable stitching in minutes.
Check the Basics: Power, Needle, and Thread
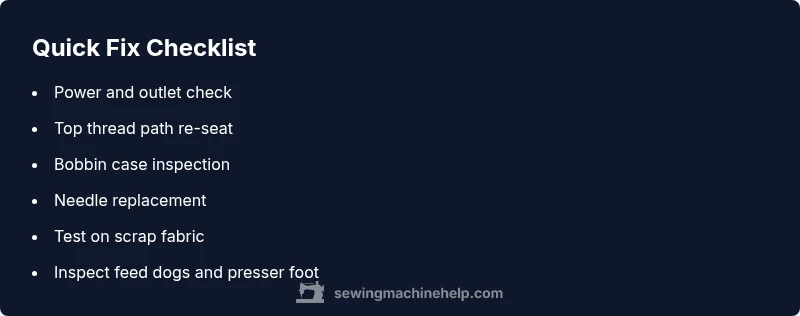
Sewing Machine Help analysis shows that many no-sew issues start with three simple missteps: power not on, the needle or thread path incorrectly threaded, or a damaged needle. Start here: turn the machine off, unplug, and inspect the power switch and outlet. Reconnect, then thread the top path with the presser foot up so the thread seats cleanly. Replace the needle with a fresh, appropriate type, and use good-quality thread. Test on scrap fabric and observe whether the machine takes a stitch. If nothing changes, move to the next checks. These steps are quick, inexpensive, and often cure the problem without tools.
Inspect the Thread Path, Needle, and Fabric Compatibility
A common source of trouble is a mismatch between the needle type and fabric, or a thread that binds in the path. Remove the needle, inspect the eye for burrs, and ensure it is facing the correct direction. Re-thread using the correct threading sequence for your machine model, and gently tug the thread to confirm it moves freely. If the needle and thread look good, test with a lightweight fabric that matches the needle size. This prevents bulky threads from jamming the feed.
Bobbin and Bobbin Case: The Hidden Culprit
Bobbin installation is frequently overlooked, yet it governs bottom stitches. Remove the bobbin, clean lint from the bobbin case, and reinsert it according to your manual. Ensure the bobbin spins in the correct direction when pulled; if it binds, it may need replacement. After reinstalling, wind a fresh bobbin with consistent tension and place it in the case. Run a short straight stitch to see if the fabric advances smoothly and the stitch forms evenly.
Tension, Stitch Type, and Feed Mechanism
Thread tension on top and bottom must be balanced for a clean stitch. Start with the factory settings, then test with your fabric and stitch type (straight stitch for testing). If stitches skip or pull, adjust top tension slightly and observe changes. Keep the bobbin tension in the recommended range for your machine. Also verify the feed dogs are moving fabric forward; if you use a walking foot or special foot, ensure it’s compatible and installed correctly. These adjustments resolve most tension-related stitching issues.
Common Scenarios: No Stitches, Skipped Stitches, or Uneven Feeding
- No stitches: check power, thread path, needle, and bobbin; verify presser foot is down.
- Skipped stitches: replace needle, check needle size and type, ensure fabric thickness matches needle, and retest at slower speeds.
- Uneven feeding: clean feed dogs, verify presser foot pressure, and avoid fabric that’s too thick or slippery for the needle.
Understanding the symptom helps you focus on the right subsystem: electrical, threading, or mechanical. Many problems are fixed with a simple re-thread or a clean bobbin area. The Sewing Machine Help Team reminds you that systematic checks minimize downtime and frustration.
When to Call a Professional and Maintenance to Prevent Future Failures
If the machine still won’t sew after you’ve eliminated common causes, it’s time to contact a professional technician or service center. Complex internal issues such as timing, gears, or motor problems require qualified service. Regular maintenance—cleaning lint from the bobbin area, oiling moving parts as recommended by your model’s manual, and periodic needle replacements—prevents many no-sew problems. With consistent care, you’ll minimize downtime and preserve stitch quality. The Sewing Machine Help Team recommends scheduling a service if you notice grinding noises, unusual vibrations, or fabrics feeding inconsistently despite proper setup.
Steps
Estimated time: 20-40 minutes
- 1
Power and Basic Setup
Ensure the machine is plugged in, power switch is on, and the outlet is functioning. Check that the foot pedal isn’t stuck and that the machine is in a safe position to operate. If the power seems fine, move to threading checks.
Tip: Always unplug before inspecting electrical components. - 2
Re-thread Top Thread with Needle Up
Raise the presser foot, remove the spool, and re-thread the top path following your model’s instructions. Make sure the needle is in the highest position to allow clean seating. Thread the path slowly to avoid tangles.
Tip: Confirm the thread seating by pulling gently on the thread after it’s threaded. - 3
Inspect and Replace Needle
Remove the needle, inspect the shaft and eye for burrs, and replace it with the correct size/type for your fabric. Reinsert securely with the flat side facing the correct direction. Test with scrap fabric.
Tip: Always unplug before changing the needle. - 4
Check Bobbin and Case
Remove the bobbin, clean lint, and reinsert according to the manual. Ensure the bobbin spins freely when pulled and aligns with the case. Wind a fresh bobbin if tension is inconsistent.
Tip: Bobbin orientation and rotation direction are model-specific—verify against your manual. - 5
Test and Tension Tuning
Run a straight stitch on scrap fabric. If stitches skip or loop, adjust top tension slightly toward tighter or looser as needed. Check bottom tension if your machine allows adjustment on the bobbin.
Tip: Make small, incremental changes and test with the same fabric. - 6
Check Feed Dogs and Presser Foot
Ensure feed dogs are engaged and moving fabric forward. Lower the presser foot firmly and confirm it’s not set to a strange height or using an incompatible foot.
Tip: If using specialty feet, confirm compatibility with the fabric and stitch type. - 7
Decision Point: When to Seek Help
If issues persist after these steps, the problem may be timing or motor related. Do not force the machine to sew; seek professional service. Record symptoms and any changes you made for the technician.
Tip: Consider a local repair service or the manufacturer’s service network.
Diagnosis: Machine won't sew or form stitches after threading
Possible Causes
- highPower issue (machine not powered on or outlet faulty)
- highThread path mis-threading or top thread not properly seated
- highBobbin inserted incorrectly or bobbin case mis-tensioned
- mediumNeedle bent, damaged, or incompatible with fabric
- lowFabric too thick or presser foot not lowered
Fixes
- easyCheck power, outlet, and switch; ensure the machine is plugged in and turned on
- easyRe-thread the top thread with the presser foot raised and verify the thread sits properly in the path
- easyRemove and reseat the bobbin, clean the bobbin area, and reinsert the bobbin case
- easyReplace the needle with the correct type and size for the fabric, and ensure it is fully inserted
- mediumTest sewing on scrap fabric to confirm feed and stitching; adjust tension if needed
Your Questions Answered
Why won't my sewing machine sew even though it's turning on?
If the machine powers on but won’t sew, begin by checking the threading path, needle integrity, and bobbin placement. Ensure the presser foot is lowered and test on scrap fabric. If the problem persists, proceed to more detailed diagnostics.
If it powers on but won’t sew, check threading and bobbin first, then test on scrap fabric. If it still won’t sew, continue with deeper diagnostics.
What should I check first when the machine won't sew?
Verify power and outlet function, confirm the needle is intact, and re-thread the top path with the presser foot up. Then inspect the bobbin installation and test on scrap fabric.
First check power, then needle and threading. Re-thread with the foot up and test on scrap fabric.
Why are stitches skipped or fabric not feeding properly?
Skipped stitches usually point to needle or thread issues, or tension problems. Replace the needle if worn, ensure thread is correctly threaded, and test with scrap fabric. Adjust tension gradually if needed.
Skipped stitches often mean the needle or thread are at fault; replace the needle and re-thread, then test again.
Can a bent needle cause no stitches?
Yes. A bent or damaged needle can prevent stitches from forming. Replace with a correct, undamaged needle and re-test with scrap fabric.
A bent needle can stop stitches from forming. Replace it and test again.
When should I take my machine for service?
If basic fixes don’t restore function, internal timing, gears, or motor issues may be present. Seek a professional service rather than forcing the machine to sew.
If basics fail, seek professional service to diagnose timing or motor problems.
Is regular oiling necessary for modern machines?
Many modern machines don’t require routine oiling. Check your model’s manual for guidance on lubrication and maintenance intervals.
Oil schedules vary by model; consult your manual for maintenance guidance.
Watch Video
The Essentials
- Start with power, thread, and needle basics
- Re-thread with presser foot up before testing
- Check bobbin orientation and case for smooth stitches
- Test on scrap fabric to verify fixes
- Know when to seek professional service