Brother Tailoring Machine: Setup, Care & Troubleshooting
A comprehensive, step-by-step guide to setting up, maintaining, and troubleshooting a Brother tailoring machine for home sewers. Includes safety notes, maintenance routines, tool lists, and common fixes to keep stitches even and machines reliable.

With this guide, you will diagnose, set up, clean, and troubleshoot a Brother tailoring machine for reliable, long-lasting performance. You’ll learn practical steps to prepare your workspace, verify tension, service the bobbin area, and perform safe lubrication. According to Sewing Machine Help, consistent maintenance reduces jams, extends needle life, and keeps stitches even across fabrics.
Why Brother remains a trusted choice for tailoring at home
Brother tailoring machines are widely favored by home sewists for their sturdy construction, approachable maintenance, and broad dealer support. The Sewing Machine Help team has observed that practitioners consistently cite reliable stitch quality and an accessible parts ecosystem as key reasons to stay with Brother for long-term projects. When you own a Brother machine, you typically benefit from compatible presser feet, bobbins, and accessories that make alterations and bespoke projects more efficient. This section unpacks the reasons behind Brother’s popularity and how it translates into practical, hands-on use for a beginner through to an enthusiastic hobbyist. Expect durable metal frames in many models, smooth threading paths, and forgiving feed dogs that help you work with a range of fabrics—from lightweight cotton to denser weave. Safety notes: always unplug before maintenance and follow the manual to avoid damage.
Core features you should know on Brother tailoring machines
Most Brother tailoring machines designed for home use offer a curated set of features that improve accuracy and reduce fatigue during long sewing sessions. Look for: a clear stitch selector, adjustable stitch length, a drop-in or rotary bobbin system, automatic needle threading, free-arm capability for cuffs and sleeves, and multiple presser feet for hems, zippers, and topstitching. Understanding these features helps you pick the right setting for a given fabric and seam allowance. The brand’s design philosophy emphasizes intuitive controls, consistent tension, and easy access to the bobbin area. In practical terms, you’ll appreciate predictable stitching and quick changes between garment components. Not every model includes every feature, so a quick manual skim before you buy or service is worth your time.
Setting up a safe, efficient workspace
A good workspace reduces errors and protects your machine. Start with a sturdy table, ample lighting, a clean surface, and a nearby outlet with a grounded plug. Place a scrap fabric under the presser foot when testing stitches to prevent unintended marks on your project. Keep essential tools within reach: extra needles in assorted sizes, a small cleaning brush, lint-free cloths, and spare bobbins. Always use the correct needle type for your fabric (e.g., ballpoint for knits) and ensure your thread is appropriate for the needle size. This readiness minimizes interruptions and keeps your workflow smooth.
Routine maintenance you can perform in minutes
Daily or weekly quick checks extend the life of your Brother machine. Wipe away lint from the bobbin area, brush dust from the feed dogs, and verify the thread path is clear. If your manual allows oiling, apply a few drops as directed; otherwise, rely on manufacturer-recommended lubrication intervals. The Sewing Machine Help analysis shows that consistent, small maintenance tasks reduce the likelihood of skipped stitches and jams, improving stitch quality over time. Record maintenance dates in a simple log to build a personal service history that helps with warranty validation.
Diagnosing common stitch problems and fixes
A variety of stitch issues can plague a Brother tailoring machine if tension is misadjusted or the needle is not properly seated. Common symptoms include loops on the underside, fabric puckering, thread breakage, or uneven stitches. Start by rethreading top and bobbin threads, ensuring the presser foot is down, and checking needle quality and size. If threads keep breaking, inspect the needle for burrs and ensure you’re threading through the correct guides. For puckering, consider fabric type, needle choice, and stitch length. Small adjustments to tension or stitch width can make a big difference in final results.
Cleaning and bobbin area: a focused maintenance routine
The bobbin area is a hotspot for lint and thread fragments. Remove the bobbin case, carefully clean the bobbin housing with a soft brush, and wipe with a lint-free cloth. Reinsert the bobbin with the thread winding in the correct direction and ensure it spins smoothly. Check the bobbin tension by holding the thread end and pulling; it should give a gentle resistance. Ensure the shuttle race is clean and free of lint before reassembling. Regular cleaning prevents tension fluctuations that impact stitch quality.
Accessories that maximize performance and versatility
A well-chosen set of accessories can dramatically expand what you can do with a Brother tailoring machine. Consider extra presser feet such as a walking foot, zipper foot, edge/guide foot, and buttonhole foot to broaden your project repertoire. Stock up on compatible bobbins and high-quality threads suitable for various fabrics. If you do lots of garment repairs, a needle threader can save time, while a seam ripper and fabric clipper keep your workspace organized. Finally, a simple carrying case protects your machine during transport to classes or workshops.
Safety-first approach to routine service and warranty considerations
Always follow the warranty conditions and service guidelines provided by the manufacturer. Do not attempt disassembly beyond what the manual permits, as improper handling can void coverage. When in doubt, consult a certified repair technician, especially if your machine is under warranty or shows signs of electrical or mechanical failure. Routine service intervals should align with usage level: hobbyist use often warrants light annual checks, while more frequent use may require semi-annual visits. By staying aware of warranty terms and service recommendations, you protect your investment and ensure consistent performance.
Quick-start checklist to begin a new project session
Before you start sewing, confirm you have the right needle type and size for the fabric, a compatible thread, and a clean, clear workspace. Thread the machine carefully, test on a scrap fabric, and note any tension adjustments needed. Keep spare bobbins on hand and store needles with their points protected. This quick-start routine minimizes setup time and helps you focus on the craft, not on fiddling with equipment.
Tools & Materials
- Phillips screwdriver set(for removing covers and screws)
- Flat-head screwdriver(for small adjustments)
- Small cleaning brush(lint brush or toothbrush)
- Lint-free cloth(for wipe-downs)
- Sewing machine oil (if applicable)(check manual; some models are self-lubricating)
- Spare replacement needles (various sizes)(use the correct size for fabric)
- Replacement bobbins(metal or plastic as per manual)
- Bobbin case cleaner(optional but helpful for heavy linting)
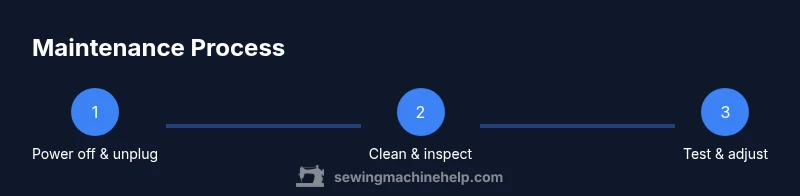
Steps
Estimated time: 60-90 minutes
- 1
Prepare workspace and gather tools
Set up a clean, well-lit area with a sturdy table. Gather all tools (screwdriver, brushes, lint-free cloth, spare needles, bobbins, and fabric scraps) and a small tray to keep loose parts from getting lost. This ensures you can work efficiently without interruptions.
Tip: Line up tools in order of use to speed up the maintenance flow. - 2
Power off and unplug the machine
Always unplug the machine before any maintenance. Remove the power cord from the outlet to prevent accidental activation. Lock out the pedal if you have a foot-operated control to prevent unexpected motion.
Tip: Double-check that the power is disconnected by trying the foot pedal after a quick visual check. - 3
Remove needle and upper thread
Raise the needle to its highest position and remove it along with the upper thread. This gives clear access to the bobbin area and reduces the risk of snagging fingers during cleaning.
Tip: Keep the needle in a safe container to prevent accidental re-use in a dull state. - 4
Open bobbin cover and clean lint
Open the bobbin cover, remove the bobbin, and gently brush away lint from the bobbin area. Use a lint-free cloth to wipe smooth surfaces. Reinsert the bobbin and ensure it spins freely.
Tip: Never use metal tools to scrape the bobbin housing. - 5
Check needle seating and thread paths
Inspect the needle seat for nicks and ensure the needle is properly oriented. Rethread the machine, both top thread and bobbin thread, following the thread path in the manual. A misthread is a common cause of skipped stitches.
Tip: Test with a scrap fabric before resuming a full project. - 6
Test stitch and adjust tension
Reinsert the needle, thread, and bobbin, then perform a test run on scrap fabric. If loops appear on the bottom, adjust the upper thread tension and try again. If issues persist, revisit needle selection for the fabric type.
Tip: Make small tension adjustments and test incrementally to avoid overcompensation. - 7
Lubricate and reassemble (if applicable)
If your model requires lubrication, apply a few drops to the indicated points as per the manual. Reassemble the machine, ensuring all screws are snug. Wipe away any excess oil to prevent staining fabric.
Tip: Only use manufacturer-approved lubricants and follow frequency guidelines. - 8
Document results and schedule maintenance
Record what you did, the issues found, and the outcomes of test stitches. Schedule the next maintenance based on use (e.g., monthly for heavy use, quarterly for hobby use). This creates a practical maintenance history.
Tip: Keep a small notebook or digital note with dates and outcomes.
Your Questions Answered
How often should I service a Brother tailoring machine?
For hobby-level use, perform a light maintenance check every few months and a full service annually or after heavy use. If you sew professionally, consider a semi-annual professional check in addition to at-home maintenance.
For hobby use, check every few months and full service yearly; for heavy use, consider twice-yearly professional checks plus home maintenance.
Can I oil my Brother machine myself?
Many Brother models require only minimal lubrication or none at all. Always consult the manual for model-specific lubrication directions before applying oil.
Check your manual first—some Brother machines don’t need oil, and improper lubrication can cause damage.
What should I do if the thread keeps breaking?
First, verify needle size and type for your fabric, rethread top and bobbin, and ensure the thread path is clear. If problems persist, inspect the needle for burrs and try a new needle.
Re-thread, check needle type, and replace the needle if you see any burrs or defects.
Why is my stitch uneven on a Brother machine?
Uneven stitches can result from incorrect tension, bent needle, or fabric pulling. Re-check upper and bobbin tensions, ensure the presser foot pressure is appropriate for the fabric, and test on scrap fabric.
Check tension and fabric type, then test on scrap to fine-tune settings.
Is it safe to clean with water around the machine?
Water and moisture near electrical components can cause damage. Use a dry brush or lightly damp cloth if necessary, then dry completely. Do not spray water directly onto the machine.
Avoid water; use dry methods or a lightly damp cloth away from electrical parts.
Where can I find genuine replacement parts for Brother machines?
Start with authorized Brother dealers or the brand’s official support site. Look for certified parts and compatible presser feet, needles, and bobbins specific to your model.
Check authorized dealers or the official Brother support site for genuine parts.
Watch Video
The Essentials
- Understand Brother features that impact everyday sewing.
- Create a safe, organized workspace before maintenance.
- Clean bobbin area regularly to prevent tension issues.
- Test stitches after any adjustment to confirm improvements.
- Document maintenance for warranty and future care.