How to Tell If a Sewing Machine Is Good
Discover how to tell if a sewing machine is good by evaluating mechanical condition, stitch quality, safety, and parts availability. A home sewers guide to informed buying and reliable performance.

By the end of this guide, you’ll be able to tell if a sewing machine is good by evaluating its mechanical condition, stitch quality, and maintenance needs. You’ll learn practical tests, what to inspect on the exterior and interior, and how to gauge parts availability. This approach helps home sewists and beginners choose a reliable machine.
Core indicators of a good sewing machine
If you’re asking how to tell if sewing machine is good, focus first on core indicators that reflect long-term reliability. A well-made machine should offer consistent stitch quality across fabrics, stable feed dogs, and a smooth, resistance-free handwheel. Look for solid construction—metal frames tend to be sturdier than all-plastic bodies—and a machine that feels balanced when you lift and move it. The machine should sit level, with doors and covers that close snugly. In addition, the presence of a clear, well-illustrated manual and a straightforward threading path are practical signs of care and future ease of maintenance. According to Sewing Machine Help, a good machine should deliver consistent stitches and respond predictably to adjustments in tension and stitch type. The goal is predictable performance you can rely on for everyday projects, from hems to quilting tests.
Mechanical condition checks
A reliable machine should rotate smoothly without unusual grinding, grinding, or grinding-like noises. Start by turning the handwheel to see if the needle moves freely and returns to its top position without resistance. Open the bobbin area and check for loose screws, worn tension parts, or excessive lint build-up. Inspect feed dogs: they should grip fabric firmly when you test a straight stitch, without slipping. If you notice wobble, binding, or rough spots during manual rotation, that’s a sign the mechanism may need service. Record any issues and compare them with the user manual’s service guidance. This block emphasizes practical, hands-on evaluation you can perform in minutes, even before powering the machine.
Electrical safety and maintenance
Electrical safety is non-negotiable. Inspect the power cord and foot pedal for cracks, exposed wires, or stiffness. The plug should fit snugly without overheating during a test run. If the machine has a removable power supply, check that it seats securely and returns to neutral when unplugged. When testing, always unplug first and never touch live components with wet hands. Regular maintenance includes cleaning lint from internal niches, oiling as recommended by the manufacturer, and replacing worn parts before they fail. Sewing Machine Help emphasizes that predictable performance comes from consistent upkeep and using the right lubricants for your model.
Stitch quality tests and compatibility
Testing stitches is your most direct measure of goodness. Run a straight stitch on cotton, then test a zigzag and a decorative stitch if available. Check for even thread delivery, minimal thread breakage, and balanced tension that doesn’t pull fabric to one side. If possible, simulate real projects: seam a curved edge, handle a corner, and sew through multiple fabric weights (quilting cotton, denim, or canvas). The machine should behave consistently—no looping, skipping, or bird-nesting under normal settings. If you see uneven feed or inconsistent stitch length, consult the tension discs and threading path. This practical testing helps confirm that the machine meets your typical project needs.
Threading, tension, and bobbin basics
A good sewing machine offers an intuitive threading path and easy access to the bobbin. Verify that the top thread seats correctly and passes cleanly through the tension discs. Check bobbin winding and insertion: it should unwind smoothly and feed without snagging. A common red flag is persistent looping underneath the fabric, which signals tension misalignment or incorrect threading. Practice threading on scraps and store a quick reference of the correct path near the machine. If tension remains stubborn, reset to factory settings and retry with the same weight thread and fabric to isolate variables.
Exterior and build quality assessment
Exterior inspection tells you whether the machine was built to last. Look for metal components in the frame, sturdy hinges, and metal presser feet. A heavier, well-balanced unit often indicates durable parts and better long-term performance. Check paint wear, fatigued switches, and loose knobs—these can hint at heavy use or poor maintenance. A well-kept exterior isn’t a guarantee of inner quality, but it correlates with longevity and ease of future servicing. Remember: a machine with a solid chassis typically tolerates routine maintenance and assembly adjustments more reliably over time.
Parts availability and serviceability
Even a good machine can fail or require upgrades. Before buying, verify that manufacturer and third-party parts are readily available. Confirm the presence of a current user manual, service documentation, and access to a certified technician or local repair shop. Check whether common components—needles, feet, belts, and tension discs—are easy to source. Sewing Machine Help notes that reliable machines tend to have a robust parts ecosystem, which reduces downtime and repair costs when issues arise. If you’re buying used, ask about the last service date and whether the seller includes any spare parts or a starter kit.
Buying used vs new: what counts
When deciding between used and new, weigh the machine’s age, maintenance history, and how easily you can obtain support. A used machine can be a great value if it’s in good mechanical shape and comes with owner-provided maintenance records. However, ensure you can verify its performance with live stitching and that there’s a clear path to affordable parts and service. New machines generally offer the latest safety features and longer warranties, but they may carry a higher upfront cost. Regardless of age, a good machine should feel reliable during test stitching, respond predictably to adjustments, and have parts that are readily available.
Quick-start checklist for buyers
Use this concise checklist to decide quickly if a machine is worth purchasing:
- Inspect the exterior for rust, cracks, and loose fits.
- Test the handwheel, bobbin area, and feed dogs for smooth operation.
- Run a straight stitch and a zigzag on multiple fabrics.
- Check the power cord, foot pedal, and electrical safety.
- Confirm parts availability and a current manual or service options.
- Compare offered maintenance records or service history if buying used.
- Ask for a post-purchase testing window or warranty terms.
noteIndexingChoices
Tools & Materials
- Screwdriver set (Phillips #2 and flathead)(For screws in bobbin area and needle plate)
- Small flashlight(Inspect under feet and inside covers)
- Owner's manual(Manual access essential for tension and maintenance guidance)
- Fabric scraps (cotton, knit, denim)(Test stitching on multiple fabric weights)
- Lint brush or compressed air(Remove lint from bobbin area and feed dogs)
- Replacement needles (sizes 14-18 for test)(Different fabrics require different needle types)
- Measuring tape(Check overall dimensions and presser foot clearance)
- Lubricant/oil suitable for the model(Only if the manual recommends oiling)
Steps
Estimated time: 2-4 hours
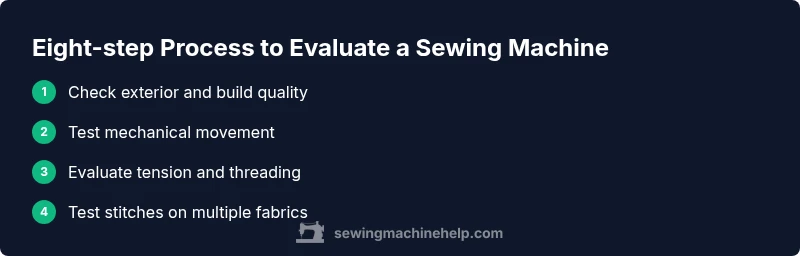
- 1
Gather and inspect the machine
Begin by gathering the machine, manual, and a test bundle of fabrics. Look over the exterior for cracks, rust, or loose screws. Note the model number and determine if spare parts are readily available. This step sets expectations for what you’ll test next and helps you compare against other machines.
Tip: Take clear photos of labels and any cosmetic flaws to reference later. - 2
Check mechanical movement
Power the machine (if safe to do so) and listen for unusual sounds. Manually turn the handwheel to ensure smooth motion with no catching. Open the bobbin area to ensure there’s no excessive lint and that screws are tight.
Tip: If the handwheel binds, stop and check for thread nesting or obstruction before forcing movement. - 3
Inspect electrical safety
Examine the power cord, plug, and pedal for cracks or exposed wires. Ensure the switch and cord connectors are secure. If possible, perform a light test run with supervision and unplug immediately after to inspect for heat or smells.
Tip: Never operate a damaged cord; this is a non-negotiable safety check. - 4
Test stitch quality on fabrics
Set up straight, zigzag, and any available decorative stitches. Use scrap fabrics of cotton, synthetic, and denim when possible. Observe stitch consistency, thread breakage, and fabric feeding; the machine should maintain even stitch length across weights.
Tip: Record any tension adjustments needed for different fabrics and note how stable the baseline stitch stays. - 5
Evaluate threading and tension path
Thread the machine following the manual’s path. Check that the tension discs engage smoothly and maintain balanced upper and lower thread tension. Re-thread if looping or bird-nesting appears underneath; this often indicates misthreading rather than a faulty machine.
Tip: Avoid forcing threads through stiff guides; a clean, deliberate threading action yields better tension. - 6
Assess exterior build and presser feet
Examine the frame materials and the durability of presser feet. Ensure the feet attach firmly and are easy to swap. Check that levers and dials align correctly and return to rest positions without sticking.
Tip: A machine with secure feet and smooth lever operation reduces misfeeds during projects. - 7
Check parts availability and service
Confirm model compatibility with widely available parts and accessories. Look for a current user manual, service manuals, and nearby repair options. If buying used, ask about last service date and whether spare parts were provided.
Tip: Part availability is as important as the current condition for long-term use. - 8
Make a buying decision plan
Weigh price against features, condition, and support options. Decide on a personal threshold for investment based on your typical projects. Create a short list of must-have features (e.g., metal frame, walk-away features) and nice-to-have extras.
Tip: Have a clear budget and a go/no-go list to avoid impulsive buys.
Your Questions Answered
What are the most important signs that a sewing machine is good?
Look for smooth mechanical movement, consistent stitches across fabrics, stable tension, and safe electrical components. A solid manual, a sturdy frame, and readily available parts are also strong indicators of long-term reliability.
Important signs include smooth movement, even stitches, and safe wiring. A good machine also has strong parts availability.
How can I test a machine if I buy it used?
Ask the seller to demonstrate stitching on several fabrics, inspect the bobbin area for lint, and check the motor’s responsiveness. Verify the power cord and foot pedal work, and request recent service records when possible.
Have the seller run a few stitches on different fabrics to see how it performs.
Should I buy a used machine or a refurbished one?
Used machines can offer great value if mechanically sound and well maintained. Refurbished units usually come with some warranty and have been cleaned and serviced. Decide based on the machine’s history, price range, and your comfort with potential repairs.
Think about reliability and after-sale support; refurbished units often include a warranty.
What role does tension play in determining if a machine is good?
Tension affects stitch balance. If you cannot achieve balanced stitches on various fabrics after proper threading, the machine may require adjustment or parts replacement.
Tension controls stitch quality; if you can’t balance it, the machine isn’t ideal yet.
How do I know if parts are still available for an older model?
Check the manufacturer’s site, authorized service centers, and reputable repair shops. Look for a parts catalog or third-party compatibility lists, and ask about replacement belts, needles, and feet.
Parts availability is essential for ongoing use; verify before purchasing.
Can a machine with good exterior still have hidden issues?
Yes. Exterior cosmetics can hide mechanical wear or electrical faults. A thorough, hands-on test is essential to uncover such issues before purchase.
Exterior looks can be deceiving; test thoroughly to reveal hidden problems.
Watch Video
The Essentials
- Test stitching on multiple fabrics for consistency
- Check mechanical and electrical safety before power-on
- Verify parts availability and service options
- Evaluate exterior build for longevity and durability
- Use a structured buying plan to reduce risk