How to Tell Sewing Machine Needle Size: A Practical Guide
Master identifying and selecting the correct needle size for sewing projects. This guide covers needle labeling, sizing systems, fabric-specific tips, and a step-by-step test routine to ensure flawless stitches.

Learn to identify your sewing machine needle size quickly and accurately. This quick answer explains how to read needle markings, interpret different sizing systems (US and metric), and verify fit with a test stitch. With the right needle you’ll improve stitch quality, prevent fabric damage, and reduce snags during seaming.
How to tell sewing machine needle size: quick guide and why it matters
Choosing the right needle size affects stitch quality, fabric handling, and machine longevity. In this section, we cover the basics of size labeling, common systems, and why using the wrong size can create skipped stitches, snags, or fabric puckering. How to tell sewing machine needle size is a skill that every home sewist should master, and this guide will walk you through reliable habits for identifying the correct size before you stitch. According to Sewing Machine Help, starting with the correct needle size prevents tension issues and reduces rework, saving time on future projects.
Understanding needle size is not about memorizing a single number; it’s about matching the fabric, thread, and machine requirements. You’ll learn to read markings, recognize the difference between US and metric systems, and know when to replace a needle that’s worn or bent. This foundational knowledge helps you avoid common tension problems, skipped stitches, and fabric snags, which are the most frequent signs that the needle size is off. By the end of this section, you’ll be able to articulate a general rule of thumb for most mid-weight fabrics and feel confident when testing a new material.
How needle size systems work: US, metric, and specialty codes
Needle sizing uses several numbering systems, which can feel confusing at first. The most common are US sizing (numbers like 9, 11, 14) and metric sizing (like 65, 70, 90) that correspond to the needle’s thickness. Some machines and fabrics also imply specialty codes for embroidery needles, twin needles, or jeans needles. The key concept is that a smaller number generally means a thinner needle, while a higher number indicates a thicker shaft. Recognizing the system your machine expects helps you pick the right size quickly and avoid guesswork. For beginners, the takeaway is to confirm the expected system in your machine’s manual and start with a mid-range size when trying a new fabric.
Sewing Machine Help’s guidance emphasizes aligning needle system choices with fabric type and stitch goal. When in doubt, cross-check the spelling on the needle packaging with your machine’s compatibility notes. This reduces the risk of tension irregularities and fabric perforation, especially on delicate or slippery materials.
Reading needle markings and packaging: where to look first
Most modern needles carry size markings on the shank side or printed on the packaging. Inspect the flat side of the needle shaft using good light; you may see numbers such as 70/10 or 90/14, or a metric marking like 65 or 75. If you see a combination (e.g., 70/10), that indicates both sizing conventions. Always verify you’re reading the marking in the correct orientation and compare to your machine’s documentation. If the size is unclear, don’t force the needle in; instead use a gauge or the packaging to confirm. Also, check if the needle is a universal versus a system-specific type—some machines require a particular needle system beyond the size number.
Reading the packaging carefully helps you avoid mismatches that can cause thread breakage or skipped stitches. If you’re shopping in-store, bring a sample fabric and test stitch with a few sizes to confirm which feels best for your material. This proactive step saves time and reduces waste in ongoing projects.
How to choose a size based on fabric weight and thread type
Fabric choice drives needle size more than thread alone. Very light fabrics—like chiffon or silk—often perform best with a finer needle, while medium-weight cotton or linen generally works well with mid-range sizes. Heavier fabrics such as denim typically require a sturdier needle to prevent fabric fibers from folding into the eye or bending the needle. If you’re using specialty threads, consider needles designed for those threads to prevent shredding or loop issues. A practical rule is to start with a mid-range needle for everyday fabrics and adjust up or down based on stitching results.
The overarching idea is to avoid pushing a needle beyond its intended range. Excessively large needles can damage the material or machine; overly small needles may break or create holes. Always test on a scrap piece to confirm the needle choice aligns with your fabric’s texture, weave, and finishing.
How to identify the size on your current needle and what to do if it’s worn
Begin by removing the needle with the needle clamp loosened. Examine the needle’s flat shank if the size is etched; some needles only show size on the packaging. If you have a worn needle, you may not be able to read the size reliably; in that case, replace with a new needle of the appropriate size for your fabric and machine. Always store needles safely to prevent bending and mix-ups. If your machine has a preferred needle type, adhere to that requirement to maintain optimal stitch formation and tension.
Step-by-step testing: verifying needle size with a scrap test
Test stitching on a scrap sample before sewing your final project. Start with a straight stitch and check for thread nests or skipped stitches. If the fabric puckers or threads break, adjust the needle to a thicker size; if the needle leaves holes, you might be using a needle too large for the fabric. After each change, re-thread the machine and run a short test, comparing results side by side. This process helps you validate the needle choice under realistic sewing conditions and reduces the risk of damaging your project fabric.
Common mistakes and quick fixes you should avoid
Common mistakes include assuming the needle size equals the fabric weight, failing to replace bent needles, or reusing dull needles across very different fabrics. The fix is to replace dull or bent needles promptly and maintain a small set of sizes tailored to your most-used fabrics. Remember to rethread after changing needle size to ensure proper thread path. Also, never force a needle through thick seams; if a needle binds, stop and reassess the size and needle type. Keeping a tidy, labeled needle kit helps you stay consistent across projects.
Quick reference and final tips for beginners
As you gain experience, you’ll recognize patterns: lighter fabrics take smaller needles and heavier fabrics take larger ones. Always test on scrap fabric, keep a note of your preferred sizes for each fabric type, and store needles in a closed container to avoid bending. The more you practice, the quicker you’ll pick the right needle size for any project, and you’ll notice improved stitch quality and fewer issues. The Sewing Machine Help team recommends keeping a small needle kit ready and referencing your machine’s recommendations for best results.
Tools & Materials
- Needle gauge or a calibrated ruler(Used to verify needle diameter or read packaging markings accurately)
- Replacement sewing machine needles (various sizes)(Have a small set on hand for testing (fine, mid-weight, heavy))
- Fabric scrap samples(Use representative fabrics to test needle size and tension)
- Sharp scissors or thread snips(Trim threads cleanly during tests)
- Good lighting or magnifying glass(Helps read small needle markings clearly)
- Sewing machine manual (for needle system compatibility)(Always cross-check the manual for accepted needle types)
Steps
Estimated time: 20-30 minutes
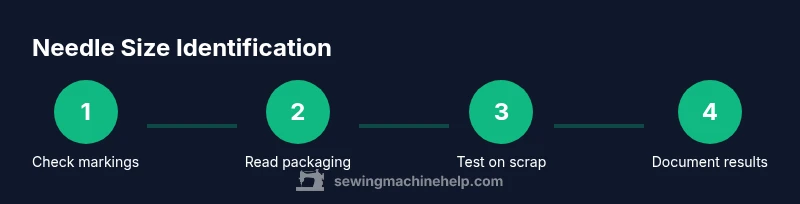
- 1
Gather needles, thread, and fabrics
Lay out a selection of needles, a spool of matching thread, and fabric scraps that mimic your project. This helps you compare different sizes under real sewing conditions. Having a small notebook ready lets you jot which size performed best for each fabric.
Tip: Label each needle with its intended fabric type to avoid confusion later. - 2
Inspect the needle size marking on the needle or packaging
Look for size markings on the needle’s shank or on the packaging. Confirm whether the size uses the US system (numbers) or the metric system, and note any dual markings like 70/10. If the marking is unclear, set that needle aside and use a known size instead.
Tip: Use a magnifier if the font is small; even a quick check under a lamp helps. - 3
Compare the size to your machine’s compatible range
Consult your machine’s manual or the machine’s display if available to identify acceptable needle ranges. Start with a middle-ground size within that range for your fabric. Avoid forcing sizes outside the recommended spectrum, as this can cause tension issues or mechanical stress.
Tip: When testing a new range, use scrap fabric first to avoid damage. - 4
Install the selected needle and thread a sample
Install the chosen needle securely and thread the machine correctly. A properly installed needle reduces thread looping and tension problems. Take a few seconds to re-thread after any size change to ensure the thread path is clean.
Tip: Double-check that the needle is fully seated and clamped before sewing. - 5
Run a test stitch on scrap fabric
Sew a short test swatch and evaluate stitch formation, tension, and fabric behavior. Look for skipped stitches, bird-nesting, or snags. If issues appear, adjust the needle size and retest with a fresh scrap.
Tip: Compare stitches side by side with the previous test to identify improvements. - 6
Document your needle size choice for future projects
Record the fabric type, needle size, and any notes about the test results. This makes it easier to repeat the setup for similar fabrics and speeds in the future. Over time, your notes become a personalized sizing guide.
Tip: Keep the notes in a dedicated sewing journal or note app for quick reference.
Your Questions Answered
Why is knowing needle size important for sewing outcomes?
Knowing needle size helps you achieve even stitches, avoid fabric damage, and reduce puckering. It also minimizes tension issues and skipped stitches that can ruin a project.
Knowing the right needle size keeps stitches even and fabrics safe, reducing tension problems and skipped stitches.
Can I use any needle size for any fabric?
No. Needle size should be chosen based on fabric weight and thread type. Using the wrong size can cause holes, snags, or poor tension.
No—choose the size based on fabric weight and thread type to avoid damage and poor stitches.
How do I check the needle size if the marking is worn off?
If markings are unreadable, replace with a known size appropriate for the fabric and machine, and verify with a scrap test. Keep a record to avoid guessing next time.
If markings are worn, replace with a known size and test on scrap to confirm.
What happens if I use the wrong needle size?
You may experience skipped stitches, fabric snags, or holes. Tension can become uneven, and the machine may jam if stressed.
Wrong needle size can cause skipped stitches, snags, and tension problems.
Is there a universal needle size for all machines?
Most home sewing machines use standard household needles, but always check the manual for your model’s preferred systems and sizes.
Most machines use standard household needles, but check your manual for the recommended system.
What fabric typically requires the largest needle size?
Heavier fabrics like denim or canvas generally need larger, sturdier needles to penetrate weave without bending.
Heavy fabrics often need larger needles to prevent bending and ensure clean penetration.
Watch Video
The Essentials
- Read the size on the needle or packaging.
- Match size to fabric weight and thread type.
- Always test on scrap fabric before final sewing.
- Keep sizes organized for quick reference.