How to Fit Sewing Machine Needle: Step-by-Step Guide
Learn how to fit sewing machine needle correctly with a step-by-step approach, safe tips, and troubleshooting to ensure flawless stitches across fabrics.

Mastering how to fit sewing machine needle ensures smooth stitches, reduces fabric damage, and prevents machine jams. In this guide you’ll identify the right needle type and size, align it correctly in the needle clamp, and verify stitch quality with a quick test on scrap fabric. Follow the steps below for a safe and reliable needle change.
The essential purpose of needle fit and why it matters
Mastering how to fit sewing machine needle is foundational to successful sewing. If you're wondering how to fit sewing machine needle, you'll quickly learn that the right needle type, size, and orientation affect thread tension, fabric penetration, and stitch quality. A correctly fitted needle reduces skipped stitches, fabric snags, and needle breakage. According to Sewing Machine Help, the biggest gains come from matching the needle system to the machine and the fabric, then seating the needle fully in the clamp.
When you fit the needle correctly, you create a reliable path for the thread from the spool to the needle eye, through the bobbin, and back up to the take-up lever. This alignment minimizes tension issues and ensures smooth stitch formation. If the needle is loose, bent, or inserted backwards, you may see looping, thread nests under the fabric, or uneven stitches. Take a few minutes to verify that your needle is seated correctly before you begin any project.
Understanding needle types and their fabric implications
Sewing machines use specific needle systems that determine compatibility and performance. The most common categories are universal, ballpoint, sharp, and heavy-duty variants. Universal needles provide a general-purpose option suitable for woven fabrics, while ballpoint needles glide through knits without snagging. Sharp needles are ideal for precise, fine fabrics, and heavy-duty options handle denim and canvas without deflection. Always check your machine’s manual for the recommended needle system and size range, because using the wrong type can cause skipped stitches or fabric damage. For beginners, starting with a standard universal needle in a mid-range size (for example, size 80/12 for mid-weight fabrics) is a safe approach. Remember that thread type and fabric weight influence needle choice just as much as the fabric itself.
Choosing the right needle size for your fabric
Needle size influences penetration, fabric surface, and thread tension. Lighter-weight fabrics generally pair with smaller needles (e.g., 70/10 or 65/9), which create clean holes without tearing the fabric fibers. Medium-weight fabrics often use around 80/12 or 90/14. Heavy fabrics like denim or canvas call for larger sizes such as 100/16 or 110/18 to avoid bending or dulling the needle. When in doubt, test on a scrap piece of the same material. Also consider the thread thickness; thicker threads require similarly sized or slightly larger needles to manage stitch formation without creating drag. This balancing act between fabric, thread, and needle is a cornerstone of high-quality sewing.
Preparing your machine before changing the needle
Safety first. Before any needle replacement, power down the machine, unplug it, and raise the needle bar to its highest position. Remove the presser foot and needle plate if needed to gain clear access to the needle clamp. Clean out lint and thread bits from the needle area, as obstructions can prevent proper seating. Have your replacement needle ready, and confirm its type and size match the fabric project. If you’re unsure, consult the machine manual or trusted guides such as Sewing Machine Help for compatibility. A clean, uncluttered workspace helps you insert the needle straight and avoid misalignment.
How to ensure the needle is seated correctly (alignment and safety)
The correct seating means the needle is straight, fully inserted, and secured by the clamp. With the machine powered off, gently insert the needle with the flat side facing the back (or per your model’s instruction), push it up until it seats fully, and tighten the clamp screw securely. Avoid forcing the needle past the clamp’s stopping point, which can bend the needle or damage the needle bar. If your machine requires a screwdriver, use the proper size to avoid slippage. A loose needle can cause thread breakage and uneven stitches; a too-tight needle can bend or snap under stress.
Testing stitch quality after fitting the needle
After fitting a new needle, re-thread the machine and test on a scrap fabric. Begin with a straight stitch on a medium-length setting to compare stitches on the top and under side. Look for even stitch size, no skipped stitches, and no thread bunching. If tension seems off, re-thread both the upper and bobbin tensions and re-test. If the fabric or thread grinds or snags, recheck needle insertion and ensure the needle is the correct type and size for the fabric.
Maintenance, care, and safety reminders
Regular maintenance supports reliable needle performance. Change needles after completing a sewing project or when you notice burrs, bend marks, or skipped stitches. Keep the needle area clean and periodically examine the needle for wobble or bending. Always unplug the machine and remove the bobbin before any maintenance. Store spare needles in a dry place to prevent rust. By following these practices, you’ll extend your machine’s life and maintain consistent stitch quality.
Tools & Materials
- Sewing machine needle (appropriate type and size)(Universal 70/10 to 90/14 for most fabrics; ballpoint for knits; check fabric weight and thread type)
- Small screwdriver(Typically flat-head or Phillips, used to loosen the needle clamp screw on many models)
- Scissors or thread snips(For trimming thread ends and any loose fibers around the needle area)
- Tweezers or needle-nose pliers(Helpful for removing damaged needles or guiding thread in tight spaces)
- Scrap fabric(Test fabric to check stitch formation after replacing the needle)
- Owner’s manual or model number(Consult for model-specific needle system and seating instructions)
Steps
Estimated time: 5-10 minutes
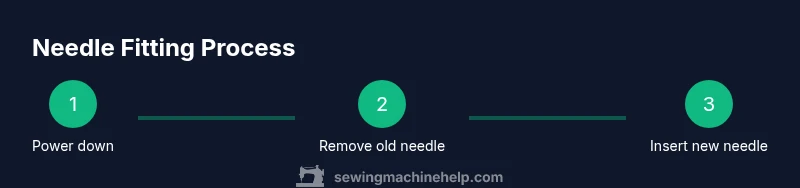
- 1
Power down and prepare workspace
Turn off the machine and unplug it. Clear the area and lay out your tools so you can reach the needle clamp easily, reducing risk of slips during replacement.
Tip: Keep the foot pedal unplugged until the process is complete to avoid accidental starts. - 2
Raise the needle bar to the highest position
Use the handwheel to raise the needle bar until the needle is fully visible. This makes removing the old needle safe and straightforward.
Tip: If your machine has a start/stop button, ensure it’s in a neutral position before turning the handwheel. - 3
Remove the old needle
Loosen the needle clamp screw just enough to free the needle. Gently pull the needle straight down and out without bending it.
Tip: Take note of the needle's orientation and how it seated for future reference. - 4
Select and insert the new needle
Choose the correct needle type and size for your fabric and thread. Insert the needle with the flat side facing the back (or per your manual) until it seats fully in the clamp.
Tip: Avoid touching the needle eye with fingers to prevent oil transfer or misalignment. - 5
Tighten the needle clamp securely
Tighten the clamp screw firmly but not over-tight. The needle should not wiggle if you gently tug it with a finger.
Tip: If you use a screwdriver, ensure you do not strip the screw head. - 6
Re-thread and align the machine
Re-thread the upper thread and re-seat the bobbin as required by your model. Check that the take-up lever moves freely and the thread sits correctly in the tension disk.
Tip: Always guide the thread through the needle eye from front to back to prevent knots. - 7
Test stitch on scrap fabric
With everything reassembled, run a quick test on scrap fabric to verify stitch formation and tension. Adjust if needed and re-test.
Tip: Start with a straight stitch before testing zigzag or decorative stitches.
Your Questions Answered
Can I use any needle in my sewing machine, or do I need a specific system?
Most machines use a specific needle system and size range. Check your manual for the recommended system (e.g., a common household system) and the compatible needle sizes. Using an incompatible needle can cause jams, skipped stitches, or damage the needle bar.
Most machines need a specific needle system. Check your manual to find compatible sizes; using the wrong needle can cause jams or skipped stitches.
What happens if I insert the needle upside down?
Inserting the needle with the flat side incorrectly oriented can affect penetration and stitch formation. Always insert with the flat side facing the back (per your machine’s guidance) and seat it fully before tightening the clamp.
If you insert it upside down, stitches can be off. Check the flat side facing the back and seat firmly.
How do I know what needle size to use for fabric?
Light fabrics respond to smaller needles, while heavier fabrics need larger sizes. Start with a medium size and test on a scrap to confirm stitch quality and fabric penetration.
Use a smaller needle for light fabrics and a larger one for heavy fabrics; test on scrap to confirm.
Why do I get skipped stitches after changing the needle?
Skipped stitches usually mean the needle isn’t seated properly or the thread isn’t threaded correctly. Re-check needle insertion, re-thread the machine, and test on scrap fabric.
Skipped stitches often come from a poor needle seating or mis-threading. Recheck and test on scrap.
Is ballpoint better for knits than universal needles?
Ballpoint needles are generally preferred for knits to avoid snagging the fibers, while universal needles work well for most woven fabrics.
Ballpoint is typically better for knits; universal usually works for woven fabrics.
How often should I replace a needle?
Replace needles after finishing a project or when you notice bending, dulling, or fabric snags to maintain stitch quality and machine health.
Replace a needle after a project or when you see bending or dulling.
Watch Video
The Essentials
- Identify the correct needle type for your fabric.
- Always seat the needle fully in the clamp before sewing.
- Test on scrap fabric and adjust tension as needed.
- Keep the work area clean to prevent snags and misalignment.
- The Sewing Machine Help approach emphasizes model-specific compatibility for best results.