How to Change a Needle on a Sewing Machine
Learn to safely replace a sewing machine needle with step-by-step instructions, fabric tips, and troubleshooting to ensure perfect stitches every time.

You’ll learn how to safely change a sewing machine needle and get back to sewing with confidence. Gather a new needle size appropriate for your fabric, a screwdriver if needed, and a clean workspace. This quick guide covers removal, insertion, and testing to ensure stitches align correctly. Follow the steps in order and avoid forcing parts. With practice, needle changes take seconds and reduce fabric snags.
Why changing the needle matters
A fresh, properly installed needle is the foundation of good stitching. Dull needles can skip stitches, cause fabric snags, or create unwanted holes. Using the wrong needle for a given fabric type also increases the risk of skipped stitches and thread fraying. According to Sewing Machine Help, maintaining sharp, correctly sized needles not only improves accuracy but also extends the life of your machine by reducing stress on the hook and tensions. Before you change a needle, take a moment to understand your fabric and thread combination, because this decision determines needle type, size, and needle point. This awareness helps you avoid common headaches like looped threads or uneven stitching. A calm, well-lit workspace and a clean needle plate area contribute to a smoother, safer change experience.
In the broader context of sewing maintenance, changing needles regularly is part of a healthy care routine. When your needle dulls, it’s not just about the needle; it’s about the overall quality of your stitches and your machine’s longevity. By adopting a simple change protocol, you’ll notice fewer thread breaks, cleaner seams, and more consistent tension across projects. The Sewing Machine Help team emphasizes that consistency starts with a sharp needle and proper alignment.
Choosing the right needle for your fabric
Selecting the appropriate needle size and type is crucial for achieving clean, even stitches. For woven fabrics, a standard universal needle (usually around size 80/12) works well, while lighter fabrics may perform best with smaller sizes like 70/10. For knit fabrics, opt for a ballpoint needle to avoid snagging and damaging fibers. Heavier fabrics such as denim or canvas benefit from a thicker, sturdier needle like a size 90/14 or 100/16, depending on thread weight and fabric density. It’s a good habit to consult your machine’s manual for needle recommendations and to verify the needle clamp can accommodate the chosen size. Remember that a mismatch between fabric and needle can lead to skipped stitches, thread breaks, and frayed edges.
Beyond size, consider the needle’s point: sharp points excel on woven fabrics, ballpoints glide through knit fabrics, and wedge or denim needles pierce heavy fabrics with less resistance. The right needle also interacts with thread type – a silk thread pairs best with a sharp, slightly finer needle, whereas a heavy polyester or topstitch thread benefits from a stronger needle. Keeping an assortment of needles on hand helps you quickly adapt to different projects.
Safety first: prep your machine
Safety and preparation set the stage for a smooth needle change. Begin by turning off the machine, unplugging it, and lowering the needle to its highest position. This reduces the risk of accidental starts while you work. Clear the work area of pins, threads, and fabric scraps to prevent interference with the needle clamp. If your machine has a removable needle plate, have a small container nearby to catch the needle if it drops during removal. Always ensure the presser foot is raised and the needle is in the “up” position before loosening any screws. A clean workspace also helps you see small parts more clearly, reducing the chance of misplacing a tiny screw or needle.
Referencing general tool safety, take a moment to check that your power switch is off and the power cord is unplugged, a standard precaution across most sewing-machine procedures. Proper lighting and a steady stance minimize slips, which is especially important when handling sharp objects like a needle.
If you’re new to needle changes, practice on a scrap piece or a non-critical fabric sample to build confidence before moving to your actual project. This approach keeps your fabric pristine and your machine in good working order.
Tools and materials you’ll need (and what to check in advance)
Before you begin, gather a few essential items and verify compatibility with your machine. You’ll need a replacement needle of the correct size and type for your fabric, a small screwdriver for your needle clamp, a pair of scissors or thread snips, and a lint-free cloth or brush for cleaning away lint around the needle area. Having a spare needle on hand is a smart precaution in case the first one arrives in poor condition from the package. Keep the machine manual nearby for model-specific advice, as some machines use different screw sizes or require unique tools.
Having these items ready reduces interruptions and keeps your workflow efficient. If your machine has a dedicated needle-threader, you can use it after installation once you confirm the needle is securely clamped. A tidy workspace helps you avoid accidentally dropping small parts into the machine, which could cause future malfunctions.
How to remove the old needle safely
Start by loosening the needle screw with the appropriate screwdriver. Hold the needle steady as you loosen, ensuring you do not bend or twist it. Once the screw is loose enough, carefully slide the needle straight down and out of the needle clamp. Avoid pulling the needle at an angle, which could damage the clamp or bend the needle shank. If the needle is stubborn, double-check that the needle is in the correct orientation and that you have loosened the screw sufficiently.
Take a quick look for any burrs on the needle tip or signs of damage in the needle thread path. If you notice damage, replace the needle before proceeding. Place the old needle in a safe container to prevent accidental pricks or misplacement.
This removal step is a common sticking point for beginners, but a steady hand and careful loosening will ensure you don’t bend or misuse the clamp.
How to insert the new needle correctly
Insert the new needle with the flat side facing the back of the machine and push it all the way up into the clamp. Once inserted, tighten the needle screw securely but not overly tight to avoid stripping the screw head. Double-check that the needle is vertically aligned and fully seated, then remove any lint from the clamp area with your cloth or brush. If the needle has a specific orientation for your model, follow the manual’s guidance to ensure proper alignment with the thread path.
If you’re unsure whether the needle is seated correctly, gently tug the needle up and down; a properly secured needle should not wiggle or slide out. Over-tightening can wear the clamp, while under-tightening can cause the needle to loosen during sewing.
With practice, inserting a new needle becomes a quick, confident routine that minimizes fabric snags and stitching issues.
Re-threading and testing the new needle
After you’ve secured the new needle, re-thread the machine following your usual threading path, ensuring the thread path goes through guides, the take-up lever, and the needle eye without crossing or tangling. Re-threading can reveal any alignment issues early, so take your time to do it carefully. Once threaded, perform a quick test on scrap fabric first. Start with a straight stitch and then a simple zigzag to confirm that the needle and bobbin thread interact correctly. If you notice thread buildup on the needle or fabric, adjust the thread tension or recheck needle orientation.
A proper test helps you catch issues before they affect your actual project, preventing wasted fabric and time. If your fabric is delicate, test with a small sample to observe any needle-scar or perforation.
With confirmation that stitch quality is stable, you’re ready to continue sewing with renewed confidence.
Common mistakes and troubleshooting tips
Even experienced sewers encounter occasional needle-change hiccups. Common mistakes include inserting the needle the wrong way or not seating it fully, which can cause skipped stitches or thread breaks. Another frequent issue is not using the correct needle type for the fabric, leading to fabric snags or fiber damage. If your stitches look uneven, recheck needle compatibility, re-thread the machine, and test on scraps.
Troubleshooting often involves a simple reset: re-thread the needle area, re-thread the bobbin, and test on scrap fabric. If you still see issues, inspect the needle for burrs, check the needle clamp for burrs or misalignment, and confirm the presser foot is lifted before changing the needle. These checks can prevent bigger problems later.
To avoid repeated issues, handle the needle with care during removal and installation, and store spare needles in a safe container away from potential bending or dulling.
AUTHORITY SOURCES
- Britannica: Sewing needle overview and history. https://www.britannica.com/technology/Sewing-needle
- University of Illinois Extension: Needle types and fabric considerations. https://extension.illinois.edu/
- University of Minnesota Extension: Sewing needles basics and care. https://extension.umn.edu/
These sources provide additional context on needle types, fabric compatibility, and general sewing machine maintenance practices referenced in this guide.
Tools & Materials
- Replacement needle (size appropriate for fabric)(Common options: 70/10, 80/12 for light to medium fabrics; 90/14 for heavier fabrics)
- Small screwdriver for needle clamp(Typically a 2.0 mm or smaller; keep spare for convenience)
- Thread snips or small scissors(Sharp blades help cut thread cleanly without fraying)
- Lint-free cloth or brush(Used to clean lint around the needle area)
- Manual or machine reference(Helpful for model-specific instructions)
- Spare needle container(Keep used needles separate from new ones)
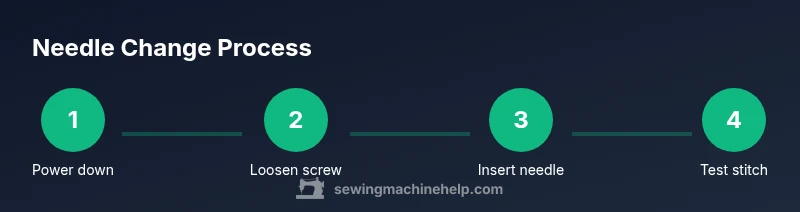
Steps
Estimated time: 5-12 minutes
- 1
Power down and prepare the workspace
Turn off the machine and unplug it from the power source. Raise the needle to its highest position and clear the area of fabric and pins. This minimizes the risk of accidental starts or snags while you work.
Tip: Keep your fingers away from the needle clamp and use good lighting to see small parts clearly. - 2
Loosen the needle screw and remove the old needle
Use the screwdriver to loosen the needle clamp screw a few turns while holding the needle. When the screw is sufficiently loose, gently slide the old needle straight down and out of the clamp. Do not bend or twist the needle during removal.
Tip: If the needle is stubborn, double-check that you are loosening the right screw and that the machine is fully raised. - 3
Inspect and prepare the new needle
Check the new needle for any packaging damage. Confirm the needle type matches your fabric and thread. Clean the clamp area to remove lint or burrs that could affect seating.
Tip: If the needle shows any burrs, replace it before insertion. - 4
Insert the new needle with correct orientation
Insert the needle with the flat side facing the back of the machine and push it all the way up into the clamp. Tighten the screw securely, but avoid over-tightening which could strip the screw head.
Tip: Ensure the needle is fully seated; a loose needle can slip during stitching. - 5
Re-thread and align the path
Re-thread the machine following the standard path, ensuring the thread goes through guides and the take-up lever. Check that the thread enters the needle eye smoothly and check for any tangles before test sewing.
Tip: Take your time with threading; wrong routing is a common cause of obvious stitching issues. - 6
Test on scrap fabric and adjust if needed
Run a quick test stitch on scrap fabric to verify tension and stitch quality. If stitches look off, re-check needle seating, thread path, and tension settings before continuing with your project.
Tip: Always test before proceeding; it saves fabric and frustration on real projects.
Your Questions Answered
Why should I change the needle?
A dull or damaged needle can cause skipped stitches and fabric snags. Replacing it with the correct type for your fabric improves stitch quality and reduces strain on the machine.
A dull needle causes stitching problems, so changing it improves your results. A proper needle for your fabric helps your machine sew smoothly.
What size needle should I use for most fabrics?
For most woven fabrics, a size 80/12 universal needle works well. For knit fabrics, use a ballpoint needle; for heavier fabrics, go with a 90/14 or larger depending on fabric and thread.
For most fabrics, start with an 80/12 universal needle. Switch to ballpoint for knits and heavier needles for sturdy fabrics.
Can I reuse a needle after sewing a project?
It’s best to replace a needle after completing a project or after any sign of wear. Reusing a dull needle can affect stitch quality and threaten fabric integrity.
Reuse is not recommended; replace a worn needle after each project for best results.
What if the machine won’t thread after changing the needle?
Re-thread the machine path, ensuring the thread goes through all guides and the take-up lever. Check that the needle is correctly seated and not bent. A quick re-thread often resolves the issue.
If threading fails after a needle change, re-thread the path and confirm the needle is seated straight.
Do I need to change the needle type if I switch thread brands?
Different threads can affect tension and performance. If you switch to a significantly different thread (e.g., from cotton to heavy polyester), consider using a needle better suited for that thread.
Changing thread can mean changing needles too for optimal results.
How often should I change the needle?
Change the needle when you notice skipping stitches, rough starts, or fabric snagging, or after completing a project. Regular replacement keeps stitching clean and consistent.
Change the needle when stitch quality drops or after finishing a project.
Watch Video
The Essentials
- Choose the correct needle for your fabric.
- Power off and unplug before starting.
- Insert the needle with the flat side to the back and seat fully.
- Test on scrap fabric after installation.