What Needles to Buy for Sewing Machines
Learn which needles to buy for sewing machines, including universal, ballpoint, sharp, microtex, and specialty options. Practical guidance on sizes, fabrics, and swapping needles for home sewers.

By the end of this guide you’ll know what needles to buy for sewing machines, including universal, ballpoint, sharp, microtex, and specialty options. You’ll learn how to match sizes to fabric weight, swap needles safely, and assemble a practical starter kit. This overview also explains when to use each needle type and how to test stitches before committing to a project.
What needles to buy for sewing machine: fundamentals
Choosing the right needles begins with your fabrics and projects. The question what needles to buy for sewing machine is not about one universal answer; it’s about building a small, flexible set that covers most home sewing tasks. According to Sewing Machine Help, a practical starter kit includes universal needles for everyday woven fabrics, ballpoint needles for knits, and sharp or microtex needles for lightweight synthetics or delicate fabrics. Beyond these basics, you’ll want specialty needles for denim, leather, or topstitching. By stocking a few sizes and types, you’ll minimize skipped stitches, fabric snags, and broken needles. In this article you’ll learn how to evaluate fabrics, select needle types, and assemble a kit you can reach for without a long shopping list. The goal is to balance versatility with tailored performance, so you’re prepared for cotton, jersey, rayon, and even light denim without swapping machines or rethreading repeatedly. Before you buy, note that needle points and shank size can affect stitching. A standard home-sewing machine often uses a flat shank, compatible with most universal needles; some low-price machines prefer specific brands or needle systems. You don’t need every needle type at once, but a well-chosen starter set pays for itself by saving time and reducing damage. In the next sections we’ll map fabrics to needle types, compare common options, and show you how to assemble a shop-ready kit.
Needle types explained: universal, ballpoint, sharp, microtex, specialty
Needle types fall into a few broad families, and starting with universal and ballpoint covers most everyday tasks. Universal needles are designed to handle woven fabrics and light blends; they perform well on cotton, linen, and many synthetics. Ballpoint needles have a rounded tip that slides between yarns in knit fabrics rather than piercing them, reducing runs and snagging. Sharp or microtex needles have a finer point and a slimmer blade, perfect for high-thread-count cotton, silks, and precision topstitching. Specialty needles like denim, leather, and twin needles are built for specific jobs and are worth keeping on hand. According to Sewing Machine Help, your choice should also reflect your machine’s needle system; some newer machines require a particular type of needle with a specific shank style. When building your kit, start with a core set—universal, ballpoint, and one sharp/microtex—and add specialty options as your projects demand. Each needle is labeled with a size; for general projects, sizes in the 70/10 to 90/14 range cover most fabrics. The smaller sizes are for lightweight fabrics; larger sizes handle tougher threads and denser materials. Practically, you’ll pair a finer needle with fine fabrics and a heavier needle with denim or canvas. Also consider needle point shape: sharp pointed needles for woven fabrics, ballpoint for knits, and microtex for densely woven synthetics.
Matching needles to fabric weight
Fabric weight guides needle choice. Lightweight fabrics like chiffon, voile, or silk respond to finer needles (e.g., 70/10 or 75/11) because they produce clean, delicate stitches without perforating the fabric. Medium-weight fabrics such as cotton blends, denim blends, and canvas typically respond well to 80/12 or 90/14 needles, depending on thread tension and stitch type. Heavy fabrics like heavy denim or canvas often require a larger needle (90/14–110/18) and sometimes a denser needle tip. When you’re unsure, start with a mid-range size (80/12 or 90/14) and test on a scrap. If the fabric fibers bunch or pucker, switch to a larger needle or a different point style. Sewing Machine Help analysis shows that most home sewers benefit from stocking universal, ballpoint, and sharp needles, then adding specialty options as projects demand.
Specialty needles and when to use them
Denim needles are built for heavy woven fabrics with thick threads; leather needles have a wedge-shaped point and a tapered blade to pierce leather cleanly; twin needles are used for decorative topstitching across knit or woven fabrics. Ballpoint needles excel on knits, while microtex/sharp needles excel on lightweight synthetics or high-density fabrics. When you work with leather, use a needle specifically designed for leather and adjust stitch length to avoid tearing. For denim, a denim needle paired with a sturdy needle thread helps prevent skipped stitches. Twin needles create parallel lines of stitching and are great for hems on knit fabrics. As always, check your machine’s manual for compatibility with the needle system and shank type to avoid bending or breaking needles.
Reading needle packaging and labeling
Most needle packaging shows a size range (for example 70/10 to 90/14) and a needle type code (universal, ballpoint, microtex, denim, leather, twin). Look for the size range that matches your most common fabrics. If you’re unsure, start with a universal 80/12 and a ballpoint 75/11. Packaging may also indicate the metal composition (high-carbon steel is common) and the recommended fabric type. Keep a labeled notebook or organizer so you can map each needle to corresponding fabrics and projects. This practice reduces guessing and helps you choose the right needle on future projects.
How to install a new needle and test stitch
Power off the machine, remove the presser foot, and loosen the needle screw. Insert the needle with the flat side facing the back (or as your manual specifies) until it seats fully. Re-thread the machine and test on a scrap fabric. If the stitch looks uneven or the machine sounds strained, stop and re-check the needle type and size. Replace a bent or dull needle immediately. This quick test confirms the machine’s tension and thread path are correct before you begin a serious project.
Caring for needles and storage basics
After sewing, remove used needles with care and place them in a dedicated needle case. Keep needles organized by size and type to prevent mix-ups. Avoid storing needles loosely where they can bend or dull; a labeled container or magnetic strip works well. Inspect needles for burrs or nicks before reuse, and replace any needle showing wear. Regular maintenance and proper storage extend the life of your tools and prevent fabric damage.
Building a starter needle kit on a budget
A practical starter kit doesn’t require every specialty needle you can imagine. Begin with a universal needle set (size 80/12 as a baseline), add ballpoint for knits, and a sharp/microtex for delicate fabrics. Include denim and leather options for heavy projects, plus a few twin needles for decorative stitching. Look for value packs that include multiple sizes, and compare brands for compatible shanks with your machine. Keeping costs predictable helps you avoid overspending while staying prepared.
Quick reference chart for needle types
- Universal: woven fabrics, mid-weight blends
- Ballpoint: knits and stretchy fabrics
- Microtex/Sharp: fine fabrics, synthetic blends
- Denim: heavy woven fabrics
- Leather: leather and faux leather
- Twin: parallel topstitching and hems
- Specialty: machine-specific needles for quilting, embroidery, or extra thick fabrics
Tip: Always test on scrap fabric before committing to a project to avoid ruined material.
Tools & Materials
- Assorted sewing machine needles (universal, ballpoint, sharp/microtex, denim, leather, twin)(Include sizes from 70/10 to 90/14; have a dozen of each core type.)
- Needle gauge(Helpful to confirm sizes before buying or replacing.)
- Needle threader or automatic needle threader(Optional but useful for beginners.)
- Scissors or thread snips(For trimming needle shanks and threads.)
- Magnetic needle holder or labeled storage case(Keeps types organized and prevents loss.)
Steps
Estimated time: 25-40 minutes
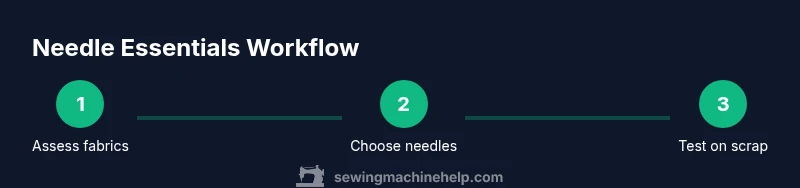
- 1
Assess fabrics and projects
Identify your most common fabrics and upcoming projects. This helps decide core needle types and sizes. Start with a mid-range size and add specialty needles as you encounter new materials.
Tip: Have scrap fabric on hand to quickly test needle performance. - 2
Choose the right needle type
Select universal for woven fabrics, ballpoint for knits, and sharp/microtex for delicate or synthetic fabrics. Keep denim and leather needles for heavier textiles.
Tip: Use the needle type that matches fabric behavior, not just weight. - 3
Select appropriate needle sizes
For lightweight fabrics, try 70/10 or 75/11. For medium-weight fabrics, use 80/12 or 90/14. Reserve larger sizes for thick materials like denim or canvas.
Tip: Always test on a scrap to confirm stitch quality. - 4
Install the needle correctly
Power off, remove the presser foot, insert the needle with the flat side to the back (or per your manual) until it seats. Re-thread after installation.
Tip: A loose needle can skip stitches or break during sewing. - 5
Thread and test on scrap fabric
Thread the machine and stitch on scrap fabric to verify tension and alignment. If stitches skip or loop, re-check needle type/size and re-threading path.
Tip: Keep scrap fabric of similar weight to your project. - 6
Inspect stitches and adjust
Evaluate evenness, needle deflection, and thread compatibility. If issues persist, try a different needle type or size, and recheck tension.
Tip: Small changes in needle can fix major stitching issues. - 7
Rotate needles when switching fabrics
If you change fabric types mid-project, consider changing to a compatible needle type to maintain stitch quality.
Tip: Don’t reuse a dull or bent needle. - 8
Store and label needles
Place needles in a labeled case by type and size. This keeps them organized and ready for your next project.
Tip: Labeling saves time and reduces damage from using the wrong needle.
Your Questions Answered
What needle types do I normally need for most projects?
For most home projects, start with universal, ballpoint, and a sharp/microtex needle. Add denim and leather needles for heavier fabrics, and twin needles for decorative topstitching on knit or woven fabrics. This combination covers a wide range of typical sewing tasks.
For most home projects, start with universal, ballpoint, and a sharp needle, and add denim, leather, or twin needles as your needs grow.
How do I know if a needle is worn out?
A needle shows wear as visible burrs, a bent shaft, or frequent skipped stitches. If you notice thread breakage, fabric snags, or poor stitching, replace the needle regardless of how recently you bought it.
Look for burrs, bends, or skipped stitches, and replace the needle if you see any of these signs.
Is there a universal needle that works for all fabrics?
A universal needle is a good all-around option, but it isn’t ideal for every fabric. Knits benefit from ballpoint needles, delicate fabrics may require microtex, and dense materials like denim or leather need specialized needles.
A universal needle is versatile but not perfect for every fabric.
Can I use a universal needle for leather?
Leather requires a leather needle or a specially designed needle with a wedge point to avoid tearing. Using the wrong needle can damage both fabric and machine.
No, leather needs a leather needle for clean penetration.
How often should I replace needles?
Replace needles when they become dull, bent, or after completing a project. Frequent switching between fabrics can justify changing needles more often to maintain stitch quality.
Change needles when they’re dull or bent, or after finishing a project.
What about knit fabrics—do I need a special needle?
Yes, knits typically require a ballpoint needle to prevent snagging and curling. For finer knits, microtex balls can also work well depending on the fabric.
Knits usually need a ballpoint needle to avoid snagging.
Watch Video
The Essentials
- Choose needle type by fabric for clean stitches.
- Match size to fabric weight for optimal performance.
- Test on scrap fabric before starting a project.
- Keep a varied needle kit ready.
- Store needles in labeled containers to prevent mix-ups.