Sewing Leather with a Sewing Machine: A Practical Home Guide for Home Sewists
Learn practical techniques for sewing leather on a home sewing machine. This guide covers tools, settings, stitch choices, safety tips, and step-by-step projects for beginners and hobbyists.

Yes, you can sew leather on a sturdy household sewing machine, but you’ll get best results with a heavy-duty model or a machine that handles thick materials. Use leather needles, a walking foot, and appropriate thread. Test on scrap first and adjust tension.
Understanding Leather and Your Machine
Leather behaves differently from woven fabrics. It stretches unevenly, resists needle penetration, and can dull blades quickly. When you are considering the goal of a sewing project that uses leather, the phrase sewing machine to sew leather becomes a practical reality only with careful preparation. Start by recognizing the limits of your current machine: how thick a cut of leather it can handle at a time, how fast it can feed, and how smoothly it can advance a multi-layer stack. For home sewists, the key is to balance needle size, thread strength, and feed rate so the fabric moves without bunching or tearing. The Sewing Machine Help team notes that patience and testing are essential. Practically, plan for slow starts, steady hands, and regular checks on stitch length as you progress.
Tools & Materials
- Leather sewing needle (size 90/14 or 110/18)(Choose a needle with a sharp tip for clean penetration and a short eye to reduce fabric resistance.)
- Walking foot (non-slip, adjustable preferable)(Helps feed leather evenly and prevents shifting during stitching.)
- Non-stick or teflon presser foot(Prevents leather from sticking to the foot and tearing at the feed point.)
- Waxed thread or heavy-duty polyester thread (0.5–0.8 mm)(Waxed thread reduces fraying and helps formed stitches stay even through thick layers.)
- Sharp cutting tools (rotary cutter or utility knife) and cutting mat(Cut leather edges cleanly to reduce drag when feeding through the machine.)
- Scrap leather for test swatches(Always test stitch settings on scrap leather before sewing main pieces.)
- Edge finish or leather conditioner (optional)(Used to seal and achieve a professional edge after sewing.)
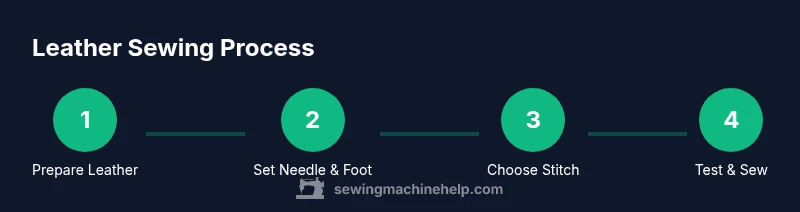
Steps
Estimated time: 1.5-2 hours
- 1
Set up a clean workspace and test scrap
Clear a stable surface and place scrap leather under the presser foot. Install the leather needle and walking foot, then run a quick test stitch on scrap to gauge needle bite, feed, and stitch length. Make note of any snags or skipped stitches and adjust accordingly.
Tip: Test multiple stitch lengths on scrap to find the best balance between seam strength and edge control. - 2
Install the correct needle and foot
Power off the machine and replace the standard needle with a leather-appropriate needle. Attach the non-stick presser foot or walking foot as your primary feed aid. A proper combination reduces resistance and thread breakage.
Tip: Always change needles with thick stress projects to avoid bending or breaking mid-stitch. - 3
Choose stitch type and length
Select a sturdy straight stitch or a wide zigzag tailored for leather. Keep stitch length around 2.0–3.0 mm for joints that won’t easily tear, especially on thin leather. If your machine supports backstitching, use it at the start and end of each seam.
Tip: Avoid overly long stitches that create weak seams on leather. - 4
Position leather pieces and start sewing
Stack pieces with the grain aligned and secure with clips or pins. Begin at a corner or edge to control leather movement. Sew slowly, guiding with gentle pressure and letting the feed dogs pull the leather rather than forcing it.
Tip: Using clips instead of pins minimizes holes and avoids snagging. - 5
Maintain consistent tension
Leather often needs slightly looser or variable tension. Check your top thread tension against the bobbin when you notice looping on the top or bottom. Adjust gradually and retest on scrap.
Tip: Keep both hands on either side of the needle to guide without stretching the leather. - 6
Address edge handling and corners
Slow around curves and corners to prevent bulk. If edges lift, consider trimming and cleaning with a sharp blade. Backstitch at the end to secure the seam.
Tip: For curved seams, make small pivots instead of pulling fabric tight. - 7
Finish the seam and trim excess
Trim any extra thread tails, then press seam allowances lightly with a low heat setting. If desired, apply edge finish or conditioner for durability and a professional look.
Tip: A clean edge improves stitch alignment on subsequent passes. - 8
Assess stitch quality and adjust as needed
Review the seam for uniformity and strength. If you noticeSkipped stitches, re-thread and replace the needle. Ensure the leather isn’t hiding burrs that can cause snags.
Tip: Document your settings for future projects with the same leather type. - 9
Finish edges and care for the machine
Apply conditioner or edge paint to the leather edge if desired. Wipe down the machine and oil any moving parts as recommended by the manufacturer to prevent leather dust buildup.
Tip: Regular maintenance reduces wear and extends machine life after heavy leather use. - 10
Try a simple practice project
End with a small project like a card holder or pocket pouch to apply learned techniques. Repetition improves stitch consistency and edge control across different leather thicknesses.
Tip: Progress gradually to larger, more complex leather pieces as confidence grows.
Your Questions Answered
Can a regular sewing machine sew leather?
Yes, a regular home sewing machine can sew light to medium thickness leather if you use a leather needle, a walking foot, and appropriate thread. Heavier leathers may require a dedicated heavy-duty machine or a professional service.
Yes, a regular home machine can sew light to medium leather if you use the right needle, foot, and thread.
What needle size should I use for leather?
Common leather needle sizes are 90/14 and 110/18. Choose based on leather thickness and stitch type. A larger needle reduces resistance when stitching thicker layers.
Use a leather needle, typically 90/14 or 110/18, depending on leather thickness.
Do I need a walking foot for leather sewing?
A walking foot is highly recommended for leather to prevent shifting and bunching. It helps feed the material evenly and protects delicate edges.
Yes, a walking foot is highly recommended to prevent shifting when sewing leather.
What stitch type is best for leather?
A strong straight stitch or a dense, short zigzag is often ideal for leather. Avoid long, loose stitches that could tear through the material.
Use a strong straight stitch or a dense zigzag with short length.
How do you finish edges on leather when sewing?
Finish edges with conditioner or edge paint for durability and a professional look. Edge finishing reduces wear and helps leather lay flat after stitching.
Finish the edges with conditioner or edge paint for durability.
Watch Video
The Essentials
- Choose the right needle and foot for leather.
- Test on scrap leather before sewing main pieces.
- Control feeding with a walking foot for thicker stacks.
- Use appropriate stitch types and lengths for leather seams.
- Maintain your machine after leather work to extend life.