Steps to Draw and Label a Sewing Machine: Beginner Guide
Learn step-by-step how to draw and label a sewing machine with clear diagrams, practical labeling tips, and safety reminders for beginner sewists. This guide uses practical visuals and a repeatable workflow to build confidence for repairing, threading, and maintenance.

You will learn to draw a simple, accurate diagram of a standard sewing machine and label its key parts, including the needle area, presser foot, feed dogs, take-up lever, bobbin case, and spool pin. This guide emphasizes clear labeling, consistent scale, safety notes for beginners, with arrows and concise descriptions for reuse.
Why tracing and labeling a sewing machine matters
For home sewists, a clear diagram of a sewing machine is a valuable study aid. By drawing the machine and labeling its parts, you build a mental map that makes repairs, threading, and routine maintenance easier. The steps on how to draw and label a sewing machine provide a structured approach that beginners can follow to build confidence. According to Sewing Machine Help, visual references accelerate learning because beginners can connect names to shapes before tackling hands-on tasks. This section explains why a labeled sketch is more than art – it’s a practical tool you’ll reuse while you read manuals, watch videos, or follow repair steps. Start with a simple silhouette and a few major parts, then expand as you gain confidence. When you draw, aim for consistent scale across the drawing so that labels point to the correct areas without crowding neighboring components. Use light pencil lines first, then darken labels once you’re satisfied with position. Remember: the goal is clarity, not artistic perfection. A well-labeled diagram helps you communicate with others, track parts when following a troubleshooting guide, and retain information longer than a plain photo.
Understanding the key parts to label
A sewing machine has many small parts, but you only need to label the major components to build familiarity. Start with the needle area, presser foot, feed dogs, bobbin case, take-up lever, thread spool, and tension discs. For each part, note its basic function in a brief label: for example, 'Thread spool: holds the thread supply' or 'Tension discs: regulate thread tightness.' Use arrows to connect labels to parts and keep the labels horizontally aligned to avoid visual clutter. If your drawing includes a top-cover or needle plate, add callouts for the stitch selector, reverse stitch lever, and handwheel. Consider creating two versions: a clean line drawing for learning labels and a shaded version for visual emphasis. If you’re unsure about a part’s exact name, reference your machine’s manual, or note a widely accepted generic term. The aim is to create a practical map that you can reference quickly during practice sessions or when following repair steps.
Preparing your drawing: scale, tools, and references
Preparation reduces frustration later. Decide on a simple scale (for example, 1:2 or 1:3) so positions stay proportional. Gather basic drawing tools: pencil, erasable ink pen, ruler, template circle, and an eraser. Collect reference photos of your specific machine model if possible; labels should be generic at first to avoid confusion. Before you start, sketch a light outline of the machine’s silhouette. Then plan label placement: place labels outside the silhouette or above the parts to minimize overlap. If you’re labeling in a language other than English, consider keeping bilingual callouts for future learners. Save a clean version with constant margins so you can reproduce it for different projects. Finally, set up a legend that defines any unusual icons or abbreviations you use. The goal is to create a reusable diagram that remains legible as you add more parts or adjust labeling.
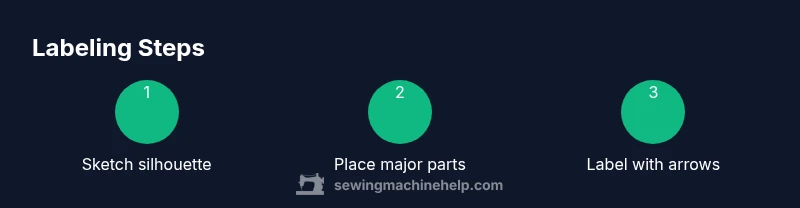
Step-by-step drawing process
Start by drawing a light, simple silhouette of the machine to establish proportional size. Add major shapes: a rounded rectangle for the body, a circle for the handwheel, and a small rectangle for the needle area. Keep lines faint so you can adjust later. Next, add the major components in their approximate locations using basic shapes—needle area, presser foot, feed dogs, bobbin case, take-up lever, and spool pin. After the silhouette feels correct, refine each shape to reflect a more accurate outline, but avoid heavy shading. Finally, test your labeling plan by projecting arrows from label callouts to their targets, ensuring arrows do not cross or crowd each other. This process emphasizes accuracy over embellishment and gives you a solid, reusable diagram for manuals and troubleshooting.
Labeling tips: arrows, fonts, and consistency
- Use bold, dark arrows with a short label near the point of reference. Prefer arrows that point from the label to the exact feature.
- Choose a clean sans-serif font and keep label size consistent across all parts. If you must shorten names, use standard abbreviations you’ll recognize later.
- Align labels on a grid: top rows for components on the machine’s upper surface, bottom rows for parts near the base.
- Color-code categories like moving parts (blue) and stationary parts (gray) to improve readability.
- Always place legends for any symbols or abbreviations used.
Tools & Materials
- Pencil (HB or 2H)(For initial sketch and light guidelines)
- Erasable ink pen(For final lines after planning is complete)
- Ruler or drafting ruler(For straight edges and aligned labels)
- Template circle or circle stencil(Helps keep label bubbles uniform)
- Paper or drawing pad(Prefer smooth surface for clean lines)
- Eraser(To lift stray marks and adjust layout)
- Reference manual or model photos(Helpful for accurate part names)
Steps
Estimated time: 60-75 minutes
- 1
Set drawing scale and gather references
Decide on a simple scale (e.g., 1:2) to keep proportions consistent, and collect reference images or diagrams of similar machines. This foundation reduces later guessing and ensures labels align with the drawn silhouette.
Tip: Start with a clean reference picture; print or trace the silhouette for accuracy. - 2
Draw the rough silhouette
Sketch a light outline of the machine using simple shapes: a rounded body, a circular handwheel, and a compact base. The goal is a proportional framework you can refine.
Tip: Keep lines very light; you will erase and adjust as you refine the shape. - 3
Add major components as simple shapes
Place the needle area, presser foot, feed dogs, bobbin case, take-up lever, and spool pin using basic blocks. Do not worry about fine details yet—focus on placement.
Tip: Use light construction lines so you can shift parts without messy erasure. - 4
Refine outlines into accurate contours
Turn rough blocks into smoother, more precise shapes that resemble your machine. Check alignment with the silhouette and adjust as needed.
Tip: Compare with your reference; correct any obvious distortions before labeling. - 5
Plan label placement and arrows
Mark where each label will go and draw faint arrows to the intended part. Aim for horizontal alignment and avoid overlapping labels.
Tip: Label positions should be outside the silhouette or at the edge to prevent crowding. - 6
Add labels with clear callouts
Write full part names or concise descriptors near each arrow. Use a consistent font and size across all labels.
Tip: Keep labels legible; avoid cramping text inside small callout bubbles. - 7
Review readability and adjust spacing
View the diagram from a distance to assess legibility. Tweak label spacing and arrow lengths if labels appear crowded.
Tip: Print a test copy to visualize real-world readability. - 8
Finalize and export the diagram
Darken the final lines, tighten label alignment, and ensure arrows point clearly. Save a clean version for printing and a draft version for editing.
Tip: Consider keeping both color and monochrome versions for different uses.
Your Questions Answered
What is the best paper and pencil setup for drafting a sewing machine diagram?
Choose a plain, smooth drawing paper and a light pencil for the initial sketch. Use an eraser frequently, and switch to a fine pen for the final callouts. A clean surface helps maintain precision.
For drafting, start with smooth paper and a light pencil, then finalize with a fine pen after layout is confirmed.
Should I color-code parts, or keep the diagram monochrome?
Color-coding can improve readability, especially in complex diagrams. If you use color, keep a legend and stay consistent across all labels. For beginners, monochrome diagrams with strong contrast also work well.
Color can help, but always include a legend and stay consistent.
How detailed should the diagram be for a beginner?
Start with the major parts and simple shapes. Add smaller components gradually as you become comfortable. Avoid overloading the diagram with fine details too soon.
Begin with major parts, then add details as you get more confident.
How can I ensure labels stay readable when printed in small sizes?
Use a clean sans-serif font, keep text concise, and choose label sizes that remain legible at typical print resolutions. Test at actual print size whenever possible.
Test print size to confirm readability.
Can I reuse the same diagram for different sewing machine models?
Yes, by labeling major, common components you’ll find on most machines. For model-specific parts, add a note or a secondary callout. This keeps your core diagram versatile.
Reuse the core diagram and add model-specific notes as needed.
What if I’m unsure about a part’s correct name?
Refer to the machine’s user manual or a reliable online resource to confirm standard terminology. If unsure, use generic descriptive terms and update later.
Check the manual or reliable sources to confirm terms.
Watch Video
The Essentials
- Label major parts for quick recognition
- Maintain consistent scale and arrows
- Keep handwriting legible and uniform
- Plan layout before finalizing labels
- Create reusable diagrams for manuals