Sewing Machine Drawing Easy: Step-by-Step Guide for Beginners
Learn to draw a sewing machine easily with a clear, step-by-step method, practical visuals, and beginner-friendly guidance from Sewing Machine Help.

You will learn to draw a sewing machine in easy, approachable steps. This guide covers basic shapes, proportion tricks, and simple shading to create a clean illustration you can replicate. Gather a pencil, eraser, and paper, then follow the step-by-step prompts to build confidence before moving to more complex sketches.
Why drawing a sewing machine helps beginners
Drawing a sewing machine is more than an art exercise; it helps you understand how the parts relate to each other. When you sketch a machine, you clarify the positions of the feed dogs, needle, presser foot, and handwheel. This foundational practice builds spatial awareness, strengthens observation skills, and sets a confident baseline before moving on to actual repairs or maintenance. For home sewists, a quick drawing can serve as a mental map when following repair guides or servicing your machine. Consistent practice also reinforces proportions, which translates into faster, more accurate troubleshooting and setup on real machines. By starting with simple shapes and steady steps, you reduce intimidation and keep motivation high during learning.
Essential materials and setup
Before you start, assemble basic tools: a pencil (HB lead), a kneaded eraser for highlights, a sharp graphite pencil for dark shading, and plain drawing paper. A light source from the right helps you perceive shadows consistently. Optional: a ruler for clean, straight lines and a blending stump for soft shading. Keep an eraser handy to test proportions without committing to ink. Set your paper on a stable surface and position reference images at eye level to compare shapes and angles as you work.
Step 1: Outline the basic shapes
Begin with a simple rectangle for the machine base and a curved arc for the neck. Add a vertical cylinder at the back to imply the motor housing. The goal is clean, simple shapes that convey overall form, not every screw. Proportion matters: the base should feel stable; the arm should extend upward without overpowering the machine body. Tip: draw light construction lines to adjust as you go. If the proportions look off, compare the base width to the height of the neck and adjust before committing to darker lines.
Step 2: Add the needle area and arm
Draw the arm extending from the body, ending in the needle bar. Indicate the presser foot just beneath the needle by a small rectangle connected to the arm. Sketch the vertical needle clamp and a hint of the needle. This step sets the focal point of your drawing, so keep lines slightly darker here. Don’t worry about tiny screws yet; focus on the larger shapes that define character and pose.
Step 3: Refine proportions and features
Refine the shape by smoothing corners and aligning the needle area with the arm. Add the spool pin, thread path, and a hint of bobbin cover. Use light shading to differentiate metal surfaces from plastic parts. Maintain consistent line weight to keep the drawing cohesive. If you notice symmetry drift, flip the paper or view it in a mirror for a quick check and correct accordingly.
Step 4: Add shading and texture
Decide a light source and apply shadow on the opposite sides. Use short, parallel strokes to mimic metal texture on the body and a softer gradient for plastic housing. Keep reflections subtle to avoid a flat look. A quick highlight on the handwheel can suggest curvature. Build depth gradually by layering light strokes rather than heavy, single lines.
Step 5: Finalize line work and clean up
Review your lines, reinforce main contours, and erase construction marks. Consider adding a soft background or shadow to anchor the machine on the page. If you want, ink over the final lines lightly or scan the drawing for digital refinement. This step is about making the drawing feel complete and ready for display or reference in a repair guide.
Step 6: Practice variations and quick drills
Draw the same machine from different angles—side, front, and three-quarter views. Try simplified cartoon versions to reinforce proportions without getting bogged down in details. Regular short practice sessions improve accuracy faster than long sporadic attempts. As you practice, compare your sketches to simple reference photos to train your eye for proportional relationships.
Common mistakes and how to fix them
Overcomplicating early sketches leads to confusion; start with basic shapes and gradually add details. Uneven line weight can disrupt readability; use consistent pressure or adjust your pencil tip. Ignoring light and shadow results in flat drawings; always plan a light source before shading. If proportions drift, step back to the original shapes and re-establish an anchor for the parts before proceeding.
Practice plan for a week
Plan a 7-day micro-practice routine: Day 1-2 outline shapes, Day 3-4 add features, Day 5-6 shade, Day 7 create a finished sketch. Short daily sessions improve retention and confidence. Use reference photos of different machines to vary your practice and to see how different models affect silhouette and detail. Track progress in a small sketchbook to stay motivated.
Quick exercises for busy days
If you only have 5 minutes, sketch a simple base silhouette and a basic needle area. Keep the exercise short and repeatable. Over time, this builds habit and reduces friction when you have longer sessions. Even quick doodles reinforce proportional knowledge and help you see shapes more clearly in real-world machines.
Resources and next steps
Seek additional drawing references from sewing manuals and manufacturer guides, but also practice with personal sketches and real machines. For more advanced techniques, pair drawing with basic machine maintenance tasks to reinforce understanding of parts and functions. Regularly review your sketches alongside the actual machine to sharpen recognition and improve your ability to transfer learning to repairs.
Tools & Materials
- pencil (HB)(for outlines and shading)
- kneaded eraser(for lightening areas and highlights)
- graphite pencil (2B/4B)(for darker shading)
- drawing paper (smooth)(to keep lines crisp)
- ruler(for clean edges if desired)
- blending stump(for soft shading)
- sharpener(to maintain a fine tip)
Steps
Estimated time: 25-40 minutes
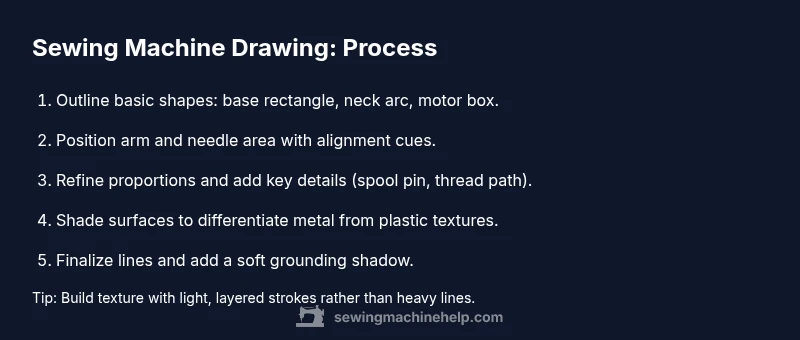
- 1
Outline basic shapes
Start with a light rectangle for the base, a curved arc for the neck, and a small box for the motor housing. Keep lines loose and avoid locking in details yet. Compare proportions as you go and adjust the balance of the form before moving to details.
Tip: Use gentle, guiding strokes and keep construction lines visible until the overall shape reads correctly. - 2
Position neck and arm precisely
Extend the neck from the base and define the arm’s direction. Sketch the main lines of the arm and indicate where the needle bar will sit. Establish a light vertical guideline to maintain alignment between parts.
Tip: Check the angle of the arm against the base; small shifts here dramatically affect overall likeness. - 3
Define the needle area and presser foot
Add the needle area, needle bar, and a small rectangle for the presser foot. Sketch the thread path and spool pin with minimal detail at first. Keep these elements proportional to the body for believable accuracy.
Tip: Don’t press hard; you want to be able to erase and refine with ease. - 4
Add details and refine features
Incorporate details like the bobbin cover and screw placements. Refine edges, smooth corners, and ensure the thread path connects realistically. This step anchors the drawing in authenticity without overcomplicating the sketch.
Tip: Use light cross-contour hints to suggest metal texture without heavy marks. - 5
Shade for depth and texture
Choose a light source and shade opposite sides. Use fine lines for metal surfaces and softer gradients for plastic. Build depth gradually by layering and avoiding dense, uniform shading.
Tip: Preserve white highlights on curved edges to emphasize form. - 6
Finalize and review
Reinforce main contours, erase stray marks, and add a simple grounding shadow if desired. Review the proportions again and adjust any areas where alignment feels off. Save your finished sketch for reference.
Tip: Compare your final with the initial shapes to ensure consistency.
Your Questions Answered
What is the easiest way to start a sewing machine drawing?
Begin with basic shapes to capture the machine’s silhouette. Slowly add details, checking proportions as you go. This keeps the drawing approachable while building accuracy.
Start with simple shapes to capture the silhouette, then add details. It keeps the process steady and accurate.
Which materials do I need for beginners?
A plain pencil set, eraser, drawing paper, and a comfortable drawing surface are enough to begin. Optional tools include a ruler for precision and a blending stump for subtle shading.
Grab a pencil, eraser, paper, and a stable surface. Optional items can help with precision and shading.
How long does it take to become proficient at drawing a sewing machine?
Proficiency grows with regular practice. Short daily sessions over a few weeks typically yield noticeable improvements in proportions and shading.
With daily practice, you’ll see steady improvement in a few weeks.
Can this drawing practice help me understand real machine parts?
Yes. Sketching helps map where parts are located and how they relate, which complements hands-on maintenance guides and parts identification.
Sketching helps you see where parts sit and relate to each other, aiding maintenance learning.
Do I need special paper or pencils for better results?
Any smooth drawing paper with a basic graphite pencil works well for beginners. Upgrade to softer pencils or shaded papers as you advance.
A smooth page and a standard pencil are enough to start; you can upgrade later as you improve.
Watch Video
The Essentials
- Start with simple shapes to establish form
- Keep lines light and adjustable
- Use shading to convey metal vs plastic surfaces
- Practice from different angles for better understanding
- Commit to short, consistent practice sessions