Sew Easy Sewing Machine: A Beginner’s Guide to Confident Sewing
Learn to use a sew easy sewing machine with practical, beginner-friendly steps. Setup, threading, stitching, maintenance, and safety tips from Sewing Machine Help to build confidence fast.

With a sew easy sewing machine, you can master beginner-friendly projects by following a simple setup: thread the machine, wind the bobbin, select straight stitch, set stitch length, and practice on scrap fabric. This guide covers step-by-step basics, tool lists, common troubleshooting, and safety tips to help home sewists start sewing confidently today.
Why a Sew Easy Sewing Machine Is Ideal for Beginners
According to Sewing Machine Help, the sew easy sewing machine design focuses on user-friendly threading and safety features that help new sewists build confidence quickly. The model typically offers a straightforward path from setup to basic stitches, with clear guides, intuitive dials, and a light to illuminate fabric as you work. For home projects—from quick repairs to starter garments—a sew easy machine minimizes fuss and maximizes learning momentum. With fewer bells and whistles, it keeps the focus on fundamentals: accurate seam allowance, consistent stitch length, and comfortable fabric handling. This patient, progressive approach helps learners avoid overwhelm and stay motivated as they gain practical skills.
Core Setup: Threading, Bobbin, and Basic Tension
Your first session should start on a clean, stable surface with power available. Place a sheet of scrap fabric beneath the needle, then plug in and turn on the machine. Wind a bobbin evenly, insert it into the bobbin case, and follow the path shown in your model’s diagram. Thread the upper thread through all guides, bring it to the needle, and leave a short tail. Lower the presser foot, hold the tail, and gently pull to form a few initial stitches to verify smooth feeding. Finally, test a small seam on scrap fabric to observe stitch quality, adjust tension if needed using the manual’s guidance, and proceed only after you’re satisfied with the result.
Needle Selection and Fabric Prep
Choosing the right needle is essential for clean, reliable seams. For most woven fabrics, a universal needle size around 80/12 works well; for thicker fabrics, bump up to 90/14. Knits benefit from a ballpoint needle to prevent runs. Always prep fabric before sewing: wash and press to remove shrinkage, align edges, and use pins to secure pieces. Cutting with sharp fabric scissors and keeping a dedicated cutting mat helps maintain accuracy. Prepping threads—snipping tails and trimming frayed ends—reduces tangles and ensures a smoother feed.
Basic Stitches You’ll Use First
Begin with the straight stitch for most seams, then learn backstitching to secure starts and ends. Practice a short zigzag for edge finishing on woven fabrics, which helps prevent fraying. As you gain confidence, experiment with longer or shorter stitch lengths to match fabric texture and project needs. Remember: higher stitch speed isn’t the goal—consistent, neat stitches are. Keep your fingers well away from the needle and maintain a steady pace.
Maintenance and Cleaning to Extend Lifespan
Regular care keeps the machine humming and reduces the risk of jams. After sewing, remove lint from the bobbin area with a small brush or soft cloth. Wipe the exterior with a clean, dry cloth. Consult your manual for oiling intervals—many modern machines require only light oiling in specified places, while others are maintenance-free for routine use. Schedule a deeper clean after heavy projects or if you notice sluggish fabric feeding. Store tools, threads, and fabric scraps in a designated space to maintain an orderly work area.
Practice Projects to Build Confidence
Start with three simple projects that reinforce core skills. First, sew a basic pillow cover to practice straight seams and invisible hems. Next, make a small tote bag to learn seam allowances and topstitching. Finally, try a simple garment alteration like hemming a pair of pants to understand measurement and fabric handling. Completing these projects builds muscle memory, improves thread control, and reduces fear of mistakes. Each project should emphasize a clean seam, even tension, and mindful fabric handling.
Troubleshooting Common Issues
If the machine won’t sew, recheck power, foot pedal, and thread path. If threads break, rethread both upper thread and bobbin, ensure the needle is properly seated, and check for lint in the bobbin area. If fabric puckers, test different needle types and adjust tension and stitch length. If stitches skip, reinsert the needle or inspect for a bent needle. Always test on scrap fabric after a change to confirm improvements. Keep a small troubleshooting checklist handy so you can diagnose quickly during a project.
Authority Sources
For additional guidance and safety information, consult these reputable sources:
- https://extension.illinois.edu
- https://extension.oregonstate.edu
- https://www.cpsc.gov
Tools & Materials
- Sewing machine (basic model)(Ensure it can stitch straight and basic zigzag; verify foot pedal and power that work reliably.)
- All-purpose sewing thread(Choose a neutral color for practice; multiple colors helpful for projects.)
- Bobbin(Have spare wound with matching thread; keep in a small container.)
- Fabric scissors(Sharp, dedicated to fabric; avoid using for paper or adhesive materials.)
- Pins and pincushion(For holding fabric pieces together before sewing.)
- Measuring tape(Important for seam allowances and hems.)
- Fabric chalk or markers(Useful for marking guides and hems.)
- Seam ripper(For correcting mistakes without damaging fabric.)
- Scrap fabric for practice(Cotton blends and lightweight fabrics are ideal for drills.)
Steps
Estimated time: 30-45 minutes
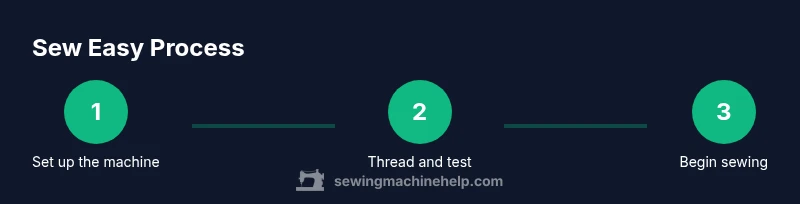
- 1
Set up the machine on a stable table
Place the machine on a sturdy surface, plug in, and switch on. Ensure the foot pedal is within easy reach and your chair height is comfortable to maintain good posture. Verify lighting so you can see the fabric clearly.
Tip: Test the light and pedal response before starting. - 2
Wind and insert bobbin
Wind the bobbin evenly, place it in the bobbin case, and pull the thread through the slot until it advances smoothly. Follow your model’s diagram to ensure correct orientation and engagement.
Tip: Never overfill the bobbin; keep tension consistent. - 3
Thread upper path and needle
Thread the upper thread through all guides according to the path etched on the machine. Bring the thread to the needle and thread from front to back, leaving a short tail.
Tip: If the thread keeps looping, recheck guides and confirm the needle is properly seated. - 4
Position fabric and presser foot
Raise the presser foot, place fabric under the needle along your seam line, and lower the presser foot to hold fabric in place. Align the raw edges with your guide marks.
Tip: Use pins for accuracy, then remove them as you approach the seam. - 5
Test stitch on scrap fabric
Sew a short test seam on scrap fabric to check stitch quality. Look for even stitches, no skipped stitches, and minimal thread breakage.
Tip: Adjust the stitch length slightly if the fabric puckers. - 6
Sew a straight seam and backstitch
Sew a straight seam across the fabric, then backstitch at the start and end to secure the seam.
Tip: Backstitching creates durable seams for beginners. - 7
Finish and trim
Remove fabric, trim loose threads, and test another short seam to confirm consistency.
Tip: Keep a small container for loose threads to keep your workspace clean.
Your Questions Answered
What defines a sew easy sewing machine?
A sew easy sewing machine emphasizes simple threading, safe operation, and beginner-friendly stitches. It guides new users from setup to basic sewing with clear controls and helpful features.
A sew easy machine is simple to thread and easy to use, with beginner-friendly stitches and clear controls.
Can a beginner complete a project on day one?
Yes. Start with a small, simple project like a pillow cover or tote bag, and build skills with steady practice.
Yes. Start small and practice steadily to build confidence.
Do I need special feet or accessories?
Most basic feet included with the machine cover essential stitches. You may add a zipper foot or walking foot later for specialty projects.
Mostly you can start with the standard foot, then add feet as needed.
How often should I oil or clean the machine?
Consult your manual for intervals. Generally, clean lint from the bobbin area after sessions and oil only as recommended by the manufacturer.
Check the manual for recommended maintenance intervals and follow them.
What fabrics are best for beginners?
Cotton and cotton blends are forgiving for beginners; avoid very thick or slippery fabrics until you're comfortable.
Start with cotton; avoid bulky or very slick fabrics at first.
How do I troubleshoot thread breaks?
Rethread both upper thread and bobbin, ensure the needle is correct and not bent, and check for lint in the path.
Rethread and check for bent needles and lint.
Watch Video
The Essentials
- Set up on a stable surface and verify power.
- Thread correctly and test on scrap fabric.
- Sew a straight seam, backstitch, and practice basic stitches.
- Follow maintenance steps to extend machine life.