Do You Need a Knot After Sewing? A Practical Finishing Guide
Explore whether you should tie a knot after sewing, how backstitching secures ends, and fabric-specific finish tips. This guide from Sewing Machine Help covers techniques, troubleshooting, and best practices for clean, durable seams.

Yes and no. Most machine-sewn finishes are secured by backstitching to lock stitch tails, not by tying a knot. Knots can bulk the seam and show through lightweight fabrics. Use backstitch, trim tails neatly, and press for a clean finish. There are exceptions for slippery threads or specialty projects where a brief hand tie-off may be appropriate.
Do you need to tie a knot after using a sewing machine?
The recurring question from home sewers is whether a manual knot is necessary after finishing a seam. The short, practical answer is that most machine finishes rely on backstitching to lock stitch tails. Manual knots can create bulk, show through lightweight fabrics, or slip if pulled. By understanding stitch formation and how to use backstitch, reverse, and tail-trimming, you can finish ends cleanly. There are exceptions—on slippery threads, very long tails, or specialty projects, a brief hand tie-off may be appropriate. The goal for beginners is to achieve a secure finish without bulky knots, while experienced sewists learn when a hand finish is warranted. Always refer to your machine manual for backstitch options and practice on scrap fabric before finishing a real project.
The science of stitch finishes: backstitch vs knots
Sewing machines are designed to lock thread ends automatically at the seam’s end. A backstitch creates a short sequence of stitches that anchors the tail and resists unraveling. This locking action relies on stitch formation, tension, and fabric feed; if any element is misadjusted, tails can slip. Knots, by contrast, depend on a looped tail that can shift with movement or fabric stretching. On most fabrics, backstitching delivers a durable finish quickly and with minimal bulk. When you engage backstitch, the machine works through the final stitches in reverse, creating a tiny lock that resists pull-out. After finishing, trim tails neatly and press. In specialty fabrics—like slippery silk, jersey knits, or coated materials—careful tail length and backstitch timing help prevent bulk at the seam line.
When to backstitch and when to tie knots make sense
Backstitching is the default finish for woven fabrics and most synthetic blends. Tie knots may be useful only in rare cases: when the thread is unusually slippery, when a seam end needs a temporary hold during construction, or when the design calls for a rustic, hand-finished look. For knits, you might reduce hassle by using a short backstitch with a zigzag or stretch stitch to accommodate fabric movement. When sewing with very short tails or when the seam will be heavily stressed (as in upholstery), you could consider a double-backstitch or a hand-tied knot as a manual reinforcement, but this should be sparing and tested first.
Practical finish techniques by fabric type
Fabric type dictates how you finish ends. For lightweight cotton or linen, backstitch twice—once in the forward direction and once in reverse—then trim tails close to the fabric surface. For knits and stretch fabrics, use a stretch stitch or a small zigzag to allow for fabric elongation, and then backstitch to secure. For satin or chiffon, reduce tail length and avoid bulky knots that may show through the fabric; a clean, single backstitch is often best. For heavy fabrics like denim or canvas, a longer backstitch or a two-step process (backstitch an initial tail, sew a few reverse stitches, then backstitch again) creates a robust finish that withstands wear. Practice on swatches to adjust tension and needle size before committing to your garment.
Troubleshooting common finishing issues
If tails fray after washing or snag, re-sew the end with a fresh backstitch to reposition the lock. Loose tails indicate insufficient backstitch length or a thread tension issue; re-sew with a shorter stitch end and re-trim. A bulky knot on lightweight fabric usually means the tail was too long or backstitch was done with too much fabric bunching. For delicate fabrics, avoid excessive bulk by trimming tails to a slim length and letting the backstitch do the work. If your machine won’t backstitch, check that the reverse lever or button is engaged, the stitch length isn’t set to zero, and the needle is correctly installed. In most cases, a quick loop of the tail and a fresh backstitch resolves unraveling problems.
Maintenance and habit-building for secure finishes
Develop a routine that includes testing stitches on scraps, cleaning lint from the feed dogs, and adjusting tension before you begin a project. Always backtest the end of a seam on scrap fabric to confirm that your backstitch anchors the tail without creating extra bulk. Build a finishing checklist into your sewing workflow: set the stitch, sew to the end, backstitch, trim tails, press, and inspect. Keep a small pair of thread snips handy and replace dull needles, as blunt needles can damage thread and fabric and produce loose ends. With consistent practice, you’ll instinctively know when to backstitch, how long to backstitch, and when a hand finish is warranted for specialty fabrics.
Quick-start finish checklist you can print
- Prepare fabric and thread, select appropriate stitch, and raise the presser foot; test on scraps.
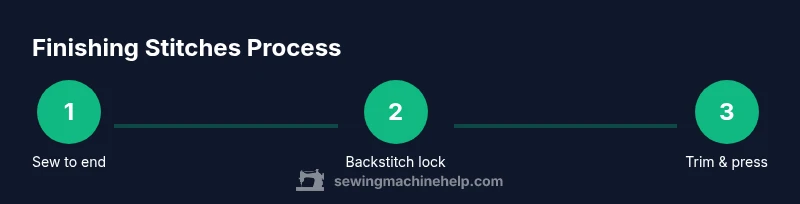
- Sew to the edge, then engage backstitch to lock the end.
- Backstitch for a short, secure tail, then trim tails close to the seam line.
- Press the seam to set the finish; consider a light touch with a tailor’s ham for delicate fabrics.
- Inspect for bulk, unraveling, or puckering; re-sew if necessary.
Tools & Materials
- Sewing machine with reverse/backstitch capability(Ensure it can perform a secure backstitch at the end of a seam)
- All-purpose sewing thread(Match fabric weight and fiber)
- Extra bobbins(For thread color changes and testing)
- Sharp fabric scissors(For clean tails and trimming)
- Seam ripper(To fix mistakes without damaging fabric)
- Pins and pincushion(Hold fabric layers during finishing)
- Measuring tape or ruler(Guide tail length and seam allowances)
- Fabric marking tool(Chalk or water-soluble pen for tail planning)
Steps
Estimated time: 30-40 minutes
- 1
Prepare fabric and tails
Place fabric under the presser foot and align the edge. Raise the needle, select a safe stitch length for the fabric, and test on scrap to confirm the tail length will backstitch cleanly.
Tip: Use a scrap swatch to test tension and tail length before sewing the actual seam. - 2
Sew to the end and prepare to backstitch
Sew to the seam end without pulling fabric. When you reach the end, stop with the needle in the down position and prepare to backstitch.
Tip: Keep the fabric smooth; avoid tugging to prevent puckering. - 3
Backstitch to lock the end
Engage reverse/backstitch and sew 3–5 stitches backward over the end, then resume forward stitching for a short tail.
Tip: Backstitch just enough to create a secure lock without creating bulk. - 4
Trim tails neatly
Lift the presser foot and trim the tails close to the fabric surface. Avoid leaving long tails that can snag or fray.
Tip: Leave a small, tidy tail that won’t slip back through the stitches. - 5
Inspect and re-finish if needed
Check the end for security. If tails pull loose, re-sew with a fresh backstitch and trim again.
Tip: Always test at higher tension on a scrap to prevent surprises on the garment. - 6
Finish with press and optional hand finishes
Press the seam to set the finish. For delicate fabrics, consider a light press and avoiding bulky knots; in some cases a brief hand finish may be warranted.
Tip: A light press helps set the threads and reduce bulk at the seam line.
Your Questions Answered
Do I always need to backstitch at the end of a seam?
In most cases, yes. Backstitching creates a small lock that resists unraveling and keeps tails secure. There are rare exceptions for specialty finishes or decorative effects where an alternative finish may be used after testing on swatches.
Yes, backstitch at the end of a seam is the standard method to secure stitches, with exceptions for specialty projects after testing on swatches.
Can I knot threads after sewing machine use on slippery fabrics?
Knotting is generally discouraged on slippery fabrics because knots can shift and create bulk. Instead, backstitch securely and trim tails. If absolutely needed, consider a brief hand tie-off and test on a scrap first.
Knotting slippery fabrics is usually not recommended; backstitch and trim tails, and only tie off by hand if you test first.
What if my machine doesn’t have a reverse stitch?
If reverse stitching isn’t available, you can manually backstitch by sewing a few stitches forward, then with the needle down, lift the foot briefly and backstitch by turning the fabric. Alternatively, you can finish with a secure hand-tied knot for special cases after testing.
Without reverse stitch, you can backstitch by hand or through careful forward stitches plus a manual lock, tested on scraps.
Is knotting recommended for hem finishes on delicate fabrics?
Generally, knots are avoided for hems on delicate fabrics because they can show through. A clean backstitch, sometimes with a tiny tail, and careful trimming is usually best. For decorative hems, a subtle hand tie-off may be used only after testing.
Knots are usually not recommended for delicate hems; backstitch and trim, testing on scraps first.
How long should thread tails be before trimming?
Tail length should be enough to secure the end with backstitch but not so long that it creates bulk. Start with a modest tail on scraps to learn what works for your fabric and machine.
Keep tails short enough to avoid bulk, but long enough to catch securely with backstitch.
Should I always press the seam after finishing?
Yes. A light press helps set the finish and reduce bulk along the seam line. Use a pressing cloth on delicate fabrics to avoid shine or damage.
Always give the seam a light press to set the finish and reduce bulk, using a cloth for delicate fabrics.
Watch Video
The Essentials
- Backstitch to lock stitch tails for most finishes.
- Knots are rarely necessary on standard fabrics.
- Match finish technique to fabric type and project goals.
- Practice on scraps to perfect tension and tail length.