How to End a Stitch on a Sewing Machine: Step-by-Step Guide
Learn how to end a stitch on a sewing machine with confident backstitching, proper thread trimming, and secure finishes. This educational guide helps beginners and home sewers achieve durable seams, with practical tips, common mistakes, and safe practices.

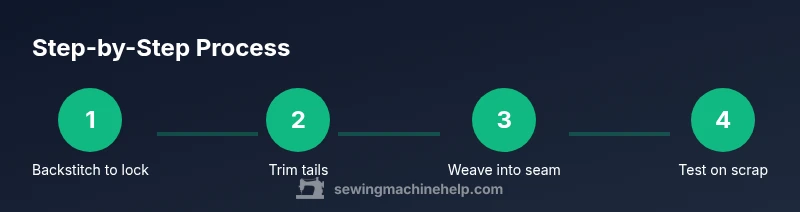
According to Sewing Machine Help, ending a stitch on a sewing machine involves backstitching to lock the seam, then trimming and securing both thread tails. Start by engaging the reverse/backstitch lever to stitch a few backward stitches, then lift the needle, raise the presser foot, and pull the fabric free with tails guided underneath. Always test on scrap first.
Why Ending Stitches Correctly Matters
How you finish a seam affects durability, fraying, and the overall look of your project. The exact moment you stop stitching determines whether a seam will hold up to stress, washing, and daily wear. For beginners, learning how to end a stitch on sewing machine is essential to avoid unraveling and puckering. According to Sewing Machine Help, a proper end keeps threads tidy, reduces bulk at corners, and makes future alterations easier. Start with a plan: choose a locking method, secure both thread tails, and verify that the needle is at the highest position before lifting the presser foot. Practicing on scrap fabric helps you nail the technique before working on your main project, especially when using delicate fabrics like silk or knit jerseys that show misends more quickly. Remember that consistent ends look more professional and reduce the need for seam ripping later.
Backstitch vs. Lock Stitch: When to Use Each
Backstitching creates a short reverse stitch that locks the end of a seam by tying the threads into place. It is the most common method for finishing seams in woven fabrics and is reliable for everyday sewing. A lock stitch, on the other hand, uses a special machine setting to automatically lock the end as it finishes the seam. Some machines offer a built-in lock stitch for extra security, which is useful when you anticipate heavy wear, such as on jeans or outdoor gear. When deciding which method to use, consider fabric type, thread weight, and the seam’s stress points. For light-fiber fabrics like chiffon, backstitching alone may suffice if you maintain even tension. For knits, you might combine a short backstitch with a small zigzag to prevent seam creep. In all cases, you should avoid leaving long thread tails to minimize snagging. Sewing Machine Help recommends testing both methods on fabric scraps to confirm the chosen approach holds up under stress.
Lock Ends Securely: Tails, Tension, and Thread Paths
A secure end requires proper handling of both the top thread and the bobbin thread. Begin by locking the top thread with backstitches, then ensure the bobbin tail also ends in a secure anchor beneath the fabric. If your machine uses a lower tension setting or a slippery fabric, you may need to shorten the tail length and gently tease the tails into the seam allowance to avoid visible bulk. When finishing, avoid pulling yarns harshly; instead, guide them smoothly under the presser foot to the underside. Consistency matters: a neat, invisible finish looks more professional and reduces complaints about loose ends in garments, household textiles, or crafts.
Step-by-Step Quick Guide to End a Stitch on a Basic Project
This section provides a concise plan you can reference while sewing. Begin by stitching a few reverse stitches to lock the seam, then continue with your regular forward stitch for a short interval beyond the seam. Lift the needle to the top position, raise the presser foot, and trim the top thread tail close to the fabric. From the underside, pull the bobbin thread to the surface and trim the tail flush. Finally, use a hand-sewing needle or tweezers to weave any tail ends into the seam allowance for a clean finish. Always check the finished seam with a gentle tug to ensure it stays secure after washing or wear.
Fabric Considerations: Knits, Wovens, and Heavy Materials
Different fabrics demand different ending techniques. Knits often benefit from a short backstitch followed by a tiny zigzag to prevent stitches from popping. Wovens typically rely on a straightforward backstitch to lock the seam without adding bulk. Heavy materials such as denim or canvas may require extra reinforcement—backstitch two or three times, then carefully weave tails to hide bulk. Regardless of fabric, avoid large thread tails that can snag or unravel. Adjusting presser foot pressure and stitch length can influence how neat the end looks on dense fabrics. Keep scrap fabric handy to experiment with end techniques before applying them to a final garment.
Troubleshooting Common Ending Issues
If ends unravel after washing, you may have used too few backstitches or a thread tension mismatch. Ensure that the top and bobbin threads are balanced; an overly tight top thread can cause extra tension and gaps where the end ends. Uneven or loose ends often come from pulling the fabric while the needle is still engaged. Stop, raise the needle, and resecure end with one more set of reverse stitches if needed. When threading, double-check that the needle is properly threaded and that the presser foot is fully lowered. If threads clip or get stuck, stop and clear lint from the bobbin area; a clean bobbin compartment helps maintain consistent ends.
Finishing Edges: Invisible Ends and Weaving Threads
To create an invisible finish, trim both tails close to the seam and weave them into the seam allowance. Use a blunt-tipped needle or tweezers to thread the ends into the interior, keeping the exterior seam flat. This technique is particularly valuable for visible seams in garments where a tidy appearance matters. If you’re working with slippery fabric, consider using a small amount of temporary fabric glue or fusible bonding tape to hold tails in place while you weave. Always test on scraps to ensure the finish remains durable after laundering.
Practice Drills to Build Confidence
Build muscle memory with repetition: practice ending stitches on scraps of different fabrics, including cotton, stretch knit, denim, and silk. Vary stitch length and tension to see how the end behaves under load. Record what works best for each fabric in a sewing journal; note the technique, tail length, and whether you needed to backstitch a second time. Consistent practice reduces end failures and makes your finishes faster and more reliable over time.
Tools & Materials
- Backstitch lever or reverse stitch function(Use to lock the seam with 2–3 backward stitches when ending a seam)
- Matching or contrasting thread(Top thread and bobbin thread should be compatible with fabric weight)
- Scissors or thread snips(For trimming top thread tails as close to fabric as possible)
- Fine-point hand needle or tweezers(Helpful for weaving tails into seam allowances)
- Scrap fabric samples(Test endings on different fabric types before final project)
- Seam ripper(Only if you need to redo an end due to mistakes)
Steps
Estimated time: 15-20 minutes
- 1
Engage reverse stitch to lock
Raise the needle to the highest position, lower the presser foot, and activate the reverse/backstitch function. Stitch 2–3 backward stitches to secure the end of the seam. This creates a robust lock that resists unraveling.
Tip: Use a short backstitch length (0.5–1.0) to avoid bulky ends. - 2
Stitch forward to anchor
Continue stitching forward for 2–3 stitches beyond the seam. This extra forward work traps the end and reduces the chance of a loose tail after finishing. Keep feed smooth and steady for an even lock.
Tip: Maintain steady speed and avoid abrupt stops to prevent stitch variation. - 3
Lift needle and trim top tail
Raise the needle to the top, lift the presser foot, and trim the top thread tail close to the fabric. This reduces bulk at the end and prepares the end for secure hiding beneath the seam.
Tip: Trim as close as possible without touching the fabric; a sharp scissor helps. - 4
Trim and secure bobbin tail
From the underside, gently pull the bobbin thread to the surface and trim the tail near the seam. Ensure the bobbin tail is captured beneath the seam and won’t pull loose.
Tip: Work slowly to avoid cutting the fabric or misplacing the tail. - 5
Weave tails into seam allowance
Using a fine hand needle or tweezers, weave any tails into the seam allowance to hide them and prevent snagging. This step creates a clean finish without visible threads on the outside.
Tip: Choose a tucked path that won’t create bulk at corners. - 6
Test on scrap and adjust
Run a short test on scrap fabric to verify the end remains secure after gentle tugging and washing. If looseness appears, reseat with an extra backstitch and reweave tails.
Tip: Document which method works best for each fabric type.
Your Questions Answered
What is the best stitch to end a seam on most fabrics?
Backstitching is the standard method for locking seam ends on woven fabrics. For knits, you may add a tiny zigzag after backstitching to reduce pull. Always test on scraps to verify durability.
Backstitching is the go-to method for most fabrics; for knits, a small zigzag can help prevent stretch.
Can I end a stitch without backstitching?
Backstitching creates a secure lock that prevents unraveling. If you skip it, you risk seams coming apart after washing or wear. Use backstitch or an equivalent lock if your fabric is prone to fraying.
Skipping backstitching risks unraveling; always lock the end with backstitch or a similar method.
How do I end a zigzag stitch safely?
End with a short backstitch to lock, then trim tails. If your machine uses a locking zigzag, ensure the stitches finish with the needle up and tail tucked under to avoid loose ends.
Finish with a quick backstitch and trim the tails away from the fabric.
Why are my ends turning frayed after washing?
Possible causes include too few backstitches, improper tension, or pulling the fabric. Recheck tension, add an extra backstitch, and weave tails into the seam allowance to secure.
Frayed ends often mean the end wasn't securely locked; check tension and backstitch count.
Should I bury the tails or leave them visible?
Burying tails into the seam allowance yields a cleaner finish, especially on garments. For visible seams, minimal tails can be woven into the interior to avoid bulk.
Bury tails inside the seam for a cleaner look; weave them to hide excess threads.
What if I forget to end the stitch properly?
If you notice it during sewing, stop, backstitch to lock, trim, and reweave as needed. If you discover later, you may need to rework the seam or secure loose tails from the inside.
If you miss it, fix it by backstitching and securing the end from inside the seam.
Watch Video
The Essentials
- Lock seams with backstitching to prevent unraveling
- Trim tails cleanly for a neat finish
- Weave tails into the seam allowance to hide ends
- Test endings on scrap fabric across fabrics
- Adjust technique for knits, wovens, and heavy fabrics