How to Stop Sewing Machine: A Practical Safety Guide
Learn how to stop sewing machine safely and quickly with practical steps for beginners and home sewists. Includes safety tips, step-by-step actions, and maintenance reminders.

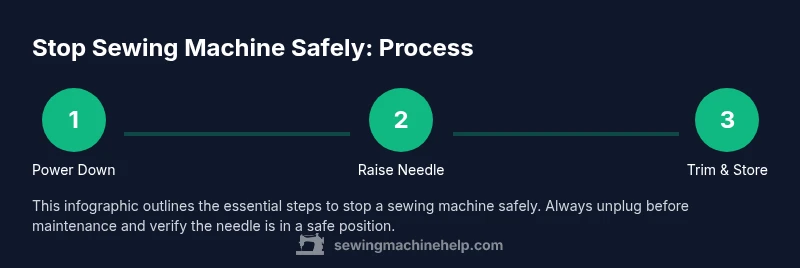
This guide will show you how to stop a sewing machine safely and quickly, whether you’re finishing a seam, troubleshooting a jam, or powering down after use. Key requirements include turning off power, unplugging the machine, and using the thread cutter or needle up position. Always follow the manufacturer’s safety guidelines.
Safe Stop: Immediate safety actions
According to Sewing Machine Help, knowing how to stop sewing machine safely is essential for preventing injuries and damage. This quick guide covers the core safety steps: power down before any adjustment, unplug the cord, and position the needle safely. Following these steps helps you control the machine without surprises, reduces the risk of needle breakage, and minimizes fabric snagging. Whether you’re a first-time user or a seasoned hobbyist, a disciplined stopping routine makes maintenance easier and safer.
Stepwise approach to stopping mid-project
When you need to stop the machine mid-project, the goal is to bring everything to a controlled halt without harming the fabric or the machine. The most reliable approach is to follow a simple sequence: power down first, then raise the needle to the highest position, and finally lift the presser foot. Keeping the needle up and the fabric flat prevents loops and tangling and makes restarting smooth. Always ensure the machine is not in motion before performing any tweaks or adjustments.
Handling jams and thread tails when stopping
A common reason to learn how to stop sewing machine safely is to address a jam or snag quickly. If you encounter a jam, stop, unplug, raise the needle, and carefully remove the fabric. Trim thread tails close to the fabric using clean scissors or thread snips. If a thread is caught on the presser foot or needle plate, gently release it to prevent pulled threads when you resume sewing. Keep a small brush handy to clear lint after stopping.
Electrical safety and unplugging after finishing
Electrical safety is critical once you’ve finished sewing. Always switch the power off and unplug the cord from the outlet before any cleaning, oiling, or needle threading. This precaution prevents accidental starts and protects you from electric shock. If your machine has a detachable power cord, store it separately to reduce wear and avoid fraying. Remember that even when the work is complete, a safe stop routine should be part of your habit.
Post-stop maintenance and storage for longevity
After stopping, perform a quick check of the bobbin area for lint and loose threads. A brief wipe and brush can prevent buildup that interferes with tension and stitch quality. Store the machine with a dust cover if possible, and keep oils and tools in a designated place away from traffic. Regular, mindful stopping habits prolong the life of moving parts and ensure a faster, safer restart next time.
Common beginner mistakes and how to avoid them
New sewists often skip unplugging or forget to raise the needle, leading to accidental starts or needle injuries. Another frequent error is leaving fabric under the presser foot, which can cause creasing or snags when resuming. To avoid these issues, build a consistent stop routine: power down, unplug, raise the needle, lift the presser foot, cut or secure threads, and inspect for jams if needed.
When to seek professional help and safe-use reminders
If you notice unusual noises, excessive vibration, smoke, or a persistent jam that won’t clear, stop immediately and seek professional service. Do not force parts or attempt major repairs yourself. A professional check ensures safe operation and can diagnose issues like misaligned bobbins or damaged gears. Keeping your stop routine and regular maintenance schedule helps prevent expensive repairs later.
Tools & Materials
- Power off switch(Turn to the Off position before unplugging.)
- Power cord and wall outlet(Unplug from the outlet to ensure no current is flowing.)
- Thread snips or small scissors(Use blunt-tipped snips to trim threads neatly.)
- Cleaning brush or lint brush(Helpful for quick post-stop lint removal.)
- Dust cover or storage space(Protect the machine from dust when not in use.)
- Good lighting(Bright light helps you see the needle area clearly.)
Steps
Estimated time: 3-7 minutes
- 1
Power down and unplug
Turn the machine's power switch to Off, then unplug the power cord from the wall outlet to eliminate the risk of accidental startup during maintenance.
Tip: Keep the plug within easy reach so you can re-energize quickly if needed. - 2
Raise the needle to the highest position
Gently rotate the handwheel toward you to lift the needle to its highest point; this prevents the needle from dropping while you adjust or clear fabric.
Tip: Keep fingers clear of the needle path while turning the handwheel. - 3
Lift the presser foot
Raise the presser foot using the lever to release fabric tension, making it easier to remove fabric safely.
Tip: If the lever feels stiff, stop and check for any obstruction. - 4
Trim thread tails
Use thread snips to trim thread tails close to the fabric; avoid leaving long tails that could snag during restart.
Tip: Leave a very small tail if you plan to resume sewing soon. - 5
Remove fabric safely
Gently slide the fabric away from the needle plate, ensuring there are no loose threads caught on the edge.
Tip: Work slowly to avoid pulling threads or tearing fabric. - 6
Inspect bobbin area for jams
Take a quick look at the bobbin area for lint or thread tangles and clear any obstruction with a brush if needed.
Tip: Only open the cover if you know how to safely access the bobbin. - 7
Store or prepare to restart
If you’re done, cover or store the machine, or reattach the power cord when you’re ready to continue sewing.
Tip: Cover the machine to protect it from dust and debris.
Your Questions Answered
What is the first step to stop a sewing machine safely during operation?
Always use the stop or power switch first, then unplug the machine to prevent accidental restarts.
First, stop the machine with the switch, then unplug it to prevent restarting.
Is it safe to stop with fabric under the presser foot?
No. Stop, raise the presser foot, and remove the fabric before turning off the machine.
Don’t stop with fabric under the foot; raise the foot and remove the fabric.
What should I do if the machine won't turn off?
Check the power switch and cord, then unplug from the outlet if the switch is unresponsive. If problems persist, consult a technician.
If it won't turn off, unplug at the wall and check the power supply.
How often should I unplug during maintenance?
Always unplug before cleaning, oiling, threading, or adjusting any moving parts.
Always unplug before any maintenance.
Do I need to rethread after stopping and restarting?
If you plan to resume sewing, rethread following your manual; otherwise, you can leave it as is until you restart.
When you resume, rethread; otherwise leave as is.
What signs indicate I should seek professional service?
If you hear unusual noises, smell burning, see smoke, or can't clear a jam, stop and consult a professional.
If you hear grinding or smell burning, stop and get professional help.
Watch Video
The Essentials
- Power down and unplug before any maintenance
- Raise needle and lift presser foot for safe access
- Trim threads and clear jams promptly
- Inspect the bobbin area to prevent future jams
- Cover and store the machine to extend life