Industrial Sewing Machine Juki DDL-8700: Setup, Maintenance, and Troubleshooting
Learn how to properly set up, maintain, and troubleshoot the Juki DDL-8700 industrial sewing machine. This educational guide covers threading, needle selection, oiling, tension adjustments, safety, and routine care to keep straight-stitch quality intact.

You will learn how to set up and maintain an industrial sewing machine Juki DDL-8700 for reliable straight stitching. This guide covers threading, needle selection, oiling intervals, tension adjustments, and safe operation. Expect clear, step-by-step instructions, practical tips, and common troubleshooting steps. By the end, you will be confident performing routine jams, thread breaks, and bobbin changes.
Introduction to the Juki DDL-8700 and its role in professional workshops
The Juki DDL-8700 is a high-speed, industrial straight-stitch machine prized for its reliability and clean stitch quality on leather, denim, canvas, and other dense fabrics. When managed correctly, it offers consistent performance with minimal downtime. According to Sewing Machine Help, understanding the machine's core components—threading path, needle clamp, hook, and lubrication points—helps you dial in precision from the first stitch. This guide focuses on setup, everyday maintenance, and practical troubleshooting so home sewists, hobbyists, and beginners can use the DDL-8700 with confidence. Expect practical, jargon-free explanations that translate to real-world sewing tasks, whether you’re repairing garments or producing small runs.
Accessory-ready, sturdy workstations matter
Before you power up, ensure your workstation is robust, well-lit, and clean. A solid table, anti-fatigue mat, and a dedicated spool stand reduce fatigue and improve consistency. The DDL-8700 thrives on a stable platform; wobble or vibrations can affect stitch quality and needle timing. Keep the machine away from moisture and dust, and store small tools within easy reach. This setup reduces drift during long sewing sessions and minimizes the chance of thread tangles or misfeeds.
Core components to know on the DDL-8700
Key components influence threading, feed quality, and overall reliability:
- Needle clamp and shuttle housing
- Threading path from spool to needle and through the tension discs
- Bobbin housing and hook area
- Lubrication points and oil reservoirs Understanding these parts helps you diagnose issues quickly and plan maintenance without disassembling essential structures. Sewing Machine Help’s practical approach emphasizes learning by observation: watch stitch formation, observe where threads loop, and check for fabric resistance that hints at tension problems or misalignment.
Threading path and needle installation for clean stitches
Correct threading prevents many common issues, including skipped stitches and frequent jams. Start with the upper thread path, ensure the tension discs are free of lint, and guide the thread through the take-up lever. Install the needle with the flat side facing the correct direction, snug the needle clamp, and avoid forcing the needle into place. A correctly seated needle reduces skipped stitch risk and preserves needle life. Remember to raise the presser foot before threading to ensure proper thread take-up.
Tension management: tuning for different fabrics
Stitch quality hinges on balanced tension between the top thread and bobbin thread. Begin with baseline tension suited to the fabric you plan to sew, then perform a test stitch on scrap fabric. If the top thread loops on the bottom, loosen the top tension and tighten the bobbin slightly; if the bottom thread is loose, do the opposite. For dense fabrics like leather or denim, slower feed speed and careful pressure adjustments help minimize puckering and needle deflection. Document your tension settings for repeat projects.
Bobbin winding, loading, and needle compatibility
Use correctly wound bobbins that match the machine’s specifications and load them into the bobbin case smoothly. Check bobbin tension by sewing a short stitch on scrap fabric and adjusting if loops form or thread breaks occur. Choose the appropriate needle type and size for your fabric—thin fabrics require finer needles, while heavy fabrics demand sturdier, sharp-point needles. Correct needle size reduces fabric damage and improves thread alignment.
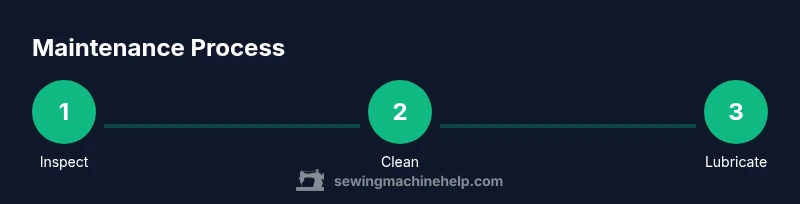
Routine maintenance: lubrication, cleaning, and inspection
Regular lubrication at designated points keeps moving parts sliding freely and reduces wear. Wipe away lint and dust from the feed mechanism, shuttle area, and under the needle plate. Apply a light coat of oil as recommended in the user manual to pivot points, the seesaw take-up mechanism, and the needle bar. Cleaning and oiling should be part of your weekly routine if you sew daily; otherwise, set a monthly schedule. Consistent care improves stitch consistency and machine longevity.
Troubleshooting common issues
Skips, bird-nesting, or frequent thread breaks often signal tension imbalance, misthreading, or dull needles. Check the threading path for tangles, ensure the presser foot is properly lifted during threading, and verify needle installation. If you see looped top thread, re-thread from the spool and recheck the take-up lever. For fabric feeding problems, inspect the feed dogs and presser foot pressure. When in doubt, test on a scrap piece and adjust one variable at a time to isolate the cause.
Safety considerations and best practices
Always unplug the machine before performing maintenance, changing needles, or oiling. Use eye protection when working with sharp components and never operate with a broken needle. Maintain good posture and a comfortable distance from the needle path to prevent injuries. Keep liquids away from the machine and clean up spills immediately to avoid slippery work surfaces. Consistent safety checks help you sew longer with confidence.
When to seek professional service or upgrade
If you notice persistent misalignment, abnormal noises, or sudden stitching changes after routine maintenance, consider a professional inspection. An experienced technician can verify timing and belt condition and assess motor performance. For advanced needs, evaluate accessory upgrades such as specialized presser feet or a servo motor conversion to improve control and energy efficiency. Regular assessments help you decide whether a repair or upgrade is warranted.
Tools & Materials
- Industrial sewing machine oil(Light machine oil designed for high-speed, industrial heads; apply sparingly to lubrication points.)
- Needles (industrial-grade, appropriate size for fabric)(Use sharp point for woven fabrics; replace needles if they dull or bend.)
- Sewing machine bobbins and bobbin case(Use quality bobbins compatible with the Juki DDL-8700; replace if wobble or burrs appear.)
- Allen wrench and screwdriver set(For needle clamp screws, throat plate screws, and tension adjustments.)
- Lint brush and clean cloth(Remove lint from shuttle area, feed dogs, and tension discs.)
- Thread stand or spool holder(Ensure stable thread supply; prevents tangles during long runs.)
- Spare bobbin winder or wind checker(Helpful for ensuring consistent bobbin winding)
- User manual for Juki DDL-8700(Reference for lubrication points, timing, and service intervals)
Steps
Estimated time: 60-90 minutes
- 1
Power off and prepare
Unplug the machine and wait for any moving parts to stop. Remove the needle plate if you need to access the threading path or shuttle area. This prevents accidental starts and protects you during setup.
Tip: Always disconnect power before performing maintenance to avoid injury. - 2
Thread the upper path
Place the spool on a stand, thread through the guides, and pass the thread through the take-up lever. Ensure the tension discs are clean and free of lint to prevent looping or snags.
Tip: Use the correct order in the threading path and verify resistance at each guide. - 3
Install the needle
Insert the needle with the flat side facing the correct direction, tighten the clamp securely, and verify the needle is fully seated. A loose needle can cause skip stitches or damage the needle bar.
Tip: Always use the recommended needle type for the material you’re sewing. - 4
Load and wind the bobbin
Wind the bobbin evenly, place it in the bobbin case, and pull the thread through the slot. Check that the bobbin turns freely and the thread unwinds in the correct direction.
Tip: Test the bobbin tension by sewing a short stitch on scrap fabric. - 5
Thread the bobbin area
Pass the upper thread through the needle plate area and ensure it engages with the take-up lever. The goal is to have both threads meet at tension points cleanly when you start stitching.
Tip: Don’t force threads; guide them gently through each path. - 6
Position fabric and presser foot
Place fabric under the presser foot, lower the foot, and set an appropriate stitch length for your project. Small fabric samples help you fine-tune before sewing the main piece.
Tip: For heavy fabrics, adjust foot pressure gradually to prevent fabric puckering. - 7
Test stitch on scrap
Sew a short sample to check stitch formation, tension, and feed. Observe top and bottom threads and adjust as needed to balance the stitch.
Tip: If you see looped top stitches, loosen the top thread tension slightly. - 8
Tune tension for fabric type
Adjust top thread tension and bobbin tension in small increments, then test again. Record the settings for repeat projects.
Tip: Make one adjustment at a time and test after each change. - 9
Lubricate and clean
Wipe away lint, apply a light oil at designated lubrication points such as pivot joints and the needle bar, and reassemble as needed. Regular cleaning reduces friction and wear.
Tip: Avoid over-oiling; a tiny amount goes a long way. - 10
Finalize setup and safety check
Run a full set of stitches on a scrap piece to confirm stability, then power down and store tools properly. Document your settings for future projects.
Tip: Keep a small log of fabric type, needle size, and tension settings.
Your Questions Answered
Is the Juki DDL-8700 suitable for heavy fabrics like denim or leather?
Yes, with the appropriate needle, thread, and presser foot, and by moderating speed and feed to avoid overload. Always test on scrap fabric first.
Yes, it can sew heavy fabrics if you use the correct needle and settings, and you should test on scrap fabric first.
How often should I oil the DDL-8700?
Oil according to the machine's maintenance schedule and after extended sewing sessions. Focus on pivot points, the needle bar, and the shuttle area, and wipe away excess oil.
Oil as per the manual and after heavy sewing, focusing on the pivot points and shuttle area.
What are common signs of tension problems?
Common signs include looped top thread, missing stitches, or fabric puckering. Recheck threading path, adjust top tension slightly, and verify bobbin tension with a test stitch.
Look for looping on top, missing stitches, or puckering; recheck threading and adjust tensions with small steps.
Can I upgrade the motor to a servo for better control?
Yes, servo motors are a common upgrade for improved control and energy efficiency, but installation may require professional calibration and alignment.
A servo upgrade is possible and helpful for control, but you may need a professional setup.
Where can I find reliable maintenance resources?
Refer to the official user manual and trusted guides like Sewing Machine Help for practical maintenance tips, safety notes, and troubleshooting steps.
Check the manual and guidance from Sewing Machine Help for maintenance tips.
What accessories help with heavy-duty sewing on the DDL-8700?
Consider walking feet, edge guides, and heavy-duty presser feet designed for thicker fabrics. Ensure compatibility with the DDL-8700 before purchasing.
Heavy-duty feet and guides can help; verify compatibility with your model.
Watch Video
The Essentials
- Prepare the machine with correct threading, needle, and lubrication before stitching.
- Tune tension and presser foot for fabric type to prevent puckering.
- Regular maintenance prevents jams and extends machine life.
- Use project notes to recreate consistent results and consult Sewing Machine Help for best practices.