Tension Setting Sewing Machine: Complete Guide for Beginners
Learn how to adjust tension on a sewing machine with practical, step-by-step guidance. Balance top and bobbin tension, test on scraps, and tailor settings for fabric weight to improve stitch quality.

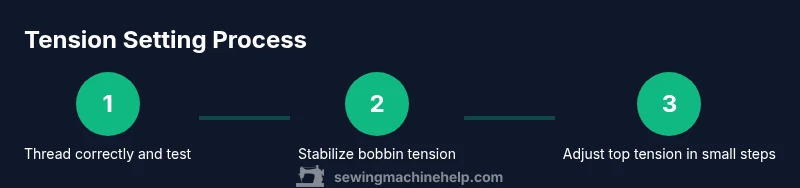
To correctly set tension on a sewing machine, ensure the machine is threaded correctly, check both needle and bobbin tensions, and adjust the top tension while testing on scrap fabric. Use consistent thread weights on top and bobbin, and tailor the settings for your fabric. Always test and document results.
Why tension setting sewing machine matters
According to Sewing Machine Help, proper tension is essential for balanced stitches and seam durability. When tension is off, fabric can pucker, seams may look uneven, and you might waste material redoing projects. Mastering tension gives home sewists reliable results across fabrics and weights, reducing frustration and improving project outcomes. In this guide, you will learn to diagnose common tension issues, understand how the tension system works, and apply practical fixes you can perform at home. Whether you sew lightweight chiffon or heavy denim, proper tension is the foundation for high-quality stitches. The information here is presented with real-world steps, checklists, and test methods that you can adopt right away. This approach helps beginners build confidence while avoiding common pitfalls that lead to poor stitch formation.
How the tension system works: top thread vs bobbin
Sewing machines balance two separate tensions to create even stitches. The top thread tension regulates how firmly the needle thread is pulled through the fabric, while the bobbin tension governs the bottom thread’s release. When these tensions are balanced, stitches sit flat on both sides and the seam holds without puckering or loose loops. If one side dominates, you’ll see distinct symptoms: loose top stitches on the front or bulky bottom stitches on the back. The key is to test with the fabrics you actually sew and adjust in small, incremental steps. Remember, the goal is a balanced stitch, not a single perfect setting. Besides the tension discs and the bobbin case, some machines have a separate adjustable screw for the bobbin area; consult your manual for model-specific details. Regular testing with scraps helps you tune the system to your typical fabrics and thread weights, making future projects smooth and predictable.
How to locate and test tensions on your machine
Begin by rethreading the machine from the start to ensure there are no threading errors contributing to false tension indicators. Locate the top tension dial (usually on the front or side of the machine) and the bobbin case tension screw (inside or under the bobbin plate). Thread the top and bobbin with identical weight thread when testing, and use a straight stitch on a neutral fabric scrap. Stitch a short seam, then examine both sides: the front should show a neat stitch line with threads overlapping evenly on the back. If the bobbin thread dominates or the top thread is visible on the underside, you’ll need to adjust the opposite tension. Make small adjustments—quarter-turns on the top dial or tiny twists to the bobbin case tension—testing after each change. Keep notes on the settings you tried so you can reproduce successful results later.
Common tension problems and practical fixes
Tension issues often fall into a few familiar patterns. If the top thread is visible on the bottom edge, the top tension is too loose or the bobbin tension is too tight. If the stitch on the top is loose, the top tension may be too tight or the fabric is too slippery for the chosen needle. Puckering on lightweight fabrics usually means tightening the top tension slightly or using a finer needle. For dense fabrics, you might need to loosen the top tension or adjust the needle size to prevent skipped stitches. When you see looped stitches on the bottom, the bobbin thread tension is off or the bobbin is mis threaded. In many cases, aligning both sides with a test seam on a scrap reveals the precise adjustments you need. Document your starting point, the adjustments you made, and the resulting stitch quality to build a reliable tension reference.
Step-by-step method to adjust tension on different fabrics
- Re-thread the machine and prepare a scrap fabric. 2) Test with a neutral weight thread and straight stitch. 3) If the top thread sits on the underside, loosen the top tension slightly and test again. 4) If the bottom thread shows on the top, tighten the top tension or verify bobbin tension. 5) For lightweight fabrics, try a slightly looser top tension; for heavy fabrics, use a tighter top tension and a sharper needle. 6) Move to a second fabric weight and repeat until stitches look balanced on both sides. 7) Record the settings that work best for each fabric family. 8) Run a final test seam to confirm stability. 9) Clean and maintain the machine to prevent tension drift.
Maintenance, testing protocol, and best practices
Developing a routine for tension testing helps keep your machine sewing consistently great. Start every sewing session with a quick tension check on a scrap fabric, especially after changing thread weights or fabrics. Use the same thread weight in both top and bobbin during tests to establish a reliable baseline. Once you’re satisfied, write down the settings so you can reproduce them later. Sew with the test seam and inspect both sides; if you notice any puckering, adjust gradually and retest. Regular maintenance—cleaning lint, oiling per the manual, and inspecting needles—reduces tension drift and extends machine life. Sewing Machine Help analysis, 2026 notes that home sewers who incorporate tension checks into their routine report more consistent stitches and fewer reworks. This practical approach means less wasted fabric and time, and more enjoyable sewing experiences.
Tools & Materials
- Owner's manual or model-specific guide(Consult tension diagrams and screw locations for your machine model)
- Screwdriver (precision flat-head or Phillips)(Used to adjust bobbin case and top tension screws; not all models require it)
- Replacement bobbins (appropriate size for your machine)(Use brand-approved bobbins to avoid tension issues)
- Sewing thread (two spools, similar weight)(Use matching weights on top and bobbin for baseline tests)
- Needle (appropriate type and size for fabric)(Replace a dull or bent needle before testing tension)
- Fabric scraps for testing(At least 4 x 6 inches per fabric weight)
Steps
Estimated time: 30-45 minutes
- 1
Re-thread and set up a scrap test
Unplug the machine, re-thread the top and bobbin, and load a clean scrap fabric. Ensure the needle is the correct type and installed with the point facing forward. This creates a reliable starting point free of threading errors.
Tip: Use the same thread on top and bobbin for a baseline test. - 2
Inspect and test bobbin case tension
Remove the bobbin case and check the tension spring for smooth movement. Reinsert the bobbin and thread, then stitch on your scrap to observe the bottom thread balance. If the bottom thread is tight or loose, prepare to adjust.
Tip: Small changes in bobbin tension can dramatically affect stitch balance. - 3
Check needle and thread compatibility
Confirm needle size matches fabric weight and thread type. Replace any worn needles and ensure the thread path is clear. This reduces tension-related inconsistencies caused by hardware faults.
Tip: Even minor needle wear changes tension perception. - 4
Adjust the top thread tension dial
Turn the top tension dial in small increments (quarter-turns) while testing on a scrap. Stop when stitches look balanced on both sides. Keep track of each adjustment for reproducibility.
Tip: Document each adjustment to avoid backtracking. - 5
Run a test stitch on scrap fabric
Sew a straight seam across the scrap and inspect both sides. Look for looping on the underside or tight, broken stitches on the top. If issues persist, revisit the top tension and bobbin tension together.
Tip: If fabric puckers, you may need to loosen top tension slightly. - 6
Fine-tune for fabric weight
Repeat tests with a lighter and a heavier fabric to confirm tension is adaptable. Gentle adjustments may be needed for each fabric weight to maintain balanced stitches.
Tip: Keep a tension log for future projects. - 7
Finalize settings and record options
Once you achieve balanced stitches, write down the dial settings for future reference. Re-thread and sew a final test seam to confirm consistency across fabrics.
Tip: This saves time on future projects and reduces trial-and-error. - 8
Routine maintenance after testing
Clean lint, oil per the manual, and store tension references safely. Regular maintenance helps prevent tension drift and extends machine life.
Tip: Schedule tension checks after changing threads or fabrics.
Your Questions Answered
How can I tell if the tension is set correctly?
A balanced stitch shows the top and bottom threads meet in the middle of the fabric with no looping on either side. If the top thread is visible on the bottom or vice versa, adjust accordingly.
Balanced stitches mean both sides look neat; adjust top or bobbin tension until they meet in the middle.
Should top and bobbin tensions always match?
Not necessarily; they should balance to produce even stitches. They may differ slightly based on fabric and thread.
Top and bobbin tensions should balance to give even stitches; they don't have to be identical.
What fabrics require different tension settings?
Lightweight fabrics often need looser top tension, while heavy fabrics require tighter top tension or different needle sizes.
Lighter fabrics usually need looser top tension; heavier fabrics require tighter top tension.
Why do I get looped stitches after tension adjustment?
Loops usually indicate the top tension is off or the bobbin tension is misadjusted, or the needle/thread combination isn’t ideal.
Loops typically mean the top tension is off or the bobbin isn’t feeding correctly.
Can I fix tension without changing needles or thread?
Often yes—adjust the tension and ensure proper threading. If wear or damage is present, replace the needle or thread as needed.
Often you can fix tension by adjusting tension and threading; replace worn needle if necessary.
How often should I check tension?
Check tension whenever you change fabrics or threads, or if you notice stitching issues during sewing.
Check tension whenever you change fabric types or encounter stitch issues.
Watch Video
The Essentials
- Test tension on scrap fabric before starting a project.
- Balance top and bobbin tension with incremental adjustments.
- Document settings to reproduce successful results.
- Perform routine tension checks when switching fabrics or threads.