Viking Sewing Machine Repair Near Me: Practical Guide
Find reliable Viking sewing machine repair near you with this practical, step-by-step guide. Learn how to evaluate shops, prepare your Viking machine, and get back to sewing.

This guide helps you locate reliable Viking sewing machine repair near you and get your machine back in top stitching form. You’ll learn how to identify authorized service centers, assess local repair shops, request estimates, and prepare your machine for service. Start by confirming Viking compatibility, checking reviews, and comparing turnaround times.
Why local Viking sewing machine repair matters
Local repair matters for Viking machines due to compatibility with models, parts availability, and faster turnaround. When your Viking machine goes out of sync, you want a technician who understands the brand’s unique mechanisms and common failure modes. According to Sewing Machine Help, choosing a local, reputable service reduces shipping risk, keeps communication clear, and often yields faster diagnostics. Start by confirming whether the shop has experience with Viking models and access to genuine parts. Compare several options, considering proximity, warranty on labor, and the shop’s policy on estimates and diagnostic fees. A nearby repair shop can provide hands-on assessment, test sewing, and real-time explanations of issues, which helps you learn more about your machine and how to prevent future problems.
-## Common Viking models and repair challenges
Viking sewing machines range from compact domestic models to more capable mid-range units. Common issues include bobbin tension instability, drive belt wear, timing misalignment, and lint buildup around the shuttle. Troubleshooting these problems requires model-specific knowledge; generic fixes can worsen alignment or timing. When you encounter skipping stitches, loose tension, or unusual noises, check the manual’s troubleshooting section and verify parts compatibility before replacing components. Remember that many Viking models use unique presser-foot assemblies and feed mechanisms, so relying on model-specific parts is essential for long-lasting repairs. Proper diagnosis may require diagnostic software or a qualified technician familiar with Viking engineering.
-## How to evaluate repair shops for Viking machines
Start with official Viking-authorized service centers or shops that advertise Viking-certification. Verify parts availability and whether the shop uses OEM or Viking-approved substitutes. Read customer reviews focused on accuracy of diagnosis, communication, and turnaround time. Ask for a written estimate with itemized parts and labor, plus a clear warranty on both parts and labor. Confirm how shipping (if needed) is handled, who covers the diagnostic fee, and whether the shop offers insured shipping. A good shop will provide a transparent process, a realistic timeline, and ongoing updates during the repair.
-## Preparing your machine for service
Before sending or dropping off your Viking sewing machine, gather essential details: model and serial number, any known issues, and the last maintenance date. Photograph the machine from key angles to document its condition. Remove accessories, including presser feet, needle plates, and any external cords; pack them separately with labels. Clean the exterior with a soft cloth and brush away loose lint around the bobbin area. Use a padded box with cushioning, and insure the shipment when shipping. Include a note with your contact information, preferred return address, and a brief description of the symptoms.
-## What to expect during the repair process
Expect an initial diagnostic check, either in-person or via remote assessment, to confirm the problem. The shop will provide a written estimate and a parts list before proceeding. If parts are on backorder, ask about ETA and whether temporary substitutions are possible without compromising performance. Throughout the repair, request regular updates, photos of progress, and confirmation once the machine has been tested. When the machine returns, perform a thorough test: stitch samples, different fabrics, thread types, and ensure smooth operation with all attachments.
-## Safe DIY checks before sending for service
Some safe maintenance tasks can be performed at home, such as cleaning lint from the needle plate, oiling per the manual, and checking bobbin alignment. Do not attempt to disassemble the timing mechanism, motor housing, or electronic boards unless you have formal training. Avoid forcing parts back into place; use manufacturer-recommended adjustments and avoid shortcuts that could affect warranty. Always unplug the machine while inspecting belts or moving parts, and keep small screws in labeled containers to prevent loss.
-## Getting back to sewing: aftercare and testing
After repair, run a series of test stitches on scrap fabric to verify tension, stitch quality, and feed response. Re-seat all accessories, re-thread the machine, and adjust tension as needed for different fabrics. Keep the repair invoice and any warranty documentation in a safe place. Regular maintenance, including cleaning and oiling as the manual recommends, can extend the life of your Viking sewing machine and help prevent future breakdowns.
Tools & Materials
- Phillips-head screwdriver (#1 and #2)(For most accessory screws on Viking machines)
- Flat-head screwdriver(For slider covers and some models)
- Needle-nose pliers(For removing lint or clips)
- Lint brush or canned air(Clean lint around shuttle and bobbin area)
- Small containers/bags(Keep tiny screws and small parts organized)
- Sewing machine oil (per Viking manual)(Use recommended lubricant type and amount)
- Replacement belts/feet (optional)(Only if you know they’re worn or incompatible)
- Soft cloths (lint-free)(For cleaning surfaces without residue)
- Owner’s manual or model details(Have model and serial number ready)
Steps
Estimated time: 1-3 weeks
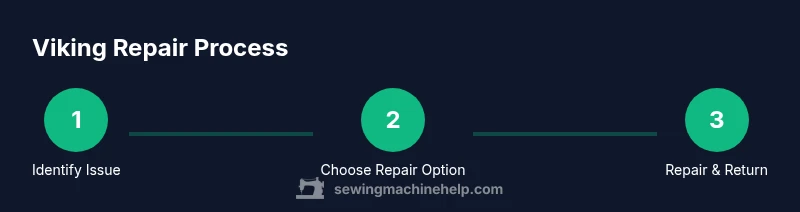
- 1
Identify model and problem
Gather the exact Viking model and serial number, describe symptoms, and note when the issue started. This helps the technician diagnose accurately and ensures the right parts are ordered.
Tip: Have the manual handy and take clear photos of the machine from multiple angles. - 2
Find reputable repair options
Research official Viking-authorized centers or shops with Viking certification. Read reviews focused on accuracy of diagnosis and turnaround times.
Tip: Ask about certification status and whether they use OEM parts. - 3
Request diagnostics and a written estimate
Ask for a diagnostic fee upfront and a written, itemized estimate before any repair work. Include parts, labor, and shipping in the quote.
Tip: Clarify if diagnostic fees are credited toward the repair if you proceed. - 4
Prepare the machine for shipment or drop-off
Remove accessories, wrap securely, and pack in a padded box. Include the manual, symptoms note, and contact details.
Tip: Insure shipments and use a trackable service. - 5
Authorize repair and monitor progress
Approve the repair plan and parts list. Request periodic updates and photos during the process.
Tip: Set a preferred contact method and response window. - 6
Receive and test the repaired machine
Upon return, re-thread, test on scraps, and check multiple fabrics and stitches to confirm quality.
Tip: Test with attachments and different thread types. - 7
Maintain records and schedule maintenance
Save all invoices and warranties. Schedule routine cleanings and oiling per the manual to extend life.
Tip: Set reminders for preventive maintenance.
Your Questions Answered
How do I find Viking sewing machine repair near me?
Start with official Viking service centers or certified local shops. Use their location search, read reviews, and verify parts availability. Contact multiple shops to compare quotes and turnaround times.
Look for official Viking service centers or shops with Viking certification in your area, then compare quotes and timelines.
What should I expect in a repair quote for a Viking machine?
A complete quote should list diagnostic fees, parts costs, labor, and shipping if applicable. It should be written and itemized, with clear terms on warranties.
Expect an itemized written quote covering diagnostics, parts, labor, and any shipping charges.
Can I repair a Viking sewing machine myself?
Minor maintenance like cleaning and oiling per the manual is okay. Do not attempt timing, motor, or electrical repairs unless you are trained.
DIY is fine for simple maintenance, but complex repairs should be done by a pro.
What parts are commonly replaced on Viking machines?
Belts, tension discs, needles, and plates are commonly replaced. Parts availability depends on model; ask for OEM or Viking-approved substitutes.
Belts and tension parts are often replaced, but availability varies by model.
How long does Viking sewing machine repair typically take?
Turnaround varies by location and part availability. Expect several days for diagnostics and about 1-3 weeks for repair and return shipping.
It usually takes a couple of weeks, depending on parts and shipping.
Is shipping risky for Viking repair?
Shipping is generally safe if you pack securely and insure the shipment. Include notes and trackable delivery.
Shipping can be safe with proper packing and insurance.
Watch Video
The Essentials
- Identify model and problem before choosing a shop
- Choose authorized Viking service or certified technicians
- Request an itemized, written repair estimate
- Ensure safe packaging and insured shipping for repairs
- Test thoroughly after repair and keep warranty records