What to Do If Fabric Gets Stuck in Your Sewing Machine
Urgent troubleshooting guide for fabric jams in sewing machines. Learn quick fixes, diagnostic flow, and preventive steps to get your project back on track safely—whether you’re a beginner or a seasoned sewist.

Unplug the machine, remove the presser foot, and gently lift the needle to clear the entry. The most common cause is a thread jam or fabric tucked under the needle plate. Start with the easiest checks: remove the bobbin case, inspect the bobbin area, and gently wiggle the fabric free. If it remains stuck, follow the diagnostic flow and steps below for a safe fix.
Why this happens: what to do if your fabric gets stuck in sewing machine
In many sewing projects, fabric jams happen when threads become tangled, the needle is misaligned, or the bobbin area is blocked. Understanding the root cause helps you pick the safest, fastest fix. According to Sewing Machine Help, most jams originate in the bobbin area or under the needle plate, especially when switching fabrics or changing stitch types. Being methodical limits damage and reduces downtime. This guide is written for home sewists who want practical, proven steps to recover a stalled project without panic or guesswork.
Quick checks before you dismantle anything
Safety first: always unplug the machine before touching moving parts. Start with the simplest fixes:
- Remove the presser foot and lift the needle to its highest position.
- Gently tug the fabric backward while keeping the needle centered; if you feel resistance, stop before forcing it.
- Open the bobbin cover to inspect for loose threads or a tangled bobbin.
- Use a small brush or compressed air to clear lint or thread fragments from the bobbin shuttle area.
- Rethread the upper thread and reseat the bobbin if you spot obvious misthreading. These quick checks solve the majority of jams without tools.
At this stage, you should have a clearer picture of where the fabric is stuck and whether the jam is in the bobbin area or the needle path.
Common causes and how to diagnose the jam
Diagnosing the jam helps you pick the right fix. Typical culprits include a thread jam in the bobbin area, a bent or improperly inserted needle, fabric pulled under the presser foot, or tension issues. Inspect the needle—remove it, inspect for burrs, and ensure it’s the correct type for your fabric. If the needle is bent or dull, replace it before re-testing. Check the bobbin thread direction and confirm proper bobbin winding as wrong tension can cause looping and snagging. Once you’ve ruled out simple issues, reassemble step-by-step and test with a scrap piece.
Remember: fabric jams can start small and escalate fast if ignored. A methodical approach trims downtime and preserves your machine.
Step-by-step fix for the most common cause (bobbin area jam)
This section walks you through clearing a typical jam around the bobbin shuttle:
- Power off and unplug the machine, then remove the accessory panel to access the bobbin area.
- Take out the bobbin case carefully and inspect for trapped threads; pull gently to remove any looped threads.
- Clean the shuttle area with a small brush. Look for hidden lint or fibers and remove them.
- Reinsert the bobbin correctly (check the direction and placement as shown in your manual).
- Rethread the upper thread, ensuring tension is balanced and the thread sits properly in the take-up lever.
- Close everything up, re-thread the needle, insert a fresh needle if needed, and test on a scrap piece.
Tip: Work slowly and avoid forcing fabric through. If resistance remains, stop and reassess.
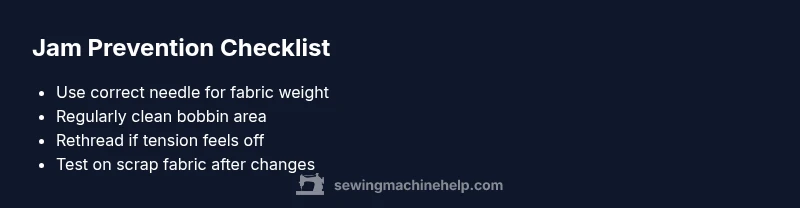
Safety and maintenance: reducing jams in the future
Regular cleaning and proper lubrication (as per your machine’s manual) helps prevent jams. Use the right needle size for the fabric, and avoid forcing thick fabrics through the needle plate. Maintain consistent thread tension, and replace worn parts promptly. After finishing a project, thread a quick test on scrap fabric to confirm smooth operation before starting a new piece. Keeping a small lint brush handy makes jam clearance faster.
When to seek professional help
If you cannot identify a simple jam after the basic checks, or if you notice unusual noises, skipped stitches that persist after rethreading, or persistent binding even after cleaning, contact a professional technician. Ongoing issues may indicate timing, gear, or shuttle problems that require specialized tools and calibration. Don’t risk worsening the problem by continuing to sew with a jammed machine. The Sewing Machine Help Team recommends consulting a qualified technician for complex repairs.
Steps
Estimated time: 25-35 minutes
- 1
Power down and prepare workspace
Unplug the machine and clear a clean, well-lit area. Remove any accessories you won’t need to minimize risk of snagging. Gather a small pair of tweezers and a soft brush for quick jams.
Tip: Always work with one hand on the machine and one on the fabric to avoid sudden movement. - 2
Access the bobbin area
Open the bobbin cover and carefully remove the bobbin case. Note how the bobbin sits so you can reinsert it correctly. Do not yank; if the jam is tight, gently twist to release.
Tip: Take a photo of the bobbin position before removal to guide reassembly. - 3
Clear the jam
Use tweezers or a small brush to remove threads from the bobbin shuttle and under the needle plate. If thread is tightly wound, cut and pull the piece free from the entry to avoid tearing fabric.
Tip: Work in small sections; don’t force stubborn threads. - 4
Check the needle
Remove the needle and inspect for bending or burrs. If damaged, replace with the correct needle for your fabric weight and type. Reinstall and snug the needle firmly in the needle clamp.
Tip: Always use the right needle size for the fabric. - 5
Rethread and test
Rethread the upper thread and re-wind the bobbin, ensuring proper tension. Spin the handwheel by hand to confirm clearance. Run a scrap piece on a slow stitch setting.
Tip: Test on scrap fabric first to avoid new fabric damage. - 6
Finalize and test
Close panels, reinsert presser foot, and perform a final test stitch on a scrap piece. If the fabric still jams, revert to diagnostic flow and consider professional service.
Tip: Document any recurring patterns to aid future maintenance.
Diagnosis: Fabric gets stuck in sewing machine during stitching
Possible Causes
- highThread jam in bobbin area
- highNeedle inserted incorrectly or bent
- mediumFabric caught under feed dogs or presser foot
- lowTension misadjustment causing upper thread snag
Fixes
- easyTurn off and unplug; remove needle plate and bobbin case to clear jam
- easyClean lint and threads; rethread machine properly
- easyReplace needle if bent or dull; ensure correct needle type for fabric
- easyReassemble and test with scrap fabric; adjust tension if needed
Your Questions Answered
Why does fabric get stuck in my sewing machine?
Fabric jams usually result from a thread jam in the bobbin area, a bent needle, or misthreading. Start with basic checks, then proceed to more detailed diagnostics if needed.
Fabric jams come from simple threading or needle issues. Start with basic checks, then follow the troubleshooting steps for a fix.
Is it safe to continue sewing if fabric is stuck?
No. Continuing to sew with a jam can break parts or worsen the problem. Stop, unplug, and clear the jam before proceeding.
Stop and unplug. Clear the jam before you try again.
How can I prevent fabric jams in the future?
Use the correct needle for your fabric, ensure balanced tension, and clean the bobbin area regularly. Practice with scrap fabric after changes.
Choose the right needle and keep the area clean to prevent jams.
Do I need to replace the needle after a jam?
If the needle shows any bending or dullness, replace it. A fresh needle reduces snagging and ensures stitches form properly.
Yes, replace a bent or dull needle after a jam.
What if the fabric tears during removal?
Stop, assess the fabric for frayed edges, and trim away damaged sections. Resume sewing with a fresh fabric segment to prevent further tears.
If tearing occurs, trim the damaged edge and continue with a new fabric section.
Should I oil the machine after a jam?
Only if your machine’s manual specifies it. Most jams don’t require oiling the immediate fix, but regular lubrication as directed helps long-term performance.
Only oil if the manual says to; follow the regular maintenance schedule.
Watch Video
The Essentials
- Unplug before you begin any fix
- Clear bobbin area first before other checks
- Test with scrap fabric after fixes
- Replace damaged needles promptly
- Regular cleaning prevents future jams