Why Does My Sewing Machine Stop? Quick Troubleshoot
Discover why does my sewing machine stop and how to fix it fast. Sewing Machine Help guides you through jams, threading, bobbin seating, and tension tweaks to get you sewing again.

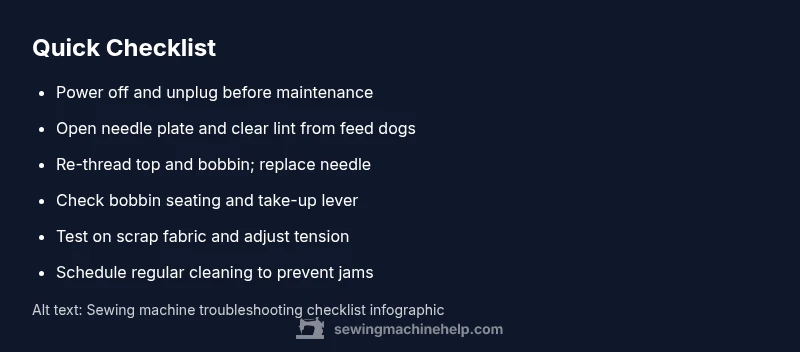
Most sewing machine stoppages are caused by a thread jam or fabric caught in the bobbin area. Quick fix: unplug, remove the needle plate, clear lint from the feed dogs, re-thread the machine top to bottom, reseat the bobbin, and replace the needle. Check that the presser foot is down and try a test stitch. If it still stops, follow the diagnostic flow.
Why does my sewing machine keep stopping
When a sewing machine stops, it can feel like a mystery, but the root causes are usually practical issues that a home sewist can fix. According to Sewing Machine Help, the most common culprits are thread jams, lint buildup, or bobbin misplacement. A quick reality check is to move the fabric out of the way, make sure the needle is properly installed, and ensure the machine is threaded correctly from spool to needle. This initial step helps separate grip-and-go fixes from deeper mechanical problems. In many cases, you can resolve the stopping simply by clearing debris, re-threading, and confirming the take-up lever moves freely. Getting into a calm, methodical mindset helps you diagnose faster and reduces the temptation to force the machine, which can cause more damage. By staying systematic, you’ll often save time and prevent minor issues from becoming expensive repairs.
Quick checks before you dive deeper
Before you panic or assume a major fault, run through a fast pre-check list. Start with the obvious: is the power switch on, is the pedal unplugged from a live socket, and is the machine actually threaded? If you’re using a metal needle, inspect for bending, digging, or blunt points. Look for lint or thread buildup around the bobbin area and feed dogs. Re-seat the bobbin according to your model’s manual, and re-thread the top thread, ensuring the thread passes through the take-up lever. Many stoppages happen when any one of these basics is overlooked. Keep a small brush handy to clean out lint and a pair of tweezers for stubborn fibers. Remember, a calm, step-by-step approach is your best ally.
Diagnostic flow: symptom to diagnosis
A structured diagnostic flow helps you avoid guesswork. Start with the symptom: does the machine stop with fabric in motion, or does it stop when starting a stitch? If it stops mid-stitch, likely a thread jam or tension issue. If it stops immediately, suspect power, switch, or motor problems. For each symptom, consider common causes in order: (1) threading and bobbin seating, (2) needle condition or size, (3) lint and debris in the bobbin area, (4) tension or take-up lever issues. Use a process of elimination and test after each fix. The Sewing Machine Help team recommends documenting what you tried and the result to avoid repeating steps.
Step-by-step fixes for common causes
The most common fixes are safe and straightforward. First, unplug the machine. Remove the needle plate and clear any lint from the bobbin area and feed dogs. Re-thread the machine from the spool to the needle, then re-seat and wind the bobbin correctly. Replace the needle if it’s bent or worn. If the problem persists, inspect the bobbin tension and ensure the bobbin case is seated properly. Finally, verify the presser foot is down and the fabric is appropriate for the chosen needle. These steps address 80–90% of stoppages and require only basic tools. The key is to work slowly and verify each change before moving on. If the machine still stops, it’s time to escalate to professional service.
Safety, maintenance, and prevention tips
Regular maintenance prevents most stoppages. Clean the feed dogs and bobbin area after every few hours of sewing, oil older machines per the manual, and replace needles every 8–12 hours of sewing or per fabric type. Use the correct needle size for your fabric, and never force a stitch through a jammed fabric. Store your machine in a clean, dry place and avoid sewing on broken threads. By incorporating a brief post-sewing routine—clean, re-thread, test on scrap—you’ll catch most issues early and keep your machine running smoothly.
How to handle unusual symptoms: skipping stitches or loud noises
If you experience skipped stitches, loud grinding, or squeaks, don’t ignore them. These symptoms often indicate timing issues, worn belts, or a misaligned needle plate. Stop sewing immediately, inspect the belt (if exposed) for wear, check the needle for proper seating, and look for fabric caught behind the needle plate. For timing faults, professional adjustment may be required. While some minor adjustments can be attempted, avoid disassembly beyond your comfort level, as that can cause misalignment or void warranties. Remember: safety first, always unplug before any inspection.
When to call a professional and what to expect
Some issues are beyond home repair, including timing, motor faults, or bent drive components. If you have tried the basic fixes and the machine still stops, consult a certified technician. Bring a clear description of the symptom, the model, and a list of steps you already tried. Expect a diagnostic fee, parts costs if replacements are needed, and a short turnaround. The aim is to restore reliable operation without causing further damage. The Sewing Machine Help team emphasizes that professional service is a smart, proactive choice when basic troubleshooting fails.
Steps
Estimated time: 45-60 minutes
- 1
Power down and prep
Unplug the machine and remove any fabric. Gather a small brush, tweezers, and a replacement needle. This first step ensures you can safely access the bobbin area and the take-up lever without risk of electric shock. Clear the surface and prepare a clean workspace to visualize the problem clearly.
Tip: Always unplug before touching moving parts. - 2
Open needle plate and clear jam
Carefully lift the needle plate and remove lint or thread choking the bobbin area. Use the small brush or tweezers to extract stubborn threads. Do not yank—gentle, patient clears prevent damage to small components.
Tip: Keep a steady hand; avoid metal tools that can scratch parts. - 3
Re-thread top and bobbin
Rerun the thread path from the spool through the tension discs and take-up lever to the needle. Wind and seat the bobbin correctly in its case. Thread tension should feel smooth; test with a scrap piece before resuming your project.
Tip: Take-up lever must be able to move freely for proper threading. - 4
Check needle conditions
Inspect the needle for bending, dullness, or incorrect size for the fabric. Replace if necessary and ensure it’s inserted fully and with the flat side facing the correct direction. A worn needle is a frequent cause of skipped stitches.
Tip: Use a new needle for each project type to avoid performance issues. - 5
Test stitch and adjust tension
Run a short test stitch on scrap fabric. Observe stitch balance—top thread should sit neatly on top of the bottom thread. If you see loops or loose stitches, adjust the needle position and try a lighter or heavier tension in small increments.
Tip: Make only small tension changes and test again. - 6
Final test and safety check
Sew a sample using the fabric type you’ll regularly work with. Confirm that the machine runs smoothly across several inches. Reassemble covers and wipe away any dust. If issues persist, proceed to professional service.
Tip: Document what you changed so you can explain it to a technician if needed.
Diagnosis: Machine stops mid-stitch or won't start after selecting a stitch
Possible Causes
- highThread jam or lint buildup in bobbin area
- mediumBobbin installed incorrectly or wound unevenly
- lowNeedle bent or wrong size for fabric
- lowTension misadjusted or thread not properly threaded
Fixes
- easyUnplug, open needle plate, clear jam; re-thread top and bobbin; replace needle; test stitch
- easyRe-seat bobbin in correct orientation; ensure bobbin winding is smooth
- mediumCheck fabric type and needle size; adjust tension and stitch selection if necessary
- hardIf persistent, schedule professional service; motor issues or timing may require a tech
Your Questions Answered
Why does my sewing machine stop mid-stitch?
Mid-stitch stops are usually caused by thread jams, lint buildup, or bobbin misalignment. Start with cleaning, re-threading, and verifying bobbin seating before exploring more complex causes.
Most mid-stitch stops happen because of jams or bobbin issues. Clear the jam, re-thread, and check the bobbin to fix it.
How do I know if the bobbin is the problem?
If the needle threads correctly but stitches fail, check the bobbin cartridge seating and ensure the bobbin winds evenly. Re-seat and re-thread the bobbin path to restore proper stitch formation.
If stitches fail but the needle threads fine, recheck the bobbin seating and winding.
What should I do first when it stops?
First unplug the machine, remove lint from the bobbin area, re-thread both top and bobbin, replace the needle, and test. If the problem persists, inspect tension and needle size.
First unplug, clean, re-thread, replace the needle, and test.
Can incorrect tension cause stoppages?
Yes. Incorrect top or bobbin tension can cause looping, skipped stitches, or stalling. Adjust tension in small increments and test on scrap fabric to find a stable setting.
Tension problems can stall stitches; adjust gradually and test.
Is it safe to clean the machine myself?
Cleaning is generally safe when you unplug first and follow the manufacturer’s guidance. Use a soft brush and avoid liquid cleaners on electronics. If you’re unsure, consult the manual or a professional.
Yes, with unplugged safety and careful cleaning. When in doubt, seek help.
When should I call a professional?
If jams recur after basic fixes, you experience timing or motor concerns, or the machine won’t operate after maintenance, professional service is advised. Bring notes on symptoms and steps tested.
Call a pro if issues persist after basics apply.
Watch Video
The Essentials
- Start with the basics: unplug, clean, re-thread.
- Check bobbin seating and take-up lever for smooth operation.
- Test with scrap fabric and adjust tension in small steps.
- Call a professional when timing or motor issues arise.