Why Doesn't My Sewing Machine Work? Quick Troubleshooting Guide
Urgent, practical guidance to diagnose why your sewing machine won’t start or sew. Learn fast checks, common causes, and safe fixes to get back to sewing with confidence.

Most sewing machine problems start with simple causes: power supply, thread tangles, bobbin misplacement, or fabric jams. The quickest fix is to verify the outlet and switch on, then clear any obvious thread tangles. If the motor hums but won’t run, check the belt and mechanical path. According to Sewing Machine Help, these basics solve the majority of issues quickly.
Why doesn't my sewing machine. work
When your machine stalls, it disrupts your project and can be frustrating. According to Sewing Machine Help, the most common triggers are power problems, thread tangles, incorrect bobbin placement, or fabric jams. Before you panic, start with the simplest checks that require no tools. Make sure the machine is plugged in, the power switch is on, and the foot pedal isn’t jammed by a position that prevents full range of motion. If the outlet is fine but the motor stays silent, the issue may be electrical or a belt problem. In any case, safety comes first: unplug the machine when inspecting moving parts. Then proceed to a systematic process that covers threading, needle, bobbin, and basic fabric handling. By following these steps, you can isolate many issues within minutes and resume sewing with confidence.
Common causes and quick tests
Many issues begin with basic setup. The top culprits include an unplugged power source, loose or broken power cord, or a clogged feed path. Check the power outlet and switch first, then gently rotate the handwheel by hand to feel for any resistance. Next, inspect the needle, thread, and bobbin path for tangles. A skipped stitch often results from a bent needle or incorrect needle size relative to the fabric. If you find lint or thread buildup around the bobbin area, clear it with a small brush. These quick checks catch 80-90% of common problems and buy you time to decide on deeper service.
Electrical issues and safe testing
Electrical problems require careful, safe handling. Start by inspecting the cord for cuts or exposed wires; never use a damaged cord. Verify that the power switch is functional and that the outlet supplies voltage (use a different device to test). If the machine has a pedal, unplug the machine and test the pedal alone for continuity with a multimeter or substitute pedal. If the motor hums but won’t start, the issue could be a stalled belt or a seized mechanism—a fix that is best left to a professional if you’re not comfortable disassembling the machine. Always disconnect power before removing covers.
Threading, needles, and bobbin basics
Threading mistakes are the #1 cause of skipped stitches and jams. Re-thread both upper thread and bobbin, ensuring no slack or tangling. Use the correct needle type and size for your fabric (e.g., ballpoint for knits, sharp for wovens) and install it in the right direction. Verify that the bobbin is wound evenly and inserted in the correct orientation; the thread should pull smoothly from the bobbin as you rotate the handwheel. A correctly threaded needle will usually yield consistent stitches and avoid shredding fabric.
When to service vs DIY and how to prepare for a repair
Not every fault is user-serviceable. If basic checks don’t restore function, you may be facing worn bearings, a misaligned belt, or electronic faults that require specialized tools. For DIY, document the symptoms, note which parts were inspected, and take clear photos of the bobbin area and belt path. This information helps a technician diagnose faster and can protect you from unnecessary disassembly. If you don’t feel confident, contact an authorized service center. The Sewing Machine Help team recommends booking service when you hear grinding, unusual noises, or the motor runs hot.
Preventing future problems: maintenance and care
Establish a simple maintenance routine to extend the life of your machine. Clean lint from the feed dogs and bobbin area after every project, oil the moving parts as recommended in your manual, and replace needles regularly. Use quality threads and fabrics to reduce lint and breakage. Schedule a periodic professional service every 12-24 months depending on usage. Regular maintenance reduces downtime and keeps your machine running smoothly, so you can sew with confidence.
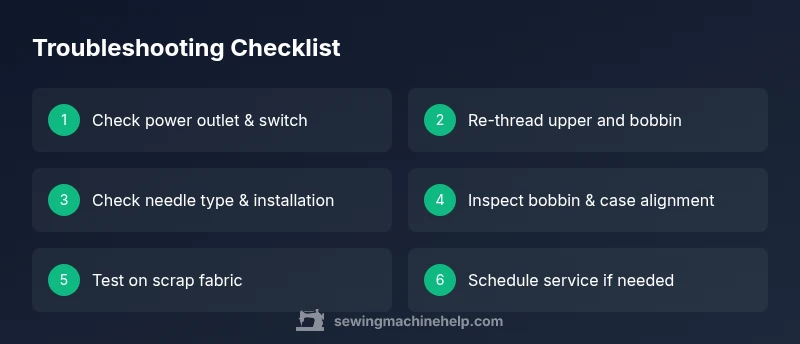
Steps
Estimated time: 45-60 minutes
- 1
Check power and safety
Unplug the machine, inspect the outlet and switch, and confirm the pedal is not stuck. Reconnect power and test the power switch with a known good outlet.
Tip: Always unplug before touching moving parts. - 2
Clear any fabric jams
Remove the fabric, cutters, and any loose threads. Manually rotate the handwheel to feel for resistance and free movement.
Tip: Keep scraps handy to test after clearing jams. - 3
Re-thread the machine
Follow the threading path step by step for both upper thread and bobbin. Ensure there are no slack catches or tangled threads.
Tip: Use a magnifying glass if threads are fine; tiny snags matter. - 4
Check the needle and fabric type
Verify the needle is straight, not bent, and appropriate for your fabric. Replace if dull or bent, and test with scrap fabric.
Tip: Install the needle with the flat side correctly oriented. - 5
Inspect the bobbin and case
Remove the bobbin, clean the bobbin area, and reseat the bobbin in the correct orientation. Ensure the case clicks into place.
Tip: Do not force the bobbin, let it seat with a gentle twist. - 6
Test stitches on scrap fabric
Run a few test stitches on scrap fabric. Check for consistent feed, tension, and stitch quality. If issues persist, go to Step 7.
Tip: Use medium-weight scrap fabric first to gauge tension. - 7
Assess belt and motor
If the motor makes noise but doesn’t move, inspect the drive belt for wear and proper tension. Do not attempt belt replacement unless you’re comfortable.
Tip: A slipping belt often shows delayed start or slow stitching. - 8
Decide on service
If basic steps fail, schedule professional service. Prepare notes on symptoms, parts checked, and photos.
Tip: Include model number and recent maintenance history.
Diagnosis: Machine won't start or sew properly, with possible jams or unusual noises
Possible Causes
- highPower supply issue or unplugged outlet
- highThread tangled in bobbin area or needle path
- highBobbin inserted incorrectly or needle not properly installed
- mediumFabric jam or feed dog obstruction
- lowWorn drive belt or seized mechanism
Fixes
- easyCheck outlet, switch, and pedal; ensure power is reaching the machine
- easyUnthread the machine and re-thread upper path and bobbin, then test
- easyRemove fabric, clear lint/thread from bobbin area, and rotate handwheel by hand
- easyReinstall the bobbin correctly and ensure bobbin case seats properly
- mediumInspect belt for wear or misalignment; replace if necessary
- hardIf motor hums but won’t cycle, seek professional service for electrical/mechanical faults
Your Questions Answered
What is the most common reason a sewing machine won't start?
Power issues or threading problems top the list. Verify outlet, switch, and obvious jams first. If the motor hums but won’t run, the belt or mechanism may be stuck.
Power or threading problems are the most common. Check outlet and jams first.
Is it safe to oil my sewing machine myself?
Oil only as the manual prescribes. Use the recommended oil and apply sparingly to moving parts. Never oil a hot machine or overflow.
Oil only as directed and sparingly.
What should I do if the needle keeps breaking?
Check needle size and type for the fabric, reinstall correctly, and replace bent needles. Tension and threading issues can also cause breakage.
Check needle size and installation, replace bent needles.
When should I seek professional repair?
If you hear grinding, burning smells, or basic fixes fail, professional service is advised. Complex electrical or belt faults require a technician.
Seek professional repair if you hear grinding or burning.
Can I fix a sewing machine without disassembly?
Many issues are resolveable by rethreading, bobbin checks, and cleaning accessible areas. If problems persist, a service visit is safer.
Some fixes don’t need disassembly; otherwise see a pro.
How often should I maintain my machine?
Clean after projects and oil per manual; schedule a professional service every 12-24 months depending on use.
Maintain after projects and schedule service yearly or two.
Watch Video
The Essentials
- Start with power and threading checks.
- Clear jams before deeper diagnosis.
- Replace bent needles and correct bobbin placement.
- Follow maintenance to prevent future failures.
- Call a professional for complex electrical or belt issues.