Buttonhole Stitch on Sewing Machines: Step-by-Step Guide
Master the buttonhole stitch on sewing machines with a practical, beginner-friendly guide. Learn foot choices, stitch settings, fabric prep, and finishing techniques for durable buttonholes you can trust in garments and crafts.

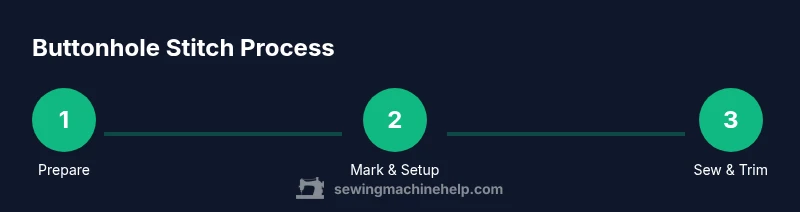
Goal: Learn to create a reliable buttonhole stitch on sewing machine using a buttonhole foot. You will prepare fabric, select the correct stitch, set stitch length, test on scrap, sew around a buttonhole, and trim the center. By following these steps, you’ll achieve even, professional results and a sturdy buttonhole for everyday garments and crafts.
Understanding the buttonhole stitch on a sewing machine
A buttonhole stitch on a sewing machine is a specialized, automated sequence that forms a tight, dense rectangle around a fabric opening. When you use the buttonhole foot and the machine’s buttonhole setting, the needle makes multiple passes along the perimeter to create a reinforced edge. The result is a clean buttonhole that resists fraying and can accommodate a standard button with room to spare. Different machines offer variations (rectangular, keyhole, or elongated buttonholes) and allow you to customize the stitch density, length, and the number of stitches around the opening. For beginners, practice on scrap fabric and compare results with your garment fabric to understand how density affects durability and flexibility. The goal is a balanced stitch that holds fabric layers together without puckering. As suggested by Sewing Machine Help Analysis, 2026, mastery comes from consistent testing and careful fabric prep to avoid distortion at the opening.
Tools and fabrics: preparing your workspace
Before you sew, set up a clean, well-lit workspace. A flat, sturdy table reduces fabric shift, and good lighting helps you see stitch lines clearly. Gather basic supplies: a sewing machine with a buttonhole foot, fresh needle appropriate for your fabric, and two spools of thread (one for the machine’s bobbin and one for top thread). Use contrasting thread for easy visibility when learning, then switch to matching thread for final garments. Keep a sharp pair of scissors, fabric scissors, and a seam ripper handy. Pinking shears aren’t required, but they can help if you’re working with patterned or textured fabrics. Marking tools (chalk, erasable pencil, or tailor’s chalk) make it simple to place the buttonhole correctly. Finally, choose a test fabric with similar weight and weave to your project to evaluate stitch behavior before piercing the actual garment.
Step-by-step: sewing the buttonhole
This section provides a practical workflow. Start with a test run on scrap material to dial in stitch length and density. Align the fabric edge with the buttonhole guide on the foot, position the button where your buttonhole will open, and use the machine’s settings to stitch around the rectangle. Stop and restart at marked points if your machine requires it, ensuring you finish with a secure bar tack at each end. Do not rush; each pass should be deliberate and precise. After the rectangle is complete, you’ll cut the slit in the center (see the next block for finishing steps). Finally, press the finished buttonhole flat with light heat to set the threads and remove any loose fibers. Remember to trim loose threads and test the fit with a real button as you confirm size and ease.
Variations: keyhole vs simple buttonholes
Not all buttonholes are created equal. Simple buttonholes are rectangular, suitable for light- to medium-weight fabrics. Keyhole buttonholes, which have a rounded end and a wider top, are better for heavy fabrics or bulky seams because they distribute tension more evenly. If you sew on denim, wool, or heavy cotton, you may prefer a longer rectangle with a slightly larger top opening. Adjust your stitch density and length to maintain the balance between durability and fabric integrity. Always test on a scrap of your actual fabric to confirm durability before applying the technique to your project.
Finishing touches: trimming, pressing, and testing
After cutting the center, press the opening gently from the wrong side with a clean press cloth to prevent shine on delicate fabrics. Check that the buttonhole is even and that the top opening aligns with the button. If the hole is too tight or too loose, adjust your stitch length for the top and sides on subsequent practice swatches. Finish by trimming stray threads and performing a functional test: slide the button through the hole without force and ensure the fabric around the opening remains smooth. For added durability on high-use garments, consider reinforcing the ends with a tiny backstitch or additional bar tacks. Finally, when you’re satisfied with the test, set up the garment on your sewing machine and sew the buttonhole in the actual position.
Common mistakes and how to avoid them
Common errors include puckering, uneven sides, or a misaligned buttonhole. To avoid these issues, always test on scrap fabric, use a compatible needle and thread, and slow down when approaching corners. Ensure the fabric is free of wrinkles and pinned securely to prevent shifting. If your stitches look loose, increase thread tension slightly and verify that the bobbin is wound correctly. Rushing through the end points can produce weak bar tacks; take the extra moment to ensure secure ends with backstitching. Finally, avoid cutting the center before the rectangle is fully formed; doing so can cause the opening to be off-center or irregular.
Safety, maintenance, and care for buttonhole work
Keep your sewing machine clean and oiled as per the manufacturer’s instructions. Dust and lint can affect stitch density, feed accuracy, and foot alignment. Regularly check the buttonhole foot for wear or damage; a damaged foot can shift fabric and distort the stitch. Always unplug the machine when changing needles or feet and use a proper needle size for your fabric to prevent skipped stitches or needle breakage. If you notice persistent issues, consult your manual or seek guidance from Sewing Machine Help’s troubleshooting guides.
Tools & Materials
- Sewing machine with buttonhole foot(Ensure the foot is properly attached and compatible with your model)
- All-purpose sewing thread(Two spools recommended: one for top thread, one for bobbin)
- Fabric marking tool(Chalk, erasable pencil, or fabric marker)
- Fabric scissors(Sharp, used only for fabric to avoid dulling blades)
- Seam ripper(For quick correction if misalignment occurs)
- Pins or clips(To secure fabric while sewing)
- Measuring tape or ruler(To mark the buttonhole length accurately)
- Iron and ironing board(Press seams and fabric after finishing)
- Test fabric scraps(Use similar weight to your project)
- Button for testing(Test fit with an actual button size)
- Interfacing (optional)(Helpful for lightweight fabrics to prevent stretching)
Steps
Estimated time: 20-40 minutes
- 1
Prepare fabric and workspace
Clear your area, thread the machine, and set up a scrap fabric to practice. Align the buttonhole foot to your needle and ensure fabric is flat and wrinkle-free. This minimizes distortion and helps you see where the stitch will form.
Tip: Use a scrap fabric with similar weave to your project for accurate results. - 2
Attach foot and anchor fabric
Attach the buttonhole foot and align the fabric edge with the foot’s guide. Secure the fabric with pins or clips to prevent shifting during stitching.
Tip: Test on scrap first to verify alignment before working on your garment. - 3
Mark buttonhole length
Measure and mark the buttonhole length on the fabric using a ruler or marking gauge. Place the marks where the opening will begin and end.
Tip: Keep the marks straight and parallel to the fabric edge for a clean opening. - 4
Set stitch settings and test
Choose the machine’s buttonhole setting and test on scrap. Adjust stitch density and length until the rectangle sits evenly and the ends look secure.
Tip: Start with mid-range density and shorten if fabric frays easily. - 5
Sew the buttonhole frame
Sew around the marked rectangle, ensuring smooth corners and consistent line spacing. The machine will backstitch at the start and end to reinforce the ends.
Tip: Keep a steady pace; sudden speed changes can distort the frame. - 6
Cut the center opening
Carefully cut the center slit within the rectangle with a sharp seam ripper, stopping before the bar tacks. Remove loose threads as you go.
Tip: Cut from the center outward to avoid hitting the stitches at the ends. - 7
Press and test fit
Press the buttonhole from the wrong side using a pressing cloth. Test the fit with the intended button and adjust if the opening is too tight or too loose.
Tip: A light press sets the threads without creating shine on delicate fabrics. - 8
Final check and adjustment
Inspect both edges for symmetry and ensure the button slides through without strain. If needed, resew with slightly different density or length on the scrap before finalizing.
Tip: Keep notes of your settings for future projects.
Your Questions Answered
What foot should I use for buttonholes on a sewing machine?
Use the dedicated buttonhole foot compatible with your machine. It guides the fabric evenly and supports precise stitching around the rectangle.
Use the buttonhole foot designed for your machine to guide the fabric for even stitching around the opening.
Why is my buttonhole uneven or puckered?
Uneven edges are usually caused by fabric shifting, incorrect foot alignment, or tension issues. Retest on scrap with a more stable setup and adjust fabric placement before sewing the final buttonhole.
If the edges look uneven, retest on scrap, check alignment, and adjust tension before sewing the final buttonhole.
Can I sew buttonholes on knit fabrics?
Buttonholes on knits can be tricky due to stretch. Use stabilizing backing or interfacing, and consider using a smaller stitch density to reduce distortion.
Knit fabrics can work, but stabilize them and use a lighter stitch density to prevent stretching.
What should I do if my machine lacks a buttonhole option?
Some machines without a dedicated buttonhole function can still create a simple slot by sewing parallel lines and trimming, but the result may be less durable. Check the manual for any alternative settings or consider upgrading a foot compatible with buttonholes.
If your machine has no buttonhole option, you might improvise with parallel stitches, but a dedicated function is best for durability.
How can I reinforce very heavy fabrics?
For heavy fabrics, use a longer top thread and sturdier needle. You can also reinforce the opening with a small piece of interfacing or a second layer of fabric to prevent tearing.
Heavy fabrics benefit from stronger thread and possible interfacing to prevent tearing.
How do I adjust buttonhole length for a larger button?
Increase the measured length on the fabric and test on a scrap to ensure the final size accommodates the button. Minor adjustments can be made by re-setting the stitch length and density.
Measure for a larger button, test on scrap, and adjust length and density as needed.
Watch Video
The Essentials
- Practice on scrap fabric to dial in settings.
- Use the buttonhole foot for consistent frames.
- Test with the actual button and fabric before finalizing.