How to Use a Sewing Machine: A Beginner's Quick Guide
Learn to safely operate a sewing machine with practical, step-by-step instructions. From setup and threading to stitching, practice plans, and maintenance, this educational guide helps home sewists build confidence and avoid common mistakes.

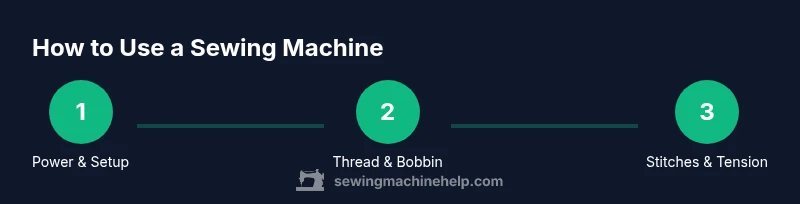
To use a sewing machine, set up a clean workspace, thread the machine and bobbin, select a basic stitch, test on scrap fabric, and practice straight and simple seams. Always unplug when threading or changing needles, and consult your manual for model-specific steps.
How to use sewing machine: Getting started
According to Sewing Machine Help, the first step to how use sewing machine is establishing a safe, comfortable workspace and understanding your model’s basics. Position your body so you can see the needle, keep wrists relaxed, and avoid leaning over the work area. Before you begin, read the manual for your specific machine because features can vary. A steady, quiet setup reduces mistakes and protects your equipment. Practice on a scrap piece to feel the machine's rhythm and sound. This foundational phase builds confidence and makes later steps more intuitive.
- Set up on a sturdy table with good lighting.
- Keep your fabric flat and free of pins at the needle line.
- Have a waste bin handy for thread scraps.
- Wear safety glasses if you tend to work quickly.
A calm, deliberate start saves time and prevents frayed seams later. Remember, the goal is to develop a consistent groove before you tackle real projects.
Threading the machine and winding the bobbin
Threading a sewing machine correctly is essential for even stitches and reliable performance. Start by placing a fresh needle and winding the bobbin according to your manual. The thread path typically begins at the spool, through the thread guide, into the tension disks, and down to the bobbin case. When winding the bobbin, run the machine slowly to ensure the thread coils evenly. Place the bobbin in its case with the thread exiting clockwise and pull it through the slit to seat it properly.
- Use high-quality thread to minimize lint and breakage.
- Ensure the needle is securely screwed in before starting.
- Test stitch on scrap fabric to verify tension balance before sewing your project.
If you notice loops or skipped stitches, recheck the thread path and tension settings. Small adjustments here prevent larger problems later.
Selecting stitches and adjusting tension
Most beginner projects start with a straight stitch. Once you’re comfortable, explore a zigzag stitch for finishing edges or decorative seams. Start with a standard stitch length around 2.5 to 3.0 mm and a width of 0 for straight seams. Tension balance is crucial: if the upper thread shows on the bottom or the bottom thread on top, you likely need to adjust the tension dials or re-thread the machine. Use scrap fabric to test adjustments until you see consistent stitches on both sides.
- Choose basic stitches first; save decorative options for later.
- Always test on fabric similar to your project material.
- When in doubt, reset to factory tension and re-test.
Understanding stitch types and tension helps you handle a wide range of fabrics with confidence.
Preparing fabric and practicing straight seams
Fabric prep is a quiet power move. Wash, dry, and press fabrics to remove wrinkles before stitching. Use a standard seam allowance (often 5/8 inch or 1.5 cm) and guide your fabric with both hands for accuracy. Start with straight seams on scrap fabric, then backstitch at the beginning and end to lock stitches. Practice stopping with the needle down, which helps control fabric and reduces fabric shift at corners.
- Pin or clip fabric to prevent slipping.
- Use chalk or fabric markers to mark seam lines.
- Increase stitch length slightly for heavy fabrics to prevent perforation.
Consistency here translates directly to cleaner, more professional results on real projects.
Safety, maintenance, and common troubleshooting
Sewing machines require regular maintenance to stay reliable. Unplug the machine before any cleaning or oiling. Remove lint with a small brush and wipe away dust from the bobbin area. A light drop of sewing machine oil may be used on moving parts as recommended by your manual. If you encounter thread nests, loops, or uneven feeding, re-check threading and tension. Keep spare needles and threads on hand, and replace dull needles promptly to avoid fabric damage.
- Never sew over pins; remove pins as you approach them.
- Use the correct needle size for your fabric.
- Store the machine in a clean, dry area to prevent rust and corrosion.
With routine checks, your machine stays quiet, accurate, and ready for longer sewing sessions.
Practice plan: gradually building skills over multiple sessions
A structured practice plan accelerates learning. Start with 15–20 minutes of basic stitching on scraps, then progress to small projects like pillows or tote bags. Each session should include a quick test of tension and a few straight seams, plus a backstitch at the start and finish. Track your progress with a simple checklist and review any issues at the end of the session to refine your technique for next time.
- Week 1: Master threading, bobbin winding, and straight seams.
- Week 2: Add zigzag stitches and seam finishing.
- Week 3: Practice corners, corners, and backstitching.
- Week 4: Complete a small project with finishing touches.
Consistency beats bursts of speed; steady practice builds muscle memory and confidence.
Authoritative resources and further learning
For deeper explanations, consult reputable sources. These external resources offer safety guidelines, basic mechanics, and project ideas you can trust:
- https://extension.illinois.edu (University extension: sewing basics and safety)
- https://extension.oregonstate.edu (Oregon State University extension: beginner projects and machine care)
- https://www.osha.gov (Occupational Safety and Health Administration: general machine safety guidance)
Refer to these authorities to supplement your hands-on practice and stay informed about safe sewing practices.
Tools & Materials
- Sewing machine (any household model)(Ensure it sits on a sturdy table with a clear workspace.)
- Foot pedal and power cord(Keep the cord out of the way of your fabric and feet.)
- Neutral or all-purpose sewing thread(Quality matters for smooth feeding and minimal lint.)
- Needles (assorted sizes)(Use appropriate size for fabric type.)
- Bobbin(s) wound with compatible thread(Pre-wind and test to avoid tension issues.)
- Scissors, rotary cutter, and seam ripper(For cutting and correcting mistakes.)
- Pins or clips, dressmaker’s chalk(Guides and marks help prevent shifting.)
- Measuring tape and guide ruler(Useful for accurate seam allowances.)
- Fabric scraps for practice(Begin with inexpensive fabric to learn.)
- Lint brush or small vacuum(Optional, helps keep the bobbin area clean.)
Steps
Estimated time: 30-45 minutes
- 1
Power up and prepare the machine
Place the machine on a stable surface, plug in, and turn it on. Take a moment to adjust your seat height so your eyes align with the needle. This setup reduces fatigue and helps you control fabric more precisely.
Tip: Always unplug before threading or changing needles to prevent accidental starts. - 2
Thread the machine and wind the bobbin
Follow the thread path from the spool through guides to the needle. Wind a bobbin on its own, then place it in the bobbin case. Test stitch on scrap fabric to ensure tension is balanced.
Tip: Use scrap fabric to check the balance between upper and lower threads before sewing real pieces. - 3
Install the needle and set basic stitch
Secure a size-appropriate needle. Select a straight stitch with a default length around 2.5–3.0 mm. Lower the presser foot and gently guide fabric under the needle.
Tip: Lower the needle when starting from the edge to avoid snagging. - 4
Practice a basic seam
Place fabric right sides together, start sewing with a backstitch, and maintain a steady pace. Stop with the needle down at corners to pivot smoothly.
Tip: Backstitch for a few stitches at the start and end to lock the seam. - 5
Finish the seam and clip threads
Raise the needle, cut threads close to the fabric, and press the seam flat. Pressing helps set stitches and reduces puckering.
Tip: Press from the right side of the fabric for a crisp finish. - 6
Experiment with stitch types
Try a zigzag stitch for edge finishing or a wider stitch for decorative details. Practice on scraps to observe how fabric behaves.
Tip: Choose stitch width carefully to avoid fabric distortion. - 7
Switch fabrics and adjust tension
Move to a new fabric and recheck tension. Adjust upper thread tension slightly if stitches pull to one side or appear uneven.
Tip: Always test on scrap fabric after any tension change. - 8
Plan a small project
Apply what you learned to a simple project like a napkin or tote. Build a short checklist of steps and finish with a clean edge.
Tip: Document your settings so you can reproduce successful results later.
Your Questions Answered
Do I need a special needle for every fabric type?
Yes. Different fabrics require different needle sizes and types. Use a universal needle for many fabrics, but switch to a ballpoint needle for knits and a sharp needle for woven fabrics to prevent skipped stitches.
Yes. Use the right needle for your fabric to avoid skipped stitches.
Why does the thread bunch up under the fabric?
This usually means the machine is not threaded correctly or the tension is off. Re-thread the machine, check the bobbin wound correctly, and test on scrap fabric.
Thread bunching usually means re-threading or adjusting tension is needed.
Is it safe to oil my sewing machine at home?
Only apply oil as recommended by your machine's manual. Use a small amount and avoid over-oiling, which can attract lint and cause jams.
Oil only as the manual says and sparingly.
How often should I service my machine?
Regular cleaning and occasional professional service keep the machine in good condition. Refer to your manual for the suggested service interval.
Keep it clean and regularly check for wear; schedule service per the manual.
Can I sew without a presser foot?
The presser foot stabilizes fabric and feeds it evenly. Most stitches require a presser foot; use the right foot for different stitches and fabrics.
The presser foot is essential for most stitches.
What should I do if my needle breaks?
Turn off and unplug the machine, remove the broken needle, and replace with a new one of the correct size. Check fabric for hidden obstructions and retest on scrap.
If the needle breaks, replace it and test on scrap first.
Watch Video
The Essentials
- Master threading and bobbin winding for reliable stitches
- Practice on scraps before working with real projects
- Backstitch at starts/ends to secure seams
- Test tension on similar fabric before tackling final product