Janome Sewing Machine for Beginners: A Practical Guide
A practical step-by-step guide for beginners using a Janome sewing machine. Learn setup, stitches, safety, maintenance, and growth tips from Sewing Machine Help.

With a janome sewing machine for beginners, new sewists gain reliable stitch quality, intuitive controls, and simple threading that makes learning easier. Choose a model with beginner presets, a drop-in bobbin, clear guides on the throat plate, and adjustable stitch length. This guide walks you through setup, basic stitches, practice projects, and essential maintenance so you can start sewing confidently.
Why the janome sewing machine for beginners is a solid starter
A janome sewing machine for beginners is designed with approachable features that reduce the learning curve while delivering dependable results. When you’re just starting, consistent stitch quality and simple threading can make the difference between progress and frustration. According to Sewing Machine Help, choosing a model with clear guides, an easy-access bobbin, and lightweight operation helps new sewists build confidence quickly. The janome brand is known for reliable mechanics and friendly presser feet, which translates into fewer jams and more time sewing. For beginners, the ideal machine balances user-friendliness with room to grow, so you won’t outgrow it after a few projects. In this guide we’ll explore what to look for, how to set up, and how to practice essential techniques using the janome sewing machine for beginners, with practical tips tailored to home sewists like you.
Key features to look for in a beginner-friendly Janome
When selecting a Janome for a beginner, you want features that simplify learning and protect your fabric. Look for a model with a clear top-loading bobbin, easy threading path, a handful of built-in stitches (including straight and zigzag), and a simple stitch-length dial. A front-loading or drop-in bobbin reduces fiddling and helps you focus on sewing. Ergonomics matter too: a light machine with a comfortable handwheel and accessible foot pedal makes long practice sessions less tiring. Sewing Machine Help notes that models with adjustable tension and a generous throat space accommodate thicker fabrics and beginner projects without frustration. Finally, consider whether the machine offers a free arm for sleeves or cuffs, which expands the kinds of projects you can tackle early on.
Setup and safety essentials before you sew
Before you thread your machine, prepare a clean workspace with good lighting. Check that the power switch is off, the machine is plugged into a grounded outlet, and the foot pedal responds smoothly. Tie back long hair and secure loose clothing. Place scrap fabric underneath your needle plate to test stitches first. This is also a great time to consult your user manual for model-specific threading routes and safety notes. Sewing Machine Help emphasizes taking a moment to set needle height and presser foot pressure appropriate to the fabric you’re using. With proper setup, you’ll avoid needle breakage and fabric jams and feel more confident as you begin.
Threading, needle, and bobbin basics
Threading a Janome correctly is essential for clean stitches. Start with a fresh needle (size depends on fabric weight) and thread with the machine threaded from spool to bobbin as directed by your manual. Wind the bobbin evenly and load it into the bobbin case. Remember to test the tension using a scrap piece: if the top thread forms a smooth interlock with the bobbin thread, you’re set. A common beginner mistake is not aligning the needle properly or using a dull needle, which causes skipped stitches. Keep spare needles on hand and replace them after every few projects or when you notice skipped stitches. Sewing Machine Help recommends rechecking the threading path after any tension adjustments to ensure consistent results.
First stitches: straight, zigzag, and backstitch basics
Start with straight stitches on scrap fabric to establish a baseline. Then try a zigzag stitch to learn fabric handling and edge finishing. Practice backstitch at the beginning and end of seams to secure threads. Keep your speed steady and guide the fabric, don’t push or pull, which can cause uneven stitches. For beginners, a short stitch length (around 2.0–2.5 mm) often yields stronger seams on woven fabrics. If you see looping or bird nesting beneath the fabric, double-check bobbin threading and upper thread tension. The goal is clean, even stitches with minimal tension issues. Remember to slow down when moving to new fabrics or more complex stitches and always test on scraps first.
Practice projects that build foundational skills
Begin with simple projects that reinforce straight seams and consistent seam allowances. A lined tote bag or a pillowcase teaches straight-line stitching, finishing edges, and pressing techniques. A practice sampler with swatches of muslin, cotton, and light polyester fabric helps you compare how different fabrics handle stitches and tension. By completing small projects, you’ll gain confidence, learn to troubleshoot, and slowly introduce more complex techniques like topstitching or narrow hems. Sewing Machine Help reminds beginners to set realistic goals and celebrate small wins as you progress.
Troubleshooting common issues you’ll encounter
Even well-set machines encounter hiccups. If stitches skip, recheck needle type and threading path, as well as fabric weight. Nests underneath indicate bobbin tension or misthreading; re-wind the bobbin and re-thread. Fabric jams usually mean fabric is pulled too aggressively or the presser foot is too high; reseat and rework with a slower pace. If your fabric bunches on the underside, the top thread may be too loose or the bobbin inserted incorrectly. Take notes of what you changed to resolve each issue; this habit speeds up future fixes and builds confidence with your Janome.
Maintenance and care routines for longevity
Regular cleaning prevents lint build-up that can affect stitch quality. Remove lint from the feed dogs and bobbin area after every few projects. Oil only where your manual recommends, avoiding belt contact areas. Replace needles after 6–8 hours of sewing or with every new fabric type. Cover the machine when not in use to protect it from dust, and store accessories in a dedicated box. Sewing Machine Help suggests setting a simple maintenance schedule—clean, oil (if applicable), and test stitch monthly—to keep your Janome running smoothly for years.
How to grow from beginner to confident hobbyist
As you gain experience, expand into more stitches and functions offered by your Janome. Explore decorative stitches for simple projects, learn to adjust tension for different fabrics, and experiment with walking feet for quilts or denim. Keep a sewing journal to record fabric types, stitch settings, and outcomes. Join a local sewing group or online forum to share tips and receive feedback. Remember that progress comes from consistent practice and gradual challenges; celebrate each milestone and set a new learning goal each month.
Tools & Materials
- Janome sewing machine(Model in good working order; ensure manual is available)
- Power cord and foot pedal(Grounded outlet; functional cord without frays)
- Spool of all-purpose thread(Neutral color works for practice)
- Bobbin case and bobbins(Use compatible bobbins for your model)
- Assorted sewing needles (size 14/90)(For woven fabrics; add sizes for knits if needed)
- Fabric scissors(Sharp, dedicated fabric scissors)
- Pins and pincushion(Flat-head pins recommended)
- Measuring tape (60 inches)(For hems and seam allowances)
- Seam ruler or fabric chalk/marking pen(Helpful for precise hems)
- Lint brush or small brush(Daily maintenance)
- Sewing machine oil (if your model requires it)(Only if specified by manual)
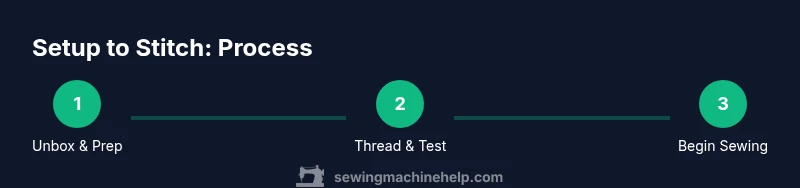
Steps
Estimated time: 30-60 minutes
- 1
Unbox and inspect the machine
Remove all packaging, plug in the machine, and perform a quick exterior check for loose screws or obvious damage. Read the manual cover to confirm model-specific setup steps. This initial check helps prevent surprises mid-project.
Tip: Take photos of any unusual parts or settings for reference later. - 2
Wind and insert the bobbin
Wind an appropriate bobbin with thread, place it in the bobbin case, and thread the top of the machine according to the manual. Ensure the bobbin rotates clockwise as it feeds, and that the thread exits the case cleanly.
Tip: Do a quick stitch test on scrap fabric to confirm smooth bobbin action. - 3
Thread the needle and prepare fabric
Raise the presser foot, thread the needle from front to back, and draw up the bobbin thread. Place your fabric under the presser foot with the edge aligned to your seam guide. Lower the presser foot to hold fabric in place.
Tip: Use a fresh needle and ensure the thread path is free of tangles before starting. - 4
Sew a straight line on scrap fabric
Select a straight stitch, set a short stitch length, and sew slowly to practice seam alignment. Keep the fabric guide aligned with the needle to maintain a consistent seam allowance.
Tip: Practice speed control; avoid forcing fabric if it resists. - 5
Experiment with zigzag and backstitch
Try a basic zigzag stitch for edge finishing and a backstitch at the start and end to secure threads. This builds familiarity with stitch variation without complexity.
Tip: Record which settings produced clean edges for future projects. - 6
Clean up and plan next project
Turn off the machine, unplug, and clean the bobbin area. Store tools properly and note what you’ll tackle next, such as a simple pillow cover or tote bag.
Tip: Keep a small notebook of stitch settings and fabrics used for quick reference.
Your Questions Answered
Is a Janome good for beginners?
Yes. Janome machines are known for reliable basic stitches, simple threading, and supportive beginner features. They strike a balance between ease of use and room to grow as you tackle more projects.
Yes—Janome machines are beginner-friendly and offer features that help new sewists learn quickly.
Which Janome model is recommended for beginners?
Look for entry-level Janome models with essential stitches, an easy bobbin system, a clear throat plate, and a comfortable footprint. Avoid overly feature-rich models if you’re just starting; you can always upgrade later.
Start with a basic Janome model with essential stitches and easy threading.
Do I need special needles for beginners?
Use standard universal needles (size 14/90) for woven fabrics and switch to smaller or larger sizes depending on fabric weight. Dull needles can cause skipped stitches and fabric snags.
Use universal needles for most beginners’ projects and replace them frequently.
How do I thread a Janome sewing machine?
Follow the threading path shown in your manual, ensuring the top thread and bobbin thread are correctly engaged. Test on scraps and adjust tension if stitches loop or pucker.
Just follow the manual’s threading path and test on scrap fabric.
What basic stitches should I learn first?
Learn straight stitch for seams, a zigzag for finishing edges, and backstitch for secure starts and ends. These form the foundation for almost all beginner projects.
Start with straight, zigzag, and backstitch stitches.
How often should I service my Janome?
Follow the manual’s guidance for cleaning and oiling. Regular light maintenance, plus prompt fixes for jams or thread issues, helps ensure long-term reliability.
Keep it clean and serviced according to the manual to maintain performance.
Watch Video
The Essentials
- Choose a beginner-friendly Janome with easy threading and clear guides.
- Master threading, bobbin installation, and basic stitches first.
- Practice on scrap fabric before tackling real projects.
- Maintain the machine regularly to prolong life.