Embroidery Janome Sewing Machine: A Practical Guide
Learn how to use a dedicated embroidery Janome sewing machine, from setup and threading to loading designs, hooping, stabilizers, and maintenance. This educational guide helps home sewists achieve clean, professional embroidery results with step-by-step instructions and practical tips.

With a dedicated embroidery Janome sewing machine, you’ll learn to load designs, hoop fabric, thread correctly, and complete a simple project with clean stitches. This quick guide outlines setup, stabilizers, and basic troubleshooting to help beginners start confidently and advance their embroidery skills. It includes essential safety tips, material recommendations, and a practical workflow you can follow this weekend.
What is an embroidery Janome sewing machine?
According to Sewing Machine Help, an embroidery Janome sewing machine is a specialized device designed to stitch decorative designs onto fabric using built-in patterns or externally loaded designs. Unlike a standard sewing machine that focuses on straight or decorative stitches, an embroidery model combines a dedicated embroidery unit, an adjustable embroidery hoop, and a precision feed system to produce consistent, professional results. Janome machines often pair a user-friendly touchscreen or LCD interface with intuitive design transfer options, so you can place a motif, select colors, and control stitch density with confidence. For home sewists, this means you can move from simple monograms to complex florals without manual punchwork. The overall goal is to create clean edges, uniform color fills, and balanced stitch tension, while keeping the process accessible even for beginners.
Why choose a Janome for embroidery?
The Sewing Machine Help team found that Janome embroidery systems generally offer smooth operation, solid hoop alignment, and broad support networks. The machines are designed to minimize fabric distortion and needle deflection, which helps beginners produce reliable results. Janome also tends to provide reliable presser-foot systems and good thread tension across a range of fabrics, from light cottons to mid-weight denims. For new users, a well-supported ecosystem means easier troubleshooting, more accessible replacement parts, and a smoother learning curve. It’s not just about fancy features; it’s about consistency and confidence when you stitch.
Key features to look for in a dedicated embroidery unit
When evaluating a dedicated embroidery unit, prioritize a large usable embroidery field, sturdy hoop options, and an intuitive interface. Look for built-in designs and the ability to import new motifs, USB connectivity or wireless transfer, and clear color management with automatic color stops. A fast embroidery speed helps complete projects sooner, but ensure the machine offers adjustable speed and start/stop controls to protect fabric when you’re learning. A bright, glare-free touchscreen, good lighting, and easy navigation also reduce mistakes. Finally, verify the machine’s reliability, warranty, and access to customer support—these are big factors in long-term satisfaction with a hobby or small-batch production setup.
Setup: Preparing your Janome for embroidery
Begin by selecting a clean, well-lit workspace and gathering your materials. Power on the machine, install the embroidery unit (if required for your model), and confirm the hoop size matches your planned design. Check the thread spools for quality, keep a spare bobbin, and ensure your fabric is clean and wrinkle-free. Calibrate the machine’s tension if it offers manual control, and set a safe embroidery speed before loading a design. A quick test stitch on scrap fabric helps confirm alignment and tension before you commit to your final piece.
Threading and bobbin basics on a Janome embroidery machine
Correct threading is the backbone of clean embroidery. Start by threading the top thread through all guides and down to the needle, then thread the bobbin and engage the bobbin pick-up. Use a fresh needle appropriate for the fabric type to prevent skipped stitches or fabric snags. Hold the thread tails gently to avoid looping, and test a short sample to ensure consistent tension. If you notice birds-nesting or uneven stitches, rethread both top and bobbin, verify needle size, and check for lint buildup in the bobbin area. Regular thread path checks save time during actual stitching.
Loading designs: USB, built-in, and connectivity
Most Janome embroidery machines support loading designs via USB drives, direct transfer from a computer, or using built-in libraries. Make sure the design fits the hoop and adheres to the fabric’s base, especially if you’re stitching dense fills. Verify the design orientation, color order, and stopping points for color changes. If you’re transferring from a computer or a USB drive, perform a quick test stitch on fabric scrap to confirm everything aligns with your design’s intended path. Respect firmware requirements and model-specific steps outlined in your manual.
Hoop selection and fabric placement
Choosing the correct hoop is essential to avoid fabric creeping and puckering. Use a hoop size that accommodates the design with some clear border; this helps you keep the fabric flat and centered. Place a stabilizer underneath the fabric to prevent stretch and distortion. Smooth the fabric, remove wrinkles, and lightly tape the edges if needed. Center the pattern on the fabric and align with hoop markings. Secure the hoop in the machine, and perform a quick dry run if your model supports it. Proper placement reduces the chance of misalignment and saves thread.
Stabilizers and threads: Getting clean embroidery results
Stabilizers are critical for successful embroidery. Choose tear-away stabilizers for woven fabrics and cut-away stabilizers for knits or stretchy materials. Use a water-soluble topping if you’re working on pile fabrics or dense embroidery to prevent stitches from sinking. Select embroidery thread in high-quality rayon or polyester to ensure color fastness and sheen. Matching stabilizer weight to fabric thickness minimizes show-through and distortion. Trialing a few stitch samples helps determine the best stabilizer combo for your project.
Common troubleshooting for embroidery jams on Janome
Thread breaks, skipped stitches, or teaerial misalignment are common issues when starting out. Check needle condition and size, rethread the machine, and verify the bobbin is feeding smoothly. Ensure the design is not exceeding hoop capacity or causing excessive stitch density. Reduce speed for delicate fabrics, and check for fabric folds inside the hoop. When problems persist, consult the manual’s troubleshooting section or contact customer support for model-specific advice.
Maintenance and care for long-term performance
Regular maintenance keeps your embroidery machine performing at its best. Clean lint from the bobbin area, wipe away dust from exterior surfaces, and oil only if your model requires it and you know the correct type. Replace worn needles promptly, as dull points can damage designs and fabrics. Store threads and stabilizers in a sealed container to prevent tangling or moisture. Schedule periodic professional servicing for a full check on timing, tension, and overall machine health.
Quick-start project: a simple design to try
Choose a small motif—like a monogram or floral accent—that fits within a 4x4 inch hoop. Hoop stabilizer and fabric, load your design, thread colors in sequence, and start with a slow speed. Change colors at color-stop points, then trim jump stitches as they appear. After stitching, carefully remove the hoop and stabilizer, gently press from the back with a pressing cloth, and admire your first completed embroidery.
Practice plan and next steps
Set a two-week plan to build familiarity with your embroidery Janome sewing machine. Week one: practice with simple shapes and consistent stitching on scrap fabric. Week two: attempt denser fills, curved lines, and basic lettering or monograms. Track your results, note tension or alignment improvements, and adjust your technique accordingly. Remember, consistency comes from repetition and careful attention to the hoop, stabilizer, and thread choices.
Tools & Materials
- Janome embroidery sewing machine(Ensure it includes embroidery unit or supports one.)
- Embroidery hoops (various sizes)(Start with a 4x4 inch hoop; larger sizes expand design options.)
- Stabilizers (tear-away and/or cut-away)(Choose weight to match fabric and design density.)
- Fabric for embroidery(Pre-wash and press; avoid fabric with heavy nap.)
- Embroidery threads (rayon/polyester)(Use colorfast, high-quality threads.)
- Bobbin thread(Lightweight thread compatible with your bobbin.)
- Embroidery needles (sharp/size appropriate)(Replace needles frequently for dense designs.)
- Scissors and thread snips(Small, sharp for trimming tails.)
- Design transfer method (USB drive or direct connect)(Check machine compatibility.)
- Small lint brush or compressed air(Clean lint from bobbin area as needed.)
- Sewing machine oil (if required by model)(Only use if manufacturer recommends.)
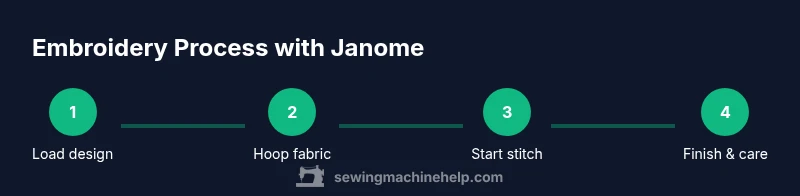
Steps
Estimated time: 45-60 minutes
- 1
Inspect design and workspace
Choose a simple design and set up a clean, well-lit workspace. Verify hoop size, stabilizer choice, and fabric compatibility before starting.
Tip: Do a quick test stitch on scrap fabric to verify alignment. - 2
Hoop fabric with stabilizer
Place stabilizer underneath the fabric and align the design area within the hoop. Smooth away any wrinkles to prevent puckering.
Tip: Use a light spray or temporary adhesive if fabric shifts. - 3
Thread and needle preparation
Thread the machine from spool to needle with clean paths; install a fresh needle suited to fabric thickness and type.
Tip: Rethread if you see skipped stitches or bird-nesting. - 4
Load design and secure hoop
Transfer the design to the machine and align the hoop with the design orientation. Verify color order and stitching path.
Tip: Run a dry stitch to confirm placement before actual embroidery. - 5
Start embroidery and manage colors
Begin stitching at a low speed; swap threads at color changes as prompted by the design. Stop if fabric shifts and realign before continuing.
Tip: Keep snips handy to trim tails between colors. - 6
Finish, remove, and care
Finish the final color, trim threads, remove the hoop, and carefully remove stabilizer. Press from the back with a protective cloth.
Tip: Wash or remove water-soluble toppers as instructed by the stabilizer type.
Your Questions Answered
What is the main difference between embroidery mode and sewing mode on a Janome?
Embroidery mode uses a hoop, buffers fabric, and stitches a design with color changes, while sewing mode focuses on built-in stitches and straight lines. The transition is accomplished by attaching the embroidery unit and loading a design. Always switch to embroidery mode when you’re ready to stitch a motif.
Embroidery mode uses a hoop and design stitching; sewing mode uses regular stitches. Switch modes when you plan to stitch a motif.
Can I use any design with my Janome embroidery machine?
Most Janome machines accept designs from USB or built-in libraries, within the hoop size limits. Ensure the design matches the hoop, verify color stops, and confirm compatibility with your model’s firmware.
Designs should fit the hoop and be compatible with your firmware. Use a quick test stitch to confirm alignment.
Do I need stabilizers for every project?
Yes. Stabilizers provide support to prevent fabric distortion, especially for dense fills or delicate fabrics. Choose tear-away for woven fabrics and cut-away for knits or stretch fabrics.
Stabilizers are essential for most embroidery; pick the right type for your fabric.
How do I fix thread breaks during embroidery?
Check the needle for damage, rethread the machine top and bobbin, and ensure the thread path is smooth. If issues persist, lower the speed and use fresh thread.
Inspect the needle, rethread both top and bobbin, and test at a slower speed.
Is it safe to embroider on stretch fabrics?
Yes, with the right stabilizer and tension adjustments. Use a stabilizer that supports the fabric and consider a smaller stitch density to reduce distortion.
Stretch fabrics can be embroidered safely with proper stabilizers and tension adjustments.
What basic maintenance should I perform after projects?
Remove lint, clean the bobbin area, and lubricate only if your model requires it. Store stabilizers and threads properly to prevent damage.
Clean the bobbin area and follow the model’s maintenance schedule.
Watch Video
The Essentials
- Prepare your design, fabric, and stabilizer before stitching.
- Hoop correctly and thread with high-quality materials.
- Stabilizers prevent puckering and improve stitch quality.
- Practice with scrap fabric to build consistency.
- Maintain the machine regularly for long-term performance.