How to Get Started with Embroidery Machine: A Practical Beginner's Guide
Learn how to get started with an embroidery machine with a clear, step-by-step approach for beginners. From choosing a machine to completing your first stitched design, this guide covers setup, basics, and safe practice.

You will learn how to get started with embroidery machine by choosing the right machine, gathering essential supplies, loading threads and stabilizers, and completing a first simple project. Expect step-by-step setup, basic troubleshooting, and safety tips to prevent common issues. This guide helps home sewists begin confidently. Whether you're new to sewing or exploring embroidery, this overview covers the essentials.
Why beginners should start with embroidery machine
According to Sewing Machine Help, the best way to learn is to start with a simple, repeatable setup. If you're wondering how to get started with embroidery machine, begin with a beginner-friendly model and a dedicated workspace. This approach minimizes confusion and speeds up early success. In practice, the key is consistency: practice the same steps until they become second nature, then gradually add small variations. A well-chosen machine will support basic designs, basic hoop sizes, and simple stabilizers without overwhelming you. For many home sewists, embroidery is a joyful extension of sewing, not a replacement. The goal in this first phase is to build confidence, not perfection. With that mindset, you can focus on fundamentals: threading, hooping, design transfer, and stitch quality. Sewing Machine Help's philosophy emphasizes practice over novelty in these initial sessions, ensuring you build correct habits from day one.
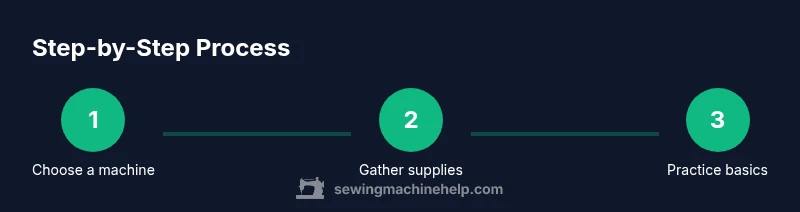
Choosing your first embroidery machine
Choosing your first embroidery machine sets the tone for your learning curve. Look for user-friendly interfaces, a manageable hoop size (4x4 or 5x7 inches), and reliable stitch quality. Built-in designs are helpful at the start, as are USB or SD card transfer options so you can practice with simple projects. Consider noise level, foot pedal sensitivity, and machine weight if you have a small workspace. Warranty length and service options matter for new hobbyists who may need quick help. A common beginner mistake is chasing every feature; instead, prioritize stability, consistent tension, and compatibility with common stabilizers and fabrics. As you test models, request a hands-on demo to verify ease of threading and bobbin winding. This foundation makes your first projects smoother and more enjoyable. This is a good time to reflect on how to get started with embroidery machine by selecting a model you can grow with.
Understanding essential tools and materials
Before you stitch, you need to understand the tools and materials that support embroidery success. The right hoop size ensures the fabric stays flat; stabilizers prevent fabric puckering; threads vary by fabric and design; needles sized for your fabric; scissors for snipping; prepared bobbins; and a workspace that keeps threads clean. In this section we won't list every item, but you should refer to the Tools & Materials section for specifics. Getting these basics sorted will reduce frustration and improve your first attempts, letting you focus on steady technique rather than hunting for supplies mid-project.
Basic setup: threading, bobbin, and fabric prep
Threading the machine and winding the bobbin correctly are foundational skills. Start by threading from spool to needle, ensuring guides are clean and tension is balanced. Wind a smooth bobbin with consistent tension, then place it in its case. Prepare your fabric by pressing, selecting a stable base, and applying the appropriate stabilizer. These steps create a clean canvas for stitches and reduce looping. These steps often reveal tensions issues early, so address any misalignment before starting a design. If you keep a scrap sample, you can test stitch quality without risking your project.
First project: simple design on fabric
Your first project should be simple and forgiving. Choose a basic shape or monogram and use a light-colored, stable fabric like cotton. Hoop securely, load a straightforward design, and run a short test before committing to the final piece. Observe stitch density, color changes, and thread trim; adjust as needed. Keep expectations modest and celebrate small wins, such as a clean outline or even stitches across the whole design.
Common issues and quick fixes
Common issues include bird-nesting at the start, thread breaks, and puckered fabric. Check needle type and size for fabric, ensure the bobbin is wound correctly, and confirm thread path is clear. If tension is off, rethread and test again on scrap; adjust upper thread tension gradually and test until stitches are even. Clean the bobbin area after several projects and inspect for lint buildup that can affect spool rotation and stitch quality. Address issues early to keep momentum.
Maintenance and care to keep your machine running
Maintenance matters as you build a routine. Clean lint from the bobbin area after sessions, wipe the needle plate, and store the machine in a dust-free space. Use a soft brush or cloth to remove thread scraps; avoid harsh cleaners near the electronic controls. Periodically check belt tension and ensure foot pedal connections are secure. A simple care routine reduces downtime and helps you stay focused on creativity rather than troubleshooting. The Sewing Machine Help team recommends a quick monthly check of oiling points if your model requires it and replacement of needles every few projects to preserve stitch quality.
Practice plan for steady improvement
Plan your practice with clear, bite-sized milestones. Week 1: master threading, hooping, and loading basic designs; Week 2: try different fabrics and stabilizers; Week 3: practice small monograms and simple shapes; Week 4: complete a small multi-layer project. Keep a log of what worked and what didn’t, noting the fabric type, stabilizer used, and any tension tweaks. This deliberate cadence helps you retain techniques and gradually increase complexity without becoming overwhelmed. The emphasis remains on accuracy, consistency, and safe handling.
Verdict: a practical path forward
The Sewing Machine Help team recommends starting with a simple, repeatable setup and progressing through carefully planned practice. The core message is to build confidence with fundamentals—hooping, stabilizing, and correct threading—before moving to more complex designs. By following these steps, you’ll gain consistent stitches and a growing sense of mastery. The Sewing Machine Help's verdict is that beginners who commit to steady, mindful practice will clearly see improvement and enjoy embroidery as a rewarding hobby.
Tools & Materials
- Embroidery hoop (appropriate size)(For beginners, start with 4x4 or 5x7 inch hoops; ensure clamp is smooth and fabric fits well)
- Stabilizer (tear-away or cut-away)(Choose stabilizer based on fabric weight and project; test on scrap first)
- Embroidery thread (spools in matching colors)(Use high-quality polyester or cotton for durability depending on fabric)
- Embroidery machine needles(Size #11 to #16 sharp or microtex depending on fabric)
- Scissors or thread snips(Small, sharp scissors for trimming tails close to stitches)
- Bobbin thread and empty bobbins(Wind clean bobbins and keep spare empty ones ready)
- Fabric for practice(Cotton or linen works well for beginners; avoid extremely stretchy fabrics at first)
- Design source (digital or built-in designs)(Have a simple design ready on USB/computer or rely on machine’s built-in library)
Steps
Estimated time: 90-120 minutes
- 1
Choose your machine
Select a beginner-friendly embroidery machine with a small but adequate hoop size, built-in designs, and easy threading. Verify the display is intuitive and that you can access stabilizers and designs without extra software.
Tip: Ask for a hands-on demo; test thread path and bobbin winding before buying. - 2
Gather essential supplies
Assemble hoops, stabilizers, threads, needles, scissors, and fabric. Having everything within reach reduces interruptions and keeps your focus on the process.
Tip: Organize items by task (hooping, threading, design loading) to speed up setup. - 3
Thread the machine and wind the bobbin
Follow the machine’s threading path precisely. Wind a smooth bobbin with even tension and place it correctly in the bobbin case to prevent nesting or loose stitches.
Tip: Test with a scrap swatch to confirm tension before a real project. - 4
Hoop fabric and load a simple design
Lay stabilizer under the fabric, hoop tightly, and align the design in the machine’s preview. Ensure fabric lies flat and the hoop clamps secure it.
Tip: Use a light touch when tightening the hoop; over-tightening can distort fabric. - 5
Run a test stitch on scrap fabric
Do a short test stitch to verify density, stitch direction, and color changes. Adjust thread path and stabilizer if needed before proceeding.
Tip: If looping occurs, rethread the upper path and ensure the needle is correctly installed. - 6
Begin your first project
Start with a simple shape or letter. Monitor stitching, stop to trim tails, and let the machine complete each color segment before changing threads.
Tip: Keep project scope small to build confidence quickly. - 7
Evaluate and adjust
After completing a pass, inspect stitches for density, gaps, or misalignment. Make minor adjustments to tension or stabilizer as needed.
Tip: Document settings that work for future reference. - 8
Care and storage after practice
Unplug, remove hoop and thread, and clean lint from the bobbin area. Store tools and fabric away from dust to protect future projects.
Tip: Develop a quick post-session checklist to stay organized.
Your Questions Answered
Do I need a computer or software to start embroidery?
Most beginner machines work with built-in designs and do not require extra software. If you want custom designs, you may need compatible software or a computer to transfer files.
Most beginners can start with built-in designs; software is optional for customization.
Can I embroider on any fabric?
Not every fabric is suitable for embroidery. Stabilizers and fabric choice matter; strong fabrics need different stabilizers, while stretchy fabrics may require tear-away stabilizers and slower speeds.
Some fabrics require stabilization and testing before stitching.
How long does it take to learn the basics?
Basics can be learned in a few weeks with regular practice, but mastery comes with ongoing projects and variation in designs and fabrics.
With consistent practice, you’ll pick up the basics quickly.
What hoop size should I start with?
Begin with a 4x4 or 5x7 inch hoop. These sizes cover many beginner projects and are easier to manage on a small workspace.
A small hoop is easier to handle while you learn.
How do I fix common tension issues?
Recheck the upper thread path, rethread carefully, verify needle type and size, and test on scrap fabric. Adjust tension gradually and test until stitches look even.
Start with rethreading and test on scrap fabric.
Watch Video
The Essentials
- Choose a beginner-friendly machine.
- Hoop and stabilize fabric correctly.
- Thread and wind bobbins with care.
- Test on scrap before finalizing a design.
- Practice regularly to build confidence.