Embroidery on Sewing Machine: Practical Guide for Beginners
Master embroidery on sewing machines with a practical, step-by-step approach. Learn fabric prep, hooping, stabilizers, and thread choices to achieve durable decorative stitching on garments and home projects.

You’ll learn to embroider on a sewing machine by preparing fabric, hooping securely, selecting the right stitch and presser foot, loading a design, and finishing with clean trimming. Essential gear includes a compatible embroidery foot, stabilizer, embroidery thread, and a suitable needle. The process yields durable, decorative stitching for apparel, crafts, and home decor.
Understanding machine embroidery basics
Embroidery on a sewing machine blends artistic stitching with everyday sewing, enabling you to decorate garments, bags, and home textiles with precision. Unlike free-motion embroidery, machine embroidery relies on stable fabric and a pre-programmed design guided by a hoop. Program selection, needle type, stabilizer choice, and proper tension all interact to create clean fills and sharp edges. According to Sewing Machine Help, the core skill is balancing fabric, stabilizer, and thread to avoid puckering and misalignment. Start with a simple motif to learn hooping and thread path before tackling complex designs. As you practice, you’ll learn to read the fabric drape, choose the right needle size, and manage the machine’s speed to control stitch density. Remember: practice on scrap fabric, and gradually increase complexity as you gain confidence.
Tools & Materials
- Embroidery hoop compatible with your machine(Choose hoop size matching design; common starting sizes are 4x4 in or 5x7 in.)
- Stabilizer (tear-away or cut-away)(Select based on fabric weight and design density.)
- Embroidery thread (polyester or rayon)(Pre-wash fabrics if colorfastness is a concern.)
- Embroidery needle (size 75/11 or 70/10)(Use needles designed for embroidery to prevent shredding.)
- Embroidery foot (clear/transparent or decorative)(If possible, choose a foot with an open toe for visibility.)
- Fabric or garment to embroider(Pre-wash and dry to minimize future distortion.)
- Bobbin and bobbin case(Use compatible thread to reduce tension issues.)
- Scissors or thread snips(Keep blades sharp for clean trims.)
- Water-soluble top stabilizer or tape(Helpful for delicate fabrics or intricate designs.)
- Marking tools(Light chalk or water-soluble pencil for alignment)
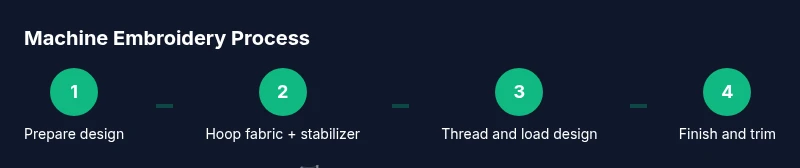
Steps
Estimated time: 60-90 minutes
- 1
Prepare design and fabric
Select a simple design to start. Transfer or print the design on fabric or stabilizer as needed, ensuring it will fit within the hoop. Pre-cut fabric to the hoop size and check the color sequence in your design software or machine library. This preparation minimizes wasted stitches and misalignment later.
Tip: Test a small sample on scrap fabric to confirm placement and density. - 2
Hoop fabric with stabilizer
Attach the stabilizer to the fabric and secure both in the hoop. Ensure the fabric is taut but not stretched. If using a knit or stretchy fabric, double stabilizers or a heavy-weight stabilizer can prevent puckering.
Tip: Twist the hoop slightly to verify it’s snug; loosen if there’s any wobble. - 3
Thread machine and load design
Thread the machine with embroidery thread and attach the embroidery foot. Load or import your design into the machine, verify the needle position, and perform a test stitch on scrap material to confirm stitch length and density.
Tip: Use a medium speed to avoid pulling threads or skipping stitches. - 4
Position needle and start sewing
Position the needle at the starting point and begin. Keep hands away from the needle path, and maintain steady fabric guidance. Use the machine’s start/stop or foot pedal as appropriate for consistent stitching.
Tip: If fabric shifts, stop, re-seat the hoop, and resume slowly. - 5
Monitor stitches and adjust tension
Watch the first few stitches for tension and thread breaks. If you notice looping or loose stitches, adjust the top thread tension or re-thread the needle. Use slow to medium speed when working through dense areas.
Tip: Pause briefly to re-check hoop alignment after the first few rows. - 6
Finish and trim
When the design completes, lift the hoop, remove fabric, and trim excess threads from the back. If you used a tear-away stabilizer, carefully remove it according to the product directions. Pressing from the back can help flatten stitches.
Tip: A quick finger-press test helps verify stability and edge clean-up.
Your Questions Answered
What fabrics are best for machine embroidery?
Natural fabrics like cotton and linen with stable weaves work well for beginners. Synthetics and blends can also be good, but choose heavier stabilizers for lighter fabrics. Always test on a scrap piece before committing to your final project.
Cotton and linen are easiest; test on scrap fabric first.
Do I need a dedicated embroidery machine?
No, many domestic sewing machines can do embroidery with the right foot and stabilizers. An embroidery-capable machine or a separate embroidery module can expand capabilities, but beginners can start with basic setups using hooping and stabilizers.
You can start with a regular sewing machine if it supports embroidery.
What is the difference between tear-away and cut-away stabilizers?
Tear-away stabilizers stay in place briefly and are removed after embroidery; cut-away stabilizers stay and are trimmed away after stitching. Choose based on fabric stability and whether the design will be washed.
Tear-away is removed after stitching; cut-away is trimmed away later.
How can I fix thread tension problems?
If stitches loop or look loose, re-thread the machine, check thread paths, and adjust the top thread tension. Ensure the needle is properly installed and not bent.
Rethread and check tension if stitches look wrong.
Can I embroider on knit fabrics?
Yes, but use stabilizers appropriate for stretch fabrics and select a smaller design with lighter density to avoid distortion. Slow feeds help maintain stitch quality.
Knits can work with proper stabilizer and gentle stitching.
How do I transfer designs to fabric?
Use carbon transfer, water-soluble markers, or software-based transfer depending on your design source. Ensure markings are non-permanent and washable if the project will be laundered.
Use safe transfer methods so designs stay put during embroidery.
Watch Video
The Essentials
- Prepare fabric and stabilizer before starting
- Choose the right needle and thread for your fabric
- Hoop tightly and guide fabric consistently
- Sew at a moderate speed and test frequently
- Sewing Machine Help verdict: practice with patience and consistency