How to Embroidery Machine for Beginners: A Complete Step-by-Step Guide
Beginner-friendly guide to using an embroidery machine, covering setup, threading, stabilizers, hooping, basic stitches, practice projects, and care to build confidence.

You will learn how to set up an embroidery machine, thread correctly, hoop fabric, load a beginner design, and start stitching with confidence. This quick guide covers essential steps, stabilizers, and a safe practice workflow you can repeat until you’re comfortable. According to Sewing Machine Help, a simple, sequenced routine helps beginners progress faster.
Getting started with your embroidery machine
Starting embroidery can feel daunting, but with a calm setup and a clear plan, you’ll progress quickly. According to Sewing Machine Help, the first priority is to understand your machine's basics: type, capabilities, and safety features. The Sewing Machine Help team found that beginners who map out their workflow—setup, threading, stabilizing, load a design, test stitch, and finish—tend to build confidence faster.
Set up your workspace in a well-lit area near a power outlet, with room for spools, fabric, and a small tray for notions. Keep fabric flat, the machine level, and the presser foot raised during threading. Read your manual for model-specific cautions, especially about needle size, thread tensions, and safe operating speeds. A simple starter routine is to warm up on a scrap piece to check tension before you stitch real fabric.
- Gather a stable surface and good lighting; a dedicated sewing desk helps you stay organized.
- Run a quick fabric test first to verify thread tension and stitch quality.
- Keep a scrap cloth handy to practice color changes and bobbin changes.
Brand note: As you begin, remember that according to Sewing Machine Help, a steady, predictable routine reduces errors and makes learning more enjoyable.
Essential tools and materials
A successful beginner setup relies on a curated kit. You don’t need every gadget on day one, but certain basics will save time and frustration. Start with a reliable embroidery machine, a compatible hoop, and stabilizers appropriate for your fabric weight. Keep a handful of embroidery threads in classic colors to practice color blends. A sharp embroidery needle (usually size 75/11 or 80/12) will reduce snags and improve stitching quality. Finally, scissors or thread snips, a bobbin, and a seam ripper for tiny fixes round out the core kit.
Stabilizers are essential for maintaining fabric integrity during stitch formation. Tear-away stabilizers are convenient for woven fabrics, while cut-away stabilizers offer extra support on knits. For beginners, a lightweight stabilizer paired with a small hoop reduces warping while you learn.
Before you begin, prepare a small stash of practice fabric: plain cotton or blended fabrics work well for learning stitches and alignment.
Pro tip: Keep a color chart or swatch book to plan color changes and avoid color-mismatched designs.
Understanding embroidery machine basics
There are several common machine configurations used by beginners. A single-needle machine is typical for entry-level users, while multi-needle machines can handle multiple threads and designs more quickly. The key differences affect setup time and design complexity. Learn how to access built-in designs, USB design transfer, and basic editing features like size and placement.
A good understanding of hoop systems helps you choose the right frame for your project. Hoops come in various sizes; align your fabric with stabilizer underneath to prevent puckering. Take time to explore the feed dogs, presser foot options, and speed control, which influence stitch quality and fabric handling.
Sewing Machine Help notes that beginners benefit from practicing with a few simple designs before moving to larger, more complex motifs. This builds muscle memory for threading, hooping, and stabilization.
Threading and bobbin basics
Threading is the backbone of clean embroidery. Start with the spool on top, route the thread through the thread guides, bring it down toward the bobbin case, and finally thread the needle. Use the manual or built-in threading guide on your machine to double-check each path.
Set the bobbin with the correct thread tension and place it in the bobbin case, ensuring it turns clockwise when needed. The bottom thread should feed smoothly with equal tension to the top thread. If the machine complains about thread tension, recheck the path for any snags and confirm the needle is clean and sharp.
Tip: If your machine has an automatic needle threader, use it; if not, a steady hand and a small flashlight can help you seat the thread cleanly.
Hoop setup and fabric prep
Hooping fabric correctly is critical for a stable stitch. Place the stabilizer on the underside of the fabric, then place the fabric and stabilizer inside the hoop. Tighten the hoop just enough to remove slack but avoid warping. It’s common to misalign fabric at the edge; check alignment in the hoop window and adjust before stitching.
Before stitching, lightly press the fabric to remove wrinkles and ensure the design sits flat. For delicate fabrics, use a wash-away stabilizer for cleaner finishes. If using knit or stretch fabrics, choose a stabilizer that provides additional support to prevent stitching from stretching.
Pro tip: Finger-tension the hoop against the fabric to prevent slippage during the first few stitches.
Color management and stitches overview
Understanding stitch types helps you select the right thread and fabric interactions. Common embroidery stitches include satin (for outlines and solid edges) and fill stitches (for broad areas). A running stitch is helpful for simple outlines and decorative details. When choosing threads, stay within the recommended weight range for your machine to avoid jams and skipped stitches.
Plan color changes in advance and consider color-fast testing on your fabric. Matching stabilizer to weight ensures consistent results and reduces puckering on the final piece. If the design calls for metallic or specialty threads, test on a scrap to gauge tension and compatibility.
Back to basics: keep your first projects simple—monograms and small shapes provide good practice without overwhelming you.
Practice project plan for beginners
Design a tiny initial project to build confidence: a single-letter monogram or a small geometric motif on woven fabric. Use a lightweight stabilizer and a 4x4 inch hoop. Start with a 2-3 color palette to minimize thread changes and mistakes. Draft a two-step process: lay down the outline first, then fill the interior with a basic pattern.
During stitching, keep an eye on fabric movement; stop the machine if the fabric shifts. After completion, trim loose threads, remove the stabilizer, and gently press your piece with a warm iron (no steam) through a cloth.
This practice project helps you build consistency with hooping, tension, and color changes. The Sewing Machine Help team emphasizes repeating simple projects to establish solid technique.
Maintenance and care for your embroidery machine
Maintenance is essential for longevity and consistent results. Regularly clean lint and thread debris from the bobbin area and lint trap. Oil or lubricate only where your manual recommends, avoiding moving electrical components. Create a routine: after every project, wipe the needle plate and bobbin area, check the needles for dullness, and replace as needed.
Store embroidery threads and stabilizers in a dry, dust-free place to prevent moisture damage. Periodically inspect belts and moving parts, and have a qualified technician service your machine if you notice unusual noises or decreases in stitch quality. Sewing Machine Help’s guidance highlights that consistent care reduces unexpected downtime and extends machine life.
Tools & Materials
- Embroidery machine(Select one with at least one compatible hoop and built-in stabilizer support)
- Embroidery hoop and backing(Choose sizes matching your project (e.g., 4x4 in, 5x7 in))
- Stabilizers (tear-away or cut-away)(Weight depends on fabric; start with lightweight for practice)
- Embroidery thread (various colors)(Use 40-weight cotton or polyester embroidery thread)
- Fabric for practice(Plain woven fabric (cotton or poplin) works well for beginners)
- Embroidery needle (size 75/11 or 80/12)(Sharp, high-quality needles prevent skipped stitches)
- Scissors or thread snips(For trimming tails and loose threads)
- Bobbin thread(Low-tension spool for smooth bottom stitching)
- Lint brush or small brush(Clean lint from bobbin area after stitching)
- Water-soluble marker or chalk(Optional for marking placement on fabric)
Steps
Estimated time: 20-40 minutes
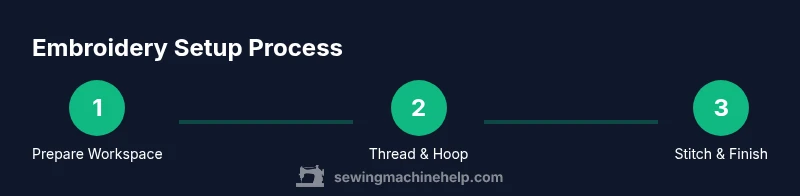
- 1
Prepare your workspace
Choose a clean, well-lit area and organize tools. Power on the machine, test the needle, and set up a scrap fabric to verify initial stitches. This prime setup reduces misfeeds and unexpected jams.
Tip: Keep a dedicated tray for threads and scissors to minimize misplacement. - 2
Thread the machine
Follow the thread path from the spool to the needle, ensuring guides are correctly seated. Verify the bobbin is wound evenly and seated in its case.
Tip: If your machine has an automatic needle threader, use it to reduce strain on eyes. - 3
Hoop and fabric prep
Place stabilizer under the fabric, hoist the material into the hoop, and tighten to remove slack. Check alignment in the hoop window to ensure the design will stitch where intended.
Tip: Gently tug the fabric to confirm there’s no looseness in the hoop. - 4
Load a simple design
Choose a small, beginner-friendly design and load it via built-in library or USB. Set the hoop orientation and confirm the size fits your hoop.
Tip: Start with a 4x4 inch design to learn tension and movement. - 5
Run a test stitch
Do a short test on scrap fabric to confirm tension and stitch direction. Make minor tension or path adjustments if needed.
Tip: Observe for thread breaks or skipped stitches during the test. - 6
Begin stitching your project
Stitch slowly, guiding the fabric and letting the machine feed smoothly. Pause if you notice fabric puckering, then stop and adjust stabilizer or hoop alignment.
Tip: Do not push the fabric; let the machine handle feeding.
Your Questions Answered
What is the easiest embroidery project for beginners?
Start with a small monogram or simple shape on woven fabric using a lightweight stabilizer. This keeps stitches predictable and helps you learn hooping, tension, and color changes without overwhelming complexity.
A simple monogram or small shape on woven fabric is ideal for beginners.
Do I need a dedicated embroidery hoop, or can I use a craft hoop?
Dedicated embroidery hoops usually provide better tension and stability. Craft hoops can work in a pinch, but they may allow fabric to move, which affects alignment and stitch quality.
Dedicated hoops give the best stability, but a good craft hoop can suffice when you’re starting out.
What is stabilizer and why do I need it?
Stabilizer supports fabric during stitching to prevent distortion. Tear-away stabilizers are common for woven fabrics, while cut-away stabilizers provide more support for knits and delicate fabrics.
Stabilizers keep fabric from stretching while the machine stitches.
Can I embroidery on knit or stretchy fabrics?
Yes, but you’ll typically need a stabilizer and possibly a different needle or stabilizer choice to prevent distortion. Practice with scrap knit before a project.
Embroidery on knits is possible with the right stabilizer and careful hooping.
How do I fix thread breaks during embroidery?
Pause, remove the fabric from the hoop, rethread the path, and inspect for tangled threads. Check needle condition and fabric tension before resuming.
If thread breaks, rethread and inspect the path and needle.
Watch Video
The Essentials
- Set up a clean, well-lit workspace.
- Thread correctly and test before sewing.
- Hoop fabric securely with stabilizer.
- Practice on scrap projects to build confidence.