Pant Hem with a Sewing Machine: A Complete How-To
Learn to hem pants using a sewing machine with clear steps, essential tools, and finishing options. This guide covers stitch choices, fabric prep, and finishing techniques for durable, professional-looking hems.

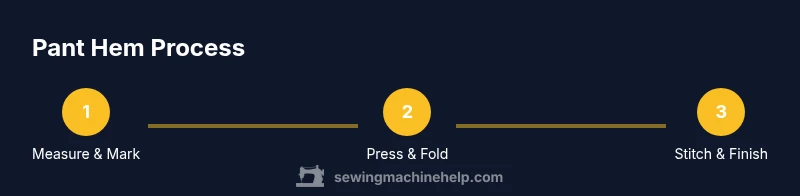
By the end of this guide you’ll be able to hem pants using a sewing machine with clean, durable results. You’ll choose the right stitch, prep the fabric, set your machine for a fine edge, and finish with either a blind hem or a top-stitch. Essential gear includes a straight stitch, a compatible needle, matching thread, and sharp scissors.
Why this method matters for pants hems
Hemming pants is a common alteration that can transform a garment from ill-fitting to polished. Using a sewing machine to finish hems provides strength, repeatable results, and a neat appearance compared with hand-stitching. The pants hem sewing machine approach is especially helpful when you’re shortening several pairs and want even lengths and professional finishes. According to Sewing Machine Help, starting with a stable fabric, a proper needle, and the right stitch will help you avoid puckers or twists. Before you begin, take the time to measure each leg, decide on the final length, and consider how the fabric behaves when pressed. Woven fabrics like cotton or denim generally tolerate a clean straight hem, while knits may curl and require a slightly different setup. Finally, select a hemming method that matches the weight of the fabric and the garment's style: a simple double-fold hem for casual trousers, or a blind hem for dress pants that should appear seamless from the outside.
Choosing the right stitch and needle for hems
Stitch choice determines durability, appearance, and how the fabric behaves as you move. For most woven fabrics, a straight stitch with a balanced, medium-length setting keeps the fold in place without creating bulk at the edge. If you’re hemming lightweight fabrics, you may reduce thread tension slightly and use a shorter stitch length to prevent pulled edges; for knits, a stretch stitch or a narrow zigzag maintains fabric flexibility. The needle matters as much as the stitch: a universal needle in the common range (for example sizes around 70/10 to 90/14 depending on fabric weight) is a good starting point. Heavier fabrics like denim or wool blends benefit from a stronger needle. A walking foot helps feed slippery or bulky fabrics evenly during hemming. Choose polyester thread that matches the fabric's fiber for durability, or cotton-wrapped polyester for natural fibers to balance grip and stretch. Always run a test seam on scrap fabric, checking for puckering, skipped stitches, or thread breakage before sewing the actual hem.
Fabric prep and measurement for hems
Accurate fabric prep and measurement set the stage for a neat hem. Start by trying on the pants and marking the desired length on the outside of each leg with fabric chalk or a washable marker; confirm that both legs match, then recheck with the garment laid flat. Add a standard hem allowance—typically 1/2 inch (1.27 cm) for woven fabrics, slightly more for heavier textiles, unless you’re doing a rolled or finished edge. After marking, wash if needed and press the hem to set a crisp crease so the fabric won’t shift as you sew. Work on a flat surface and pin or clip the fold securely to prevent shifting. If the fabric frays, finish the edge with a light overcast stitch or a narrow zigzag before folding. Finally, baste the hem in place with long, loose stitches to test length and balance before you commit to a machine seam.
Finishing options and common pitfalls
Most projects use a standard double-fold hem for durability and a clean exterior. Dress pants or delicate fabrics may benefit from a blind hem or a closely matched topstitch to hide the stitching. Always press at each stage to reduce bulk; use a tailor’s ham for curved hems and a small iron to reach corners. A common pitfall is tugging or stretching the fabric as you sew, which creates a wavy bottom edge; guide the fabric evenly and let the machine feed rather than pulling. Another frequent issue is choosing the wrong needle or thread weight, which can cause skipped stitches or visible puckers. After finishing, give the hem one final press, trim stray threads, and consider a light steam to set the edge for long-lasting wear.
AUTHORITY SOURCES
- https://extension.illinois.edu
- https://extension.umn.edu
- https://extension.arizona.edu
Tools & Materials
- Sewing machine with straight stitch capability(Must sew a straight stitch consistently at garment-weight speed)
- Appropriate needle(Universal or needle suitable for fabric weight (e.g., 70/10–90/14))
- Matching thread (polyester or cotton-wrapped)(Color should blend with fabric; consider stretch for knits)
- Fabric scissors(Sharp for clean cuts; avoid serrated blades)
- Measuring tape(Accurate hem length across both legs)
- Chalk or fabric marker(Mark hem length and fold lines)
- Pins or clips(Secure folds without shifting)
- Iron and ironing board(Press folds and hems for crisp edges)
- Seam ripper(Optional if corrections are needed)
Steps
Estimated time: 60-75 minutes
- 1
Measure and mark the hem length
Mark the desired hem length around each leg with chalk or fabric marker. Compare both legs on the inside and outside, and adjust so both hems finish at the same height. Recheck once more with the garment laid flat to ensure symmetry.
Tip: Mark both legs at the same length to ensure symmetry. - 2
Pre-press the fold to set the crease
Fold the bottom edge to the marked length and press along the crease with a hot iron. Use a pressing cloth for delicate fabrics and avoid lingering heat that could scorch the fabric.
Tip: Press from the outside to avoid impression marks. - 3
Choose your hemming method
Decide whether to use a double-fold hem, a narrow hem, or a blind hem based on fabric weight and desired look. Dress pants usually benefit from a discreet blind hem, while casual pants tolerate a visible fold.
Tip: For dress pants, a blind hem offers a neat exterior. - 4
Set up the machine and thread
Thread the needle and bobbin with appropriate thread. Set stitch length to about 2.5–3.0 and select a straight stitch for most hems. Test on scrap fabric to confirm balance before sewing the garment.
Tip: Test tension on scrap fabric first. - 5
Sew the hem in place
Align the folded edge with the machine needle and sew along the edge, using pins to secure. Maintain an even feed and avoid stretching the garment as you sew.
Tip: Backstitch at the start and end. - 6
Finish the edge and press
If using a double-fold hem, press the seam flat and topstitch near the fold for durability. Trim any loose threads and give the hem a final press.
Tip: Use a walking foot on slippery fabrics. - 7
Try on and adjust if needed
Wear the pants or lay them flat to verify length and evenness. If adjustments are needed, repeat the marking and pressing process before re-stitching.
Tip: Mark any adjustments for future alterations.
Your Questions Answered
What stitch is best for pant hems?
For most woven fabrics, a straight stitch is the standard choice. Dress pants or delicate fabrics may benefit from a blind hem for an invisible exterior.
Straight stitch is the go-to for most hems; blind hems work well for dress pants.
Should I press before hemming?
Yes. Pressing creates a crisp crease, makes folding easier, and improves accuracy. Re-press after stitching to set the seam.
Yes—press before and after to get a crisp finish.
How to blind-hem by machine?
Use a blind-hem foot or a narrow zigzag close to the folded edge. The goal is stitches that anchor the fold while remaining largely invisible from the outside.
Use a blind-hem foot and careful stitching for an invisible look.
Fabrics needing special hems?
Denim and wool may require a stronger needle and larger seam allowance; knits may need a zigzag or stretch stitch. Always test on scrap fabric first.
Denim and knits need special care; test first.
Walking foot for slippery fabric?
Yes, a walking foot helps feed slippery fabrics smoothly and prevents shifting during hemming.
Yes, walk the fabric with a walking foot.
Different leg lengths?
If the legs are different lengths, re-measure both hems and adjust to the same final length. Re-mark and re-check before stitching.
Even both hems by re-measuring and adjusting.
Watch Video
The Essentials
- Measure twice, hem once.
- Choose hem method by fabric.
- Press at every step.
- Test on scraps first.
- Finish with appropriate stitch.