Invisible Hem Stitch by Hand: A Practical Guide for Beginners
Learn how to perform an invisible hem stitch by hand with clear, practical steps. This guide covers fabric prep, thread choice, stitch placement, and finishing knots for a clean, nearly invisible finish on delicate garments.

To master the invisible hem stitch by hand, you’ll learn a nearly invisible hem for lightweight and formal fabrics. This guide covers fabric prep, stitch placement, tension control, knot finishing, and how to hide thread ends. You’ll gain a durable hem that lies flat, moves naturally with fabric, and remains neat through washing and wear.
What is the invisible hem stitch by hand?
The invisible hem stitch by hand is a tailoring technique used to create a nearly seamless hem along the raw edge of light- to medium-weight fabrics. The goal is to anchor the folded edge so that the stitches are hidden on the outside of the garment. This method is favored by hobbyists and professionals for delicate fabrics where machine stitching would leave visible thread lines. When done correctly, the stitch disappears from view, allowing a clean, professional finish. In this guide, we'll break down the technique, explain why it works, and show you how to practice on scrap fabric before applying it to your project. According to Sewing Machine Help, the invisible hem stitch by hand helps maintain fabric drape and creates a virtually invisible finish.
When to choose hand hemming over machine hemming
Hand hemming excels on delicate fabrics like silk, chiffon, and lightweight linen where machine hems can create a visible edge or drag on the fabric. A hand-stitched hem also allows for precision around curved hems and details that would be difficult for a machine to handle. Sewing Machine Help analysis shows that for formal garments or fabrics that require a softly draped edge, the invisible hem stitch by hand produces a cleaner, almost invisible finish. If speed is essential and the fabric is sturdy, a machine hem may be acceptable, but reserve it for fabrics that can tolerate a visible seam without showing through.
Preparing fabric and thread for the invis hem
Start with clean, pressed fabric and a hem line that is evenly marked. Use a thread color that matches the fabric as closely as possible; for very light fabrics, consider a slightly lighter shade rather than a perfect match to avoid a visible blue-like thread surface. Choose a sharp, fine needle appropriate for your fabric weight; cotton or polyester threads pair well with woven fabrics, while silk threads can work on delicate textiles. Always trim thread tails close to the fabric and test your stitch length on scrap fabric to ensure the hem lies flat.
Stitch anatomy and high-level technique
The invisible hem stitch by hand relies on tiny, nearly invisible stitches that catch only the folded edge and the inner fabric layer. The fundamental idea is to anchor the hem without showing stitches on the outside. Think in terms of two components: the anchor (the fold) and the bite (the small stitch that hides inside). Keeping the stitch length consistent helps the fold stay flat and avoids puckering. Practice on a scrap edge to build muscle memory for spacing and needle angle. Remember that the goal is a smooth edge that the eye nearly misses.
Common mistakes and how to avoid them
Common slip-ups include using stitches that are too long, twisting the fabric while stitching, or catching too much of the outer fabric. These mistakes create visible threads or a bulky edge. Ensure the fabric remains flat and straight, and prefer a micro-commitment size stitch. If you notice a visible line, rework the stitches by pulling slightly just before finishing to re-sink into the fold. Practice on scrap fabric until your stitch is barely noticeable from the outside.
Finishing touches: pressing, knots, and care
Once the hem is secure, gently press the edge from the inside to flatten the fold and set the stitches. Tie a secure knot and bury the thread tail inside the hem to reduce bulk. Trim any excess thread close to the knot. For longer-lasting results, avoid stretching the hem while pressing, and consider a light hand-press rather than a heavy steam setting, which could loosen the stitches. Regularly check the hem after washing and re-press if needed to maintain the invisible look.
Practice project ideas to build skill
Start with a simple straight-hem skirt or a pair of lightweight trousers. Use scrap fabric or an old garment to perfect the technique before moving to your main project. Create a small practice panel with different fabrics (silk, cotton, linen) to understand how fabric weight and fiber affect stitch visibility. Document your results with photos to track progress and refine your tension and stitch placement.
Troubleshooting and care for invisible hems
If a hem starts to show, reassess your stitching: ensure the needle is appropriate for the fabric, your thread matches closely, and your fold lies flat. For stubborn fabrics, adjust your stitch length to a minimum practical length and re-stitch. Always inspect after washing for any loosening or puckering, and re-press as needed. With consistent practice, the invisible hem stitch by hand becomes a reliable finishing technique for many sewing projects.
Tools & Materials
- Sharp needle (size 9-12 for woven fabrics)(Choose a fine needle to minimize holes and damage)
- Coordinating thread(Match color; consider 2-3 meters for a standard hem)
- Small scissors or thread snips(Trim tails close to fabric edge)
- Pins and seam clips(Hold the fold in place while stitching)
- Fabric chalk or erasable pen(Mark hem line or allowances)
- Iron and ironing board(Press the fold smooth before stitching)
- Thimble (optional)(Protect finger on thick fabrics)
- Sewing ruler or seam gauge(Helpful for precise hems)
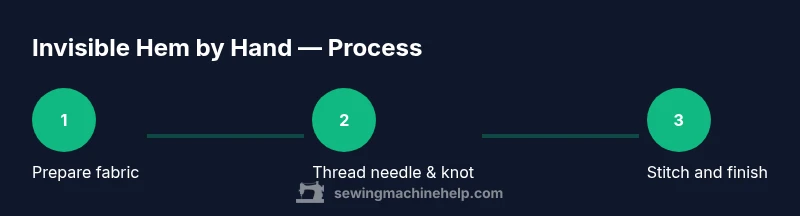
Steps
Estimated time: 30-45 minutes
- 1
Prepare fabric and mark hem
Lay the fabric flat and press the hem allowance along the edge. Mark a consistent hem width if needed to guide the fold. This creates a clean reference line for your invisible stitch and reduces drift as you work.
Tip: Use a light touch when marking to avoid imprinting visible marks on fine fabrics. - 2
Thread needle and knot
Thread the needle with a length of thread that is easy to manage. Tie a small, secure knot at the end. A stable starting point prevents a wandering tail that could show through the fold.
Tip: Double-knot the tail if you expect strain around the hem. - 3
Fold hem and align
Fold the hem to the desired depth, aligning the raw edges. Pin or clip gently to keep the fold in place. Ensure the fold runs parallel to the edge to keep the hem even as you stitch.
Tip: Check for evenness by measuring a few points along the fold. - 4
Begin invisible stitches
Insert the needle from inside the fold, catching only the inner fabric edge and a small bite of the folded fabric. Keep stitches minuscule and evenly spaced to minimize visibility on the outside.
Tip: Start with short stitches (about 2-3 mm) to avoid puckering. - 5
Advance along the hem
Continue along the hem, keeping consistent tension and avoiding pulling the fabric taut. Pause occasionally to re-check alignment and flatten any lift between stitches.
Tip: Periodically lift the fabric to verify the outside remains clean. - 6
Finish and secure
When you reach the end, tie a tiny knot inside the fold and bury the end. Trim excess thread and press lightly from inside to set the crease. Inspect the outside for any pinpricks or visible threads.
Tip: Always bury ends to prevent snagging or fraying.
Your Questions Answered
What is the invisible hem stitch by hand and when should I use it?
The invisible hem stitch by hand is a finishing technique that anchors the folded edge so the stitches disappear from view. It is ideal for lightweight and delicate fabrics where machine hems may show. Use it on skirts, hems of delicate blouses, and curved edges when a clean, invisible finish is desired.
The invisible hem stitch by hand hides the stitches, making it perfect for delicate fabrics. Use it on lightweight hems like skirts and blouses when you want a seamless look.
Can I use this stitch on all fabrics?
This stitch works best on woven, lightweight to medium fabrics. For heavy fabrics or knits, you may need a different approach or a more visible hand stitch. Always test on a scrap before committing.
It's great for light fabrics, but test on scraps for heavier textiles or knits.
What needle size should I use?
Use a sharp, small needle appropriate for the fabric weight, commonly size 9-12 for woven fabrics. Heavier fabrics may require a larger needle while still keeping stitches tiny and discreet.
Choose a small, sharp needle suitable for your fabric weight—usually size 9 to 12 for woven textiles.
How do I prevent visible thread ends?
Always bury the thread tails inside the hem and knot securely. Trim excess close to the knot to reduce bulk and prevent snagging.
Bury the tails inside and trim close to the knot for a neat finish.
Is there a version for curved hems?
Yes. For curved hems, practice smaller stitches and adjust your folding to maintain a smooth, even curve. Slower stitching helps hide the join around the curve.
You can do curves—work slowly, keep stitches tiny, and adjust the fold as you go.
Watch Video
The Essentials
- Practice on scraps before finishing real garments
- Use the right needle and matching thread for best results
- Keep stitches tiny and evenly spaced for invisibility
- Bury thread tails and press the hem for a crisp finish