Seam Guide for Sewing Machine: Your Step-by-Step Tutorial
Learn how to use a seam guide with your sewing machine. This guide covers types, setup, alignment, seam allowances, care, and troubleshooting to help you sew neat, consistent seams every time.

According to Sewing Machine Help, a seam guide for sewing machine helps you maintain consistent seam allowances, align topstitching, and finish seams neatly. To start, gather fabric, the right presser foot, matching thread, and a seam guide that fits your model. Set the needle position, stitch length, and chosen seam allowance, then practice on scraps before sewing final seams. The Sewing Machine Help Team notes that practice reduces mistakes.
What is a seam guide and why it matters
A seam guide is a small attachment or marking system that helps you align the fabric edge and needle line to a precise distance. For home sewists, the main benefit is consistency: every seam runs parallel to the edge with the same width, edge distance, and stitch length. This matters not only for appearance but also for fit, seam strength, and fabric behavior during finishing steps. According to Sewing Machine Help, a seam guide reduces the cognitive load of counting and manual marking, freeing you to focus on steering the fabric smoothly. With a reliable guide, you’ll see fewer wobbly seams, less fabric bunching, and a more professional finish on garments, bags, and home decor. The guide also helps when following complex patterns, where multiple seam allowances must align across pieces.
Beyond basic sewing, seam guides support creative techniques such as topstitching and edge finishes. They work well with a variety of fabrics—from lightweight cotton to medium-weight denim—provided you match the foot, needle, and thread to the material. As you gain experience, you’ll develop a sense for which guide type fits your projects, which leads to more consistent results across different fabrics and patterns.
Sewing Machine Help analysis shows that beginners benefit from using a dedicated seam guide to keep accurate seam allowances, while advanced sewists rely on precise guidance for complex construction. Practically, a good seam guide is a small investment that pays off with faster workflows and cleaner results. Keep a few scrap fabrics handy to test adjustments before committing to a project, and you’ll build confidence quickly.
Types of seam guides
There are several common variants, each with its own strengths. Edge guides are simple strips that align with the fabric edge and can be integrated into many standard presser feet. Adjustable guides slide or screw into a fixed position, offering flexibility for different seam allowances without re-marking. Magnetic seam guides stick to the bed or needle plate for quick, temporary alignment, ideal for quick hems or patchwork. Some machines come with built-in seam guides embedded in the needle plate or presser foot, while others require an external attachment.
Choosing the right type depends on your machine model, the types of projects you tackle, and how often you change seam allowances. For beginners, a simple edge guide or adjustable guide with clear markings is usually enough. For more complex garments or quilting, a magnetic guide plus a marked ruler can speed up multi-seam layouts. Regardless of the type, the goal is to reduce measurement errors and keep your hands free to guide the fabric with steady pressure.
From a practical standpoint, start with a single guide and learn its exact offset—so you always know where your seam will fall. Over time, you may add a second guide or upgrade to a more feature-rich option as your skills grow. The core idea is consistency: the more reliable your guide, the steadier your seams become.
Mounting and aligning a seam guide on a home sewing machine
Mounting a seam guide involves attaching it to the machine in a position that aligns with the needle’s line. Begin by turning the machine off and unplugging it for safety. If you’re using an edge guide, position it so that the guide marks the exact distance from the needle to the fabric edge that you want. For adjustable guides, loosen the set screw, slide to the desired offset, then retighten securely. If you’re using a magnetic guide, place it on a flat, clean surface away from moving parts to avoid shifting during stitching. Once mounted, align the guide with a marked reference line from your pattern. Slowly lower the presser foot and gently test a short stitch on scrap fabric to confirm the seam width before sewing your project.
Tip: Use a chalk or erasable marking tool to draw a reference seam line on the test fabric, then compare to the guide to ensure accuracy. Always recheck alignment after changing presser feet or needle types, as different feet can shift the guide relative to the needle. Reference lines should be checked at the same fabric height you’ll sew during the project to avoid parallax errors.
Working with common seam allowances using a seam guide
Most garment patterns use standard seam allowances, with 5/8 inch (16 mm) being the most common in many patterns, especially woven fabrics. Other typical allowances are 1/2 inch (12–13 mm) for knits or lighter fabrics, and 1/4 inch (6 mm) for narrow hems or topstitching variants. A seam guide helps you maintain these widths consistently across all pieces. To work with variable allowances in a single project, set one guide to the standard main seam (e.g., 5/8 inch) and use a second guide or a ruler to mark the alternative width where needed. When changing fabrics, re-measure because fabric behavior—stretch, fray, and pile—can affect the effective seam width. If you encounter bulk or ragged edges, consider a slightly wider seam allowance for extra strength or trim techniques to reduce bulk.
For beginners, practice with multiple fabric swatches to see how the seam guide behaves across different textures. Note how ironed seams press flat and how the fabric sits after stitching; this hands-on testing helps you calibrate tension, needle type, and stitch length for consistent results. A well-set seam guide reduces guesswork and accelerates your learning curve while delivering dependable outcomes across projects.
Common mistakes and how to avoid them
Even with a seam guide, missteps happen. A frequent error is forgetting to re-check alignment after changing needles or presser feet, which can subtly shift the offset and ruin the seam line. Another pitfall is assuming a single needle position works for all fabrics; different fibers and weights require adjustments to needle type and stitch length. Don’t rely on the machine’s default settings; always test on scraps first. Magnetic guides can shift if bumped, so keep your workspace tidy and use a secondary reference line to verify. Finally, avoid rushing; a steady pace with consistent fabric feeding produces smoother seams and reduces the risk of deviations.
From a practical standpoint, keep a log of your most-used seam allowances for your most common fabrics. This habit helps you choose the correct guide quickly and accurately, especially when you’re stitching a continuing project or a series of garments. The more you practice with a reliable seam guide, the fewer alignment mistakes you’ll make, which saves time and yields professional results.
Care and maintenance of seam guides
A seam guide is relatively low-maintenance, but a little care goes a long way. Wipe away lint and fabric dust after each sewing session, especially if you’ve worked with lint-prone fabrics like rayon or wool blends. If the guide uses screws, check that they remain tight; vibration can loosen parts over time. For magnetic guides, avoid exposing them to strong magnets that could misalign the alignment. Store spare guides in a dry, clean container to prevent corrosion or surface scratches. If the guide becomes difficult to move, apply a tiny amount of light machine oil to the adjustment screw or follow the manufacturer’s lubrication instructions. Always test after any maintenance to ensure your seam width remains accurate.
Sewing Machine Help emphasizes that regular upkeep preserves precision over the long term. A clean machine bed, well-attached guides, and consistent practice are the trifecta of reliable seams. With proper care, your seam guide stays accurate for many projects, and you’ll maintain confidence in your basic construction work.
Authoritative sources and further reading
This guide draws on established sewing resources and practical experience. For deeper technical details, consult university extension materials and trusted craft publishing sites. While specific brand claims can vary, the core principles of seam guides—consistent alignment, repeatable measurements, and careful testing—are universal. The following sources offer additional context and technique demonstrations that complement hands-on practice. Sewing Machine Help team also contributes practical troubleshooting tips based on broad, real-world sewing scenarios. Always cross-check measurements with your own machine and fabric to ensure perfect results while you sew.
Tools & Materials
- Seam guide attachment for your machine (edge guide or adjustable)(Ensure compatibility with your machine model and presser foot height)
- Calibrated ruler or seam gauge(Clear markings; 1/8 inch increments preferred)
- Marking tool (fabric chalk or erasable pen)(For marking seam allowances and references)
- Fabric scraps for test seams(Cotton or muslin works well)
- Replacement presser foot with edge guide (optional)(Only if your machine supports it and you want more control)
- Small screwdriver or tool for adjusting screws on the seam guide (optional)(Use only if required by your model)
Steps
Estimated time: Estimated total time: 25-40 minutes
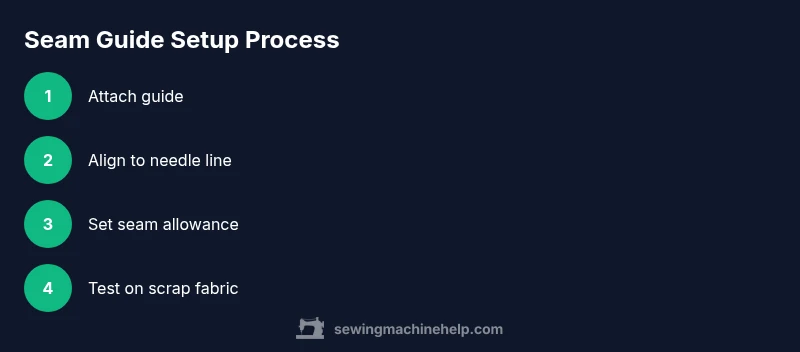
- 1
Prepare workspace
Clear the table, unplug the machine, and lay out fabric scraps. Decide which seam allowances you plan to test and have marking tools ready. This setup reduces interruptions and helps you focus on alignment.
Tip: Keep a scrap fabric on hand to quickly verify stitch width without wasting project fabric. - 2
Attach seam guide
Mount the seam guide to your machine’s bed or presser-foot area according to the manual. If using an adjustable guide, set the initial offset to the most common seam allowance you use and tighten the screws firmly.
Tip: After mounting, gently wiggle the guide to ensure there’s no loose movement before stitching. - 3
Align with needle line
Position the guide so that the seam line is precisely where you want it relative to the fabric edge. Use a marking line on your test fabric to visually confirm the offset aligns with the needle’s position.
Tip: Mark a reference line parallel to the edge at your target offset for quick checks. - 4
Set seam allowance
Choose your seam allowance (e.g., 5/8 inch) and adjust the guide accordingly. If you’re using multiple fabric types, test a few lengths on scraps to see how fabric feeds and how the stitch width reads.
Tip: Take time to verify on scrap fabric; slight shifts in fabric weight can affect the final seam width. - 5
Test on scraps
Sew a few test seams on scrap fabric, paying attention to edge alignment and stitch consistency. Check for stray thread tails, thread tension issues, or fabric tunneling that could indicate misalignment.
Tip: If the seam looks off, re-check alignment, test again, and adjust tension or foot pressure as needed. - 6
Sew final seam
Proceed with your project pieces, maintaining even fabric feed and steady speed. Periodically pause to confirm the seam guide remains aligned, especially after turning corners or repositioning fabric pieces.
Tip: Sew slowly through bulky areas to keep the seam straight and prevent guide drift. - 7
Review and adjust
After completing the seam, review the line for consistency and finish. If needed, adjust your guide offset for future seams based on the results. Re-test on scraps when you switch fabrics or patterns.
Tip: Document your best settings for future projects to save time.
Your Questions Answered
What is a seam guide and why do I need one?
A seam guide helps you maintain a consistent seam allowance and precise stitching distance from the fabric edge. It reduces guesswork, speeding up sewing and improving accuracy across projects.
A seam guide keeps your stitch lines at a steady distance from the edge, so your seams come out evenly every time.
How do I install a seam guide on a home sewing machine?
Consult your machine’s manual for the exact mounting method, then attach the guide so the offset matches your intended seam width. Tighten securely and test on scrap fabric before sewing your project.
Install the guide according to your manual, then test on scraps to confirm the seam width.
What seam allowance should I use for typical garments?
Five-eighths of an inch is common for woven garments, while knits often use about half an inch. Always check the pattern instructions and test on scraps when working with new fabrics.
Most patterns use 5/8 inch for woven fabrics and about 1/2 inch for knits, but always test first.
Can a seam guide work with all machines?
Most seam guides work with a wide range of machines, but you should verify mounting compatibility and foot clearance for your model. If uncertain, look for guides designed for your machine type.
Most guides fit many machines, but check fitment before buying.
How can I check my seam guide alignment?
Sew a test seam on scrap fabric and compare the stitch line to your reference edge. If it drifts, re-check the guide position and repeat the test.
Test on scraps, compare to the edge, adjust if needed.
What maintenance does a seam guide require?
Keep the guide clean, ensure screws are tight, and store it away from magnets. Periodically test alignment after cleaning or adjusting your machine.
Keep it clean, check tightness, and re-test after cleanups.
Watch Video
The Essentials
- Use a seam guide to ensure consistent seam allowances.
- Test on scraps before sewing project fabric.
- Align guide with needle position for accurate seams.
- Document successful settings for future use.