Fix Singer Sewing Machine: A Practical Troubleshooting Guide
A comprehensive, beginner-friendly guide to fix Singer sewing machine problems at home. Learn safe diagnostics, practical fixes, maintenance tips, and when to seek professional help.

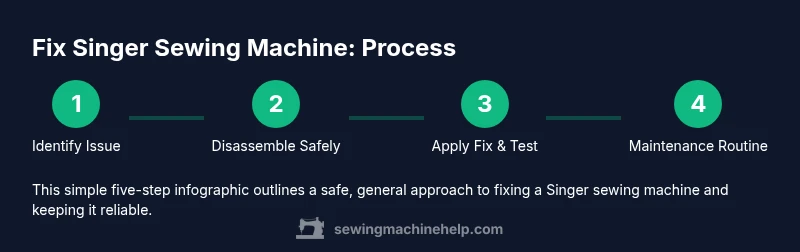
By following this guide, you can fix singer sewing machine problems with a safe, at-home approach. Start with safety checks, inspect common causes (threading, bobbin, tension, belt wear, lubrication), and gather simple tools before you begin. This practical path from Sewing Machine Help teaches diagnostics and reliable, repeatable fixes for beginners and experienced hobbyists alike.
Why fixing a Singer sewing machine matters
A well-maintained machine stays productive, produces consistent stitches, and reduces the risk of fabric damage. For home sewists, the ability to fix a Singer sewing machine at home saves time and money, and it builds confidence with every repair. The act of fixing a Singer sewing machine also deepens understanding of how the machine operates, from the needle and thread path to the shuttle and feed dogs. When you fix singer sewing machine issues early, you curb wear on components and extend the life of your investment. Sewing Machine Help emphasizes practical, repeatable steps that empower you to diagnose root causes rather than treat symptoms. The more you practice, the more reliable your results become, and you’ll feel more capable tackling future projects with the same methodical approach. The goal is steady, safe progress that you can trust as you fix singer sewing machine problems over time.
The approach outlined here mirrors how Sewing Machine Help conducts at-home repairs: start with a clear safety checklist, reproduce the problem, inspect critical areas, apply proven fixes, and test with care. This philosophy helps you build a durable habit of maintenance and small repairs, so you can keep sewing without frequent trips to a shop. When you fix singer sewing machine issues, you also learn to document what you did for future reference.
Tools & Materials
- Screwdriver set (Phillips and flat-head)(Precision bits; include tiny flat-head and star-head variants)
- Tweezers(Slim-point for thread removal and pickup hook access)
- Lint brush(Lightly removes lint from bobbin area, feed dogs, and throat plate)
- Sewing machine oil (light weight)(Only use recommended oil; apply sparingly to moving joints)
- Soft cloth(Wipe surfaces after cleaning to avoid lint transfer)
- Sewing machine manual(Model-specific guidance for disassembly and lubrication points)
- Replacement needle (various sizes)(Choose needle type appropriate for fabric and stitch type)
- Small container of mineral spirits or isopropyl alcohol(Optional deep-cleaning solvent for metal parts; use with ventilation)
- Good lighting(Bright, adjustable lamp to illuminate work area)
- Safety glasses(Eye protection during disassembly and part handling)
Steps
Estimated time: 60-90 minutes
- 1
Power off and unplug the machine
Ensure the machine is unplugged and cool before starting. Remove the foot pedal if it restricts access, and place the unit on a stable surface. This first step reduces the risk of accidental starts while you inspect components.
Tip: Always unplug before opening any covers to prevent electrical shock. - 2
Open access covers and inspect the needle area
Carefully remove any screws securing the needle plate or lower covers. Check for bent needles, misaligned needle clamps, and obvious fabric buildup. Replace a bent needle and reseat the needle correctly to avoid skipped stitches.
Tip: Handle needles with tweezers to avoid bending or pricking yourself. - 3
Check thread path and re-thread if necessary
Remove all thread, then re-thread top and bobbin paths following the machine’s threading diagram. A misrouted thread is a common cause of bird-nest stitches and tension issues. Test after re-threading on a scrap fabric.
Tip: Use good lighting and hold threads taut but not stretched. - 4
Inspect the bobbin and bobbin case
Remove the bobbin, clean lint around the bobbin area, and ensure the bobbin spins freely in the correct direction. Replace the bobbin if damaged and confirm it seats snugly in its case. Incorrect bobbin seating causes wobble and tension problems.
Tip: Always use the bobbin type specified in your manual. - 5
Evaluate needle and fabric compatibility
Confirm the needle type matches the fabric weight and thread; switch to a sharper or thicker needle as needed. Dull or bent needles cause skipped stitches and fabric snags. Re-thread after replacing the needle.
Tip: Never force a needle through thick fabric; slow sewing helps prevent needle damage. - 6
Test stitch in a controlled manner
Run a short test seam on scrap fabric. Observe stitch length, tension, and fabric feed. If issues persist, adjust tension settings incrementally and re-test, documenting changes for reference.
Tip: Keep test fabric scraps to compare results over time. - 7
Lubricate moving parts as per manual
Apply a small amount of oil to prescribed points, avoiding belts, computers, and rubber parts unless the manual authorizes it. Wipe away excess oil and run a few stitches to distribute it evenly.
Tip: Use only the oil recommended by the manufacturer. - 8
Inspect belts and drive components
Check for worn or stretched belts and replace if necessary. A slipping belt can slow stitch speed and alter tension. Ensure pulleys rotate smoothly without excessive noise.
Tip: If belt replacement is needed, do not overtighten; test with light pressure. - 9
Reassemble, then retest with fabrics
Put covers back, reconnect power, and run another test on fabric similar to your project. Confirm stable stitches and smooth fabric feed before starting an actual project.
Tip: Double-check all screws and covers are secure before sewing.
Your Questions Answered
What are the most common issues that signal a repair is needed?
Common issues include thread jams, skipped stitches, bird-nest knots, fabric feeding problems, or unusual noises. Start by checking threading, needle condition, and bobbin setup. If the problem persists after basic fixes, it may require more in-depth inspection or professional service.
Common issues are thread jams, skipped stitches, and odd noises. Start with threading and needle checks, and if problems continue, seek further help.
Can I fix a Singer sewing machine without professional help?
Many routine fixes are feasible for beginners, including re-threading, replacing a bent needle, and cleaning the bobbin area. Always follow the manual and unplug the machine before work. If you encounter motor, electrical, or warranty concerns, contact a professional.
Yes, many simple fixes can be done at home if you follow the manual and stay safe. For more complex issues, consider a pro.
How often should I oil my Singer sewing machine?
Oil frequency depends on usage and model. Check the manual for the recommended intervals and apply a light, manufacturer-approved oil to designated points only. Over-oiling can attract lint and harm performance.
Oil only where the manual says, and use a light amount to avoid lint buildup.
What needle size should I use for thick fabrics?
For heavy fabrics, select a needle designed for denim or leather, and ensure it matches the thread type. Using the wrong needle can skip stitches or break the needle.
Choose a needle suited for thick fabrics like denim, and replace it regularly to avoid stitches skipping.
Is it safe to disassemble my machine if it’s still under warranty?
Disassembly may void the warranty. Review the warranty terms before opening the machine. If in doubt, contact the manufacturer or a certified technician to preserve coverage.
Check your warranty terms first. If unsure, get expert help to avoid voiding coverage.
How can I prevent thread jams in the future?
Ensure correct threading, use compatible bobbins, and keep the needle clean and aligned. Regular maintenance, including cleaning lint from the bobbin area, reduces jams over time.
Thread correctly, keep the bobbin area clean, and maintain your machine to prevent jams.
Watch Video
The Essentials
- Assess safety before any repair
- Identify root cause with a systematic approach
- Follow model-specific guidance for lubrication
- Test and document each change
- Know when to seek professional help