How to Put Sewing Machine Foot Back On: A Practical Guide
Learn how to safely reattach your sewing machine foot with a clear, step-by-step method. This guide covers tool needs, safety, common issues, and troubleshooting for home sewists and beginners.

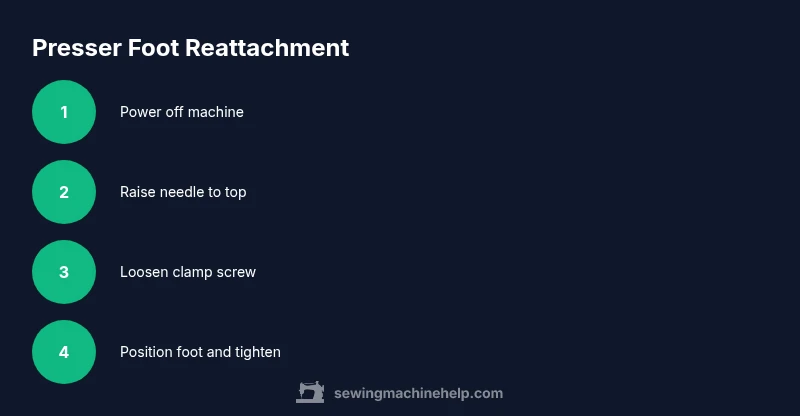
To reattach a sewing machine foot, first raise the needle to its highest position and lower the presser foot lever. Loosen the foot clamp screw, slide the foot under the holder with the needle hole aligned, then tighten the screw securely. Check that the foot sits flat, moves freely, and clears the feed dogs before testing on scrap fabric.
Why reattaching the foot matters
According to Sewing Machine Help, the presser foot is your primary control surface for fabric feeding. A foot that’s loose or misaligned can cause skipped stitches, uneven seams, and fabric jams. Properly reattaching the foot ensures consistent stitching, preserves needle life, and prevents damage to the needle plate. This guidance is especially helpful for home sewists and beginners who want dependable results without costly visits to a shop. By understanding the function of the foot and how it interacts with the feed dogs, you’ll sew with confidence and less frustration.
Foot types and compatibility: finding the right fit
Presser feet come in many shapes—zigzag, walking, quarter-inch, and specialty feet for piping or narrow hems. The exact attachment method can vary by brand and model, but the general principle is consistent: the foot clamps onto a metal bar or rotates into a holder when secured by a screw. Before reattaching, identify your foot type and verify compatibility with your machine. The owner’s manual or manufacturer website often lists compatible feet. Using an incompatible foot can lead to poor feed, stitching errors, or damage to the needle plate.
Signs the foot is loose or misaligned
Several indicators point to a foot that needs reattachment or adjustment. You might notice wobble when you wiggle the foot, unusual scrapes on fabric, or inconsistent stitch length. If the foot sits high or won’t sit flush against the needle plate, alignment is off. Regular inspection after cleaning or changing stitches helps you catch issues early. For best results, perform a quick test stitch on a scrap piece of fabric after reattachment to confirm smooth feeding and consistent tension.
Preparation: cleaning and inspecting the foot area
Begin by unplugging the machine or turning it off for safety. Remove lint and thread fragments from the presser foot area and the clamp screw to ensure a clean reattachment. Inspect the foot holder for any signs of wear or damage, and check the clamp screw for burrs or stripped threads. A clear view improves accuracy when aligning the foot with the needle hole or clamping slot. If you notice worn parts, consider replacing the foot or clamp before your next project to avoid recurring issues.
Step-by-step overview: how the reattachment process fits together
Think of reattaching as a simple sequence: power off, raise all parts for clearance, loosen the clamp, slide the new or existing foot into position, then tighten and test. Each step reduces risk of misalignment and ensures consistent fabric feeding. A quick glance at the detent or alignment marks on your machine helps verify correct orientation. In models with quick-release feet, the process may skip some screws, but the principle remains the same: secure, align, test.
Common mistakes and how to avoid them
Common errors include over-tightening the clamp screw, which can strip threads or warp the foot, and failing to align the needle hole with the foot’s opening. Another pitfall is using the wrong foot for a given stitch, which can cause uneven seams or fabric bunching. To avoid these, take a moment to align carefully, tighten just enough to secure, and test on scrap fabric before resuming a live project. A bright light and a magnifier can help with tiny screws on metal feet.
Aftercare and ongoing maintenance
After reattachment, wipe away lint around the foot holder and check the screw periodically for tightness. Store spare feet in their original packaging or a labeled container to prevent mix-ups. Regularly inspect feet for wear, especially if you switch between different stitch types frequently. Keeping a small maintenance kit on hand—screwdriver, lint-free cloth, and spare feet—helps you stay prepared for quick fixes during a project.
Tools & Materials
- Screwdriver (sized to your foot clamp screw)(A small Phillips head or flathead, matching your machine's screw)
- Lint-free cloth(For cleaning around the foot holder and needle plate)
- Bright task lighting(Ensure clear visibility of the foot clamp and screw)
- Scrap fabric for testing(Use plain woven cotton to test stitches after reattachment)
- Owner's manual or model-specific guide(Helpful for foot alignment details)
- Replacement presser foot (spare)(Keep handy if the original foot is damaged or missing)
Steps
Estimated time: 10-15 minutes
- 1
Power off and unplug the machine
For safety, disconnect the machine from power. This prevents accidental movement of the needle or foot while you’re working. If your machine has a switch, flip it to the off position and unplug the cord. Always start with a powered-down setup before performing any maintenance.
Tip: Take a moment to verify power is off before touching any parts. - 2
Raise the needle to the highest position
Turn the handwheel toward you or use the needle position button to lift the needle to its highest point. This clears the needle plate and ensures you won’t accidentally strike the needle while removing or positioning the foot. A raised needle also aligns the needle hole with the foot hole for precise reattachment.
Tip: If the needle is stubborn, remove it briefly to free the mechanism and then reinsert it. - 3
Raise the presser foot and locate the clamp screw
Lift the presser foot using the presser foot lever so you can access the clamp screw that secures the foot to the holder. Look for a small screw on the foot holder itself or on the side of the bar that the foot slides onto. Some models use a quick-release lever instead of a screw.
Tip: Have a flashlight handy if you’re inspecting tight spaces around the foot holder. - 4
Loosen the foot clamp screw just enough to free the foot
Gently turn the screw counterclockwise until the foot can move freely. Do not remove the screw completely unless you’re replacing the foot; you want to preserve the mounting hardware for quick reattachment. If you feel resistance, back off a quarter turn and reassess alignment.
Tip: Avoid using excessive force to prevent stripping threads. - 5
Position the foot under the holder with proper alignment
Slide the foot up into the holder, ensuring the front edge is aligned with the needle plate and the holes (if present) match the screw position. The foot should sit flat against the feed dogs and needle plate with no gaps. Confirm that the foot orientation corresponds to the stitch type you’ll be using.
Tip: If you’re unsure, check the alignment marks in your manual or reference diagram. - 6
Tighten the screw and perform a test sew
Hold the foot steady and tighten the clamp screw firmly, but do not overtighten. Gently press the foot to ensure it remains flat and moves with the feed dogs. Reconnect power and run a test stitch on scrap fabric to verify alignment and stitch quality. If the fabric drags or feeds unevenly, recheck alignment and re-tighten as needed.
Tip: Test on scrap first to avoid damaging a project.
Your Questions Answered
Can I reattach any presser foot if it doesn’t fit my machine?
Not all feet fit every machine. Always check the model’s manual or the manufacturer’s website for compatible foot types. Using an incompatible foot can cause damage or poor results.
Not all feet fit all machines. Check your model’s manual for compatibility before attaching.
What if the foot won’t snap into place after tightening the screw?
Recheck alignment marks and ensure the screw is fully seated but not over-tightened. If the foot still won’t seat, remove the foot and inspect the holder for damage or bent parts.
If the foot won’t snap in, recheck alignment and inspect the holder for damage.
Is it safe to sew with a loose foot?
No. A loose foot can cause skipped stitches, fabric jams, and needle damage. Always reattach and tighten properly before sewing.
No. A loose foot can cause problems and harm your fabric or machine.
Do I need to remove the needle to reattach the foot?
It’s not always necessary, but removing the needle can make alignment easier and safer. If you keep the needle in, ensure it’s fully up and clear of the foot area.
Removing the needle can help, but it’s not always required.
How can I tell if the foot is aligned correctly with the needle?
Look for a flush fit against the needle plate with no gaps. The needle should move freely through the foot’s path without hitting the foot. Run a test stitch on scrap fabric.
Ensure the foot sits flush and the needle moves without obstruction.
Why is my machine skipping stitches after reattachment?
Check that the foot is properly aligned, the needle is installed correctly, and the thread path is clear. Re-test on scrap fabric and adjust tension if needed.
Stitches skipping usually means misalignment or threading issues; verify setup and test again.
Watch Video
The Essentials
- Prepare safely: power off and unplug before working.
- Verify foot compatibility and orientation before attaching.
- Test on scrap fabric to confirm proper feeding.
- Keep a small maintenance kit handy for quick fixes.