Replacement Sewing Machine Motor: Step-by-Step Guide
This practical guide explains when to replace a sewing machine motor, what you’ll need, and how to perform the replacement safely with step-by-step instructions and maintenance tips.

By replacing the motor, you restore power to your sewing machine and extend its life. Gather a compatible replacement motor, basic screwdrivers, pliers, a multimeter, and safety gloves. This guide walks you through safety checks, removing the old motor, installing the new unit, and testing the machine before final assembly.
Understanding when a replacement sewing machine motor is needed
A replacement sewing machine motor is not always the first fix to a malfunctioning machine. Before jumping to replacement, run through a quick checklist: verify that the machine is unplugged, inspect the power cord, check the foot pedal, and confirm that the problem isn’t a simple belt slip or jam. If your machine suddenly loses power or runs intermittently, the issue could be the motor windings, brushes, or bearings wearing out. A seized or degraded motor may overheat and trigger protective circuits, which in turn prevents operation. For many hobbyists and beginners, the decision comes down to cost, availability of the correct motor, and the machine's age. The Sewing Machine Help team finds that replacing only when a motor failure is confirmed, using a correctly matched unit, yields reliable performance and fewer repeated repairs. When in doubt, consult the model's service manual or seek professional guidance to avoid wiring mistakes or mounting misalignment. In this article, we will cover how to identify compatibility, plan the replacement, and handle the installation safely.
In many cases, the root cause of motor-related failures can be diagnosed with basic tests and careful visual inspection. Look for signs like burned smells, smoke residue near the motor, or unusually hard startup. If you detect obvious damage, or the machine has high mileage, a replacement motor is often a wiser investment than an ongoing cycle of repairs. This guidance also highlights common mistakes like mixing different motor types, misaligning pulleys, or failing to secure the motor mounting, which can lead to premature failure. Throughout, we emphasize safety and model-specific compatibility to help home sewists proceed with confidence.
Choosing the right replacement motor for your model
Selecting the correct replacement motor means matching several key specifications: the correct voltage for your region, RPM range that aligns with the machine's drive system, shaft diameter and mounting pattern, pulley type, and compatible electrical connectors. OEM motors or factory-approved equivalents tend to offer the best reliability and warranty support, but well-matched aftermarket options can also work if the specifications line up precisely. Always verify model compatibility by checking the machine’s service manual, parts list, or the manufacturer’s website. If you are unsure, contact customer support or consult a professional technician. In addition to electrical specs, confirm mechanical fit—shaft length, mounting holes, and belt size all affect installation and performance. When you find a candidate, compare the motor’s torque and start-up characteristics to the original to prevent under- or over-supply of power to the sewing mechanism. The goal is a seamless replacement that delivers consistent stitch quality and reliable operation.
Safety, workspace setup, and pre-checks
Safety comes first. Work on a clean, dry, and non-conductive workspace. Unplug the machine from the wall outlet and, if possible, disconnect any external power supplies. Remove jewelry, wear safety gloves, and use eye protection when dealing with moving parts or sharp edges. Keep a small tray for screws and mounting hardware, and label wire connectors if you must disconnect them. Have a service manual or model-specific wiring diagram on hand to ensure accurate reassembly. It is also wise to have a spare brush, seal, or bearing conditioned for replaceable parts, should the motor require internal maintenance in addition to replacement. Finally, ensure good ventilation and avoid exposing plastic components to heat or solvents that could degrade them.
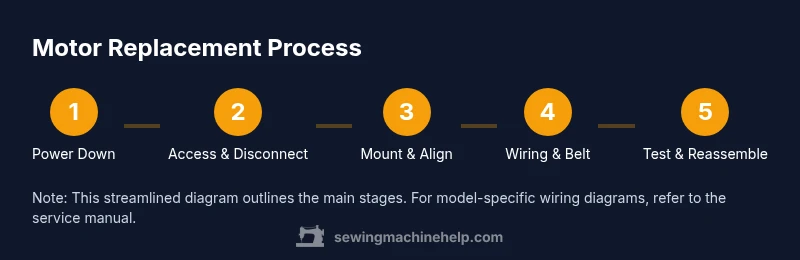
The replacement workflow at a glance
This section outlines the high-level workflow you will follow during the motor replacement. Start by confirming you have the right motor and the tools you need. Then remove the outer housings and any belts, followed by careful detaching of the old motor from its bracket. After comparison and preparation, mount the new motor, connect wiring and belts, and ensure the alignment is precise. Finally, reassemble covers and perform a careful test run at low speed before normal sewing work. While this block summarizes the steps, the step-by-step section provides detailed actions with safety notes and tips for tricky steps.
Keep in mind that each machine model can differ in small but important ways. Always follow the exact mounting pattern, clearance requirements, and wiring paths shown in the service manual. When in doubt, consult a professional. The emphasis is on accuracy, alignment, and safe handling of electrical components to avoid shocks, shorts, or mechanical binding.
Post-install testing and maintenance for long motor life
After replacement, run a free test cycle with no fabric to verify that the drum spins smoothly, the belt tracks correctly, and there are no unusual noises or overheating. Check belt tension and pulley alignment and ensure there is adequate clearance around the motor to prevent the belt from rubbing. Reassemble covers and perform a real sewing test on scrap fabric to confirm stitch consistency. Going forward, keep the machine clean and dust-free; clean the motor housing with a dry brush or compressed air from a safe distance. Periodic inspection of brushes, bearings, and seals, along with proper lubrication if recommended by the manufacturer, can extend motor life and protect your investment in the long term.
Tools & Materials
- Replacement sewing machine motor(Must match model, voltage, RPM, shaft size, and mounting holes.)
- Screwdrivers (Phillips #2 and flat-head)(For removing faceplates and motor mounting screws.)
- Nut driver or adjustable wrench(Used to loosen or tighten mounting bolts.)
- Pliers and wire cutters(For disconnecting wiring clips and trimming harnesses.)
- Multimeter(Check continuity and verify no shorts before powering the unit.)
- Electrical tape or heat shrink(Insulate and protect wiring connections after replacement.)
- Cable ties/zip ties(Secure wires away from belts and moving parts.)
- Safety gloves(Protect hands from sharp edges and metal shavings.)
- Service manual or parts list(Model-specific wiring and mounting specifications.)
Steps
Estimated time: 60-120 minutes
- 1
Power down and unplug
Ensure the machine is turned off and unplugged from the power source. Remove any batteries or portable power accessories. This prevents accidental starts and shock while you work.
Tip: Double-check the outlet and test for absence of current with a voltage tester before touching any wires. - 2
Access motor housing and belt
Remove the outer covers and any access panels to expose the motor and belt drive. Keep track of screws and locate the motor mounting bracket. If a belt is present, inspect its condition and note whether it will need replacement.
Tip: Take photos from multiple angles before disconnecting anything to aid reassembly. - 3
Disconnect drive belt from pulleys
Loosen the belt from the motor pulley and the driven pulley. Gently slide the belt off and set it aside. Confirm there is no tension or load on the belt after removal.
Tip: Be careful not to snap or stretch the belt; a damaged belt can affect the new motor fit. - 4
Label and disconnect wiring
Label each wire connector and note its position on the motor and control board. Carefully disconnect the wiring harnesses and set them aside. If any connectors are stiff, use small pliers to release them without pulling wires.
Tip: Use color-coded zip ties or tape to keep wires organized by position. - 5
Remove mounting bolts and extract old motor
Remove the motor mounting bolts and lift the motor clear of the bracket. Support the motor as you disconnect it to avoid straining the wiring harness.
Tip: If the motor is heavy, enlist a helper to avoid dropping or injuring yourself. - 6
Compare old motor to replacement and prep mount
Place the new motor next to the old one to confirm mounting points and shaft compatibility. If needed, prepare spacers or adaptors and ensure the shaft length matches the drive system.
Tip: Check shaft diameter and length; a mismatch can cause drive misalignment or belt slip. - 7
Install the replacement motor
Mount the new motor using the existing bracket and screws. Tighten mounting bolts to the specified torque and verify that the motor is seated flat without wobble.
Tip: Avoid overtightening, which can warp the bracket or mount and misalign the shaft. - 8
Reconnect wiring and belt
Reconnect the wiring harnesses in their labeled positions and reattach the belt to the correct pulleys. Ensure wires are routed away from belts and heat sources.
Tip: Apply a small amount of dielectric grease where applicable to prevent corrosion on connectors. - 9
Test run and reassembly
With the covers in place but unplugged, plug in briefly to verify the motor spins in the correct direction and the belt tracks smoothly. After a successful bare-bones test, reassemble all covers and perform a slow fabric stitch to confirm performance.
Tip: If the motor spins in reverse, swap the motor wires or check the wiring diagram for correct polarity.
Your Questions Answered
Do I really need to replace the entire motor or can I repair the windings?
Repairing windings is possible in some cases but often not cost-effective for hobbyists. Replacing with a correctly matched motor tends to be safer, more reliable, and easier to warranty. If windings are burned or bearings are seized, replacement is typically the better option.
Repairing windings may be possible in theory, but replacement is usually safer and more reliable for hobbyists. If the windings are damaged or bearings are seized, replace the motor.
How do I know which motor is compatible with my machine?
Check the model number, voltage, RPM, shaft diameter, and mounting pattern in the service manual or parts list. Ensure the connector type and belt drive align with the machine. When in doubt, contact the manufacturer or a professional technician.
Look up the model, voltage, RPM, shaft and mounting, then verify against the manual or parts list. If unsure, ask a technician.
Is it safe to replace a sewing machine motor myself?
Yes, with proper safety precautions: unplug the machine, work on a non-conductive surface, and follow the wiring diagram exactly. If you’re not confident with electrical work, seek professional help to avoid shocks or miswiring.
You can do it safely if you unplug completely and follow the wiring diagram. If you’re unsure, get a professional.
What maintenance helps extend motor life after replacement?
Keep the motor clean and dust-free, inspect belts regularly, and ensure proper ventilation. Use manufacturer-recommended lubricants only if specified, and replace worn components promptly to prevent premature failure.
Keep it clean, check belts, and follow the manual for lubrication and maintenance.
What should I do if the motor doesn’t start after replacement?
First, verify power at the outlet and confirm all wire connections are correct and secure. Check belt tension and ensure the motor spins freely without binding. If issues persist, recheck the wiring diagram or consult a technician.
Check power and wiring, then inspect the belt. If it still won’t start, consult a technician.
Watch Video
The Essentials
- Identify proper motor compatibility before purchase
- Follow model-specific wiring and mounting guidelines
- Label all connectors and keep hardware organized
- Test the motor with care before full operation
- Perform post-install maintenance to extend motor life