When to Use Sewing Machine vs Serger: A Practical Guide
Compare sewing machines and sergers to decide which tool fits garment construction and edge finishing. Practical tips and a decision framework for home sewists.

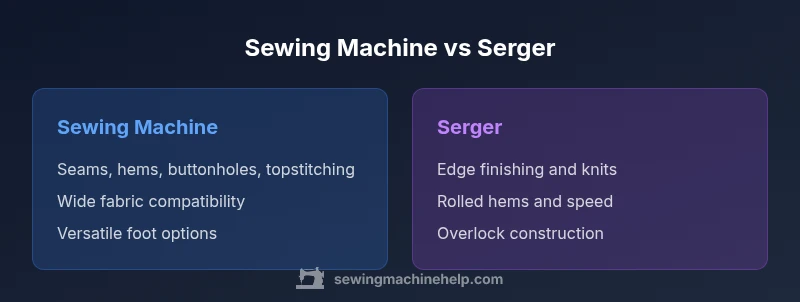
For many home sewers, a regular sewing machine handles most garment construction and top-stitching tasks, while a serger excels at finishing edges and knit fabrics. The choice depends on the project: use a sewing machine for seams, precise zippers, and hems; reach for a serger when you need clean, stretch-ready edges and fast finishing.
How the two machines are designed for different jobs
A sewing machine and a serger are engineered for different corners of the sewing world. The core difference lies in how they handle edges and seams. A conventional sewing machine creates stable, versatile seams using a single needle and a bobbin thread. It excels at constructing garments, inserting zippers, installing buttons, and finishing hems with topstitching. A serger, or overlock, slices away rough edges as it stitches over them, producing a clean edge and can create narrow rolled hems. Because a serger uses multiple threads and loopers, setup and threading tend to be more involved, but finishing time is dramatically reduced on many projects. For this reason, sergers are particularly attractive for knit fabrics and garments where edges need to stretch and endure washing cycles. For beginners, the sewing machine is often the friendlier starting point as it teaches you control, seam allowances, and seam types before tackling the more specialized serger technique.
When to use a sewing machine: core tasks
A traditional sewing machine covers a broad spectrum of tasks that form the backbone of most sewing projects. It handles flat construction seams, zippers, buttonholes, topstitching, and decorative details. For woven fabrics, consistent straight stitches help seams lie flat and durable. When you need precise seam allowances, complex stitching, or visible finish like a clean buttonhole, the sewing machine is the go-to tool. It also accepts a wider variety of presser feet designed for specific tasks—walking feet for stable feeding, zipper feet for concealed closures, and twin-needle options for durable hem finishes. In short, the sewing machine provides control, versatility, and reliability for everyday garment making and home projects.
When to use a serger: core tasks
A serger specializes in edge finishing and speed. It trims the seam while wrapping the edge with a stitch, producing a clean, professional edge that resists fraying. Sergers shine on knit fabrics, where stabilizing edges would otherwise curl or stretch. They can create narrow rolled hems, flatlock seams, and broad overlock stitches that join plies with minimal bulk. A serger is less suited to precise topstitching or inserting standard zippers, so most projects benefit from combining a sewing machine for structure with a serger for finishing edges. The result is durable seams with neat, stretch-friendly edges that withstand frequent washing and wear.
Stitch options and finishes: what each tool handles best
Understanding stitch capabilities helps you decide when to use which machine. A sewing machine typically provides straight stitches, zigzag or decorative stitches, and specialized stitches like blind hems or buttonhole stitches. It supports a wide range of presser feet for tasks such as zipper insertion, edge stitching, and cording. A serger operates with different thread paths and loopers to create overlock stitches that secure edges and trim fabric simultaneously. It excels at edge finishing, rolled hems, and clean seams on knits. While a serger can supplement many tasks, it cannot fully replace the sewing machine’s versatility for precise buttonholes, topstitching, or complex zippers.
Fabric considerations: knits vs wovens
Fabric type strongly influences tool choice. Woven fabrics, with their stable edges, respond well to a sewing machine for seams, hems, and topstitching. Sergers are beneficial when finishing edges on woven fabrics where fraying is a concern, but keep in mind their edge-trimming action can remove excess fabric on fragile weaves. Knits, on the other hand, pose a clear case for sergers. The stretch along the edge is controlled by the serger, reducing the risk of raveling during wear. However, knits can also be managed effectively with a sewing machine equipped with a stretching stitch or a walking foot. In mixed fabrics, plan to use both tools in concert for optimal results.
Project planning: matching tools to outcomes
Before starting a project, map the critical steps to the right tool. Garment construction that involves precise seams, buttonholes, and topstitching typically starts with the sewing machine. If the project requires durable knit edges, serger finishing can save time and improve edge integrity. For complex interiors or decorative details, the sewing machine remains essential, while the serger handles inside edges and quick seams to speed up production. A practical approach is to begin with a sewing machine to build the structure, then add serger finishing for knits or unfinished edges to achieve a professional look.
Practical workflow: step-by-step for a sample project
A typical workflow starts with planning and fabric preparation. Use the sewing machine to construct the main seams and insert any closures; avoid relying on decorative stitches for structural strength. Once major seams are completed, switch to the serger for edge finishing and seam wrapping, especially on knit fabrics or fabrics prone to fraying. If your project includes hems, you can choose to topstitch on the sewing machine for a crisp finish or use the serger for a lighter edge after sewing. Finally, review the finished garment for evenness, seam allowance accuracy, and thread color balance.
Maintenance and setup: keeping both machines running
Maintain both machines with a regular cleaning routine and proper threading according to your manuals. The sewing machine typically benefits from oiling at indicated intervals and changing feet for specific tasks. The serger requires careful threading and tension adjustments to avoid skipped stitches or loose edges. Always use the correct needle types and sizes for your fabric, and store machines in a clean, dust-free area. When setting up, verify that you have the right presser foot for each task and that tension is balanced for the chosen stitch. Regular servicing by a qualified technician helps maintain performance over time.
Budgeting, entry points, and upgrading paths
Both machines have entry-level options and more advanced models. A beginner often starts with a reliable sewing machine that offers a solid range of stitches and essential features. A serger is typically an additional investment, best chosen after you’ve gained experience with basic garment construction and edge finishing. As you grow, you may upgrade to models with more robust motors, broader stitch options, and improved threading systems. Consider a bundle that includes essential feet and accessory packs for a smoother learning curve and faster project completion.
Quick-start decision framework: a practical flow
- Do you need precise buttonholes and topstitching for most projects? If yes, start with a sewing machine. 2) Do your projects frequently involve knits or require clean edges at a rapid pace? If yes, introduce a serger. 3) Are you likely to work with multiple fabrics? A combination approach—sewing machine for structure, serger for finishing—often yields the best results. 4) Is space or budget a concern? Prioritize a versatile sewing machine first, then evaluate serger needs as you gain experience.
Common mistakes and how to avoid them
Common errors include ignoring fabric compatibility, using inappropriate needles, and neglecting regular maintenance. Respect the recommended needle types for fabrics, use the correct presser feet, and ensure proper threading paths. When starting with both machines, work on simple projects to build confidence before tackling complex details. Finally, avoid forcing stitches by over-tensioning threads; instead, adjust tension and stitch length slowly while testing on scrap fabric.
Final tips for practice and learning resources
Consistency is key when learning both tools. Practice with a few familiar patterns to build familiarity with stitch settings, foot choices, and tension. Use practice swatches to compare edge finishes between the sewing machine and serger. Seek out tutorials that demonstrate specific techniques for knits, hems, and decorative details. Over time, you’ll learn to gauge which tool best suits each phase of a project and how to combine them for efficient, professional results.
Comparison
| Feature | Sewing Machine | Serger |
|---|---|---|
| Primary function | Construct seams, install closures, topstitch | Finish edges, overlock seams, knit-friendly |
| Stitch options | Straight, zigzag, buttonholes, decorative stitches | Overlock/overedge stitches; rolled hems |
| Fabric handling | Wide range; less edge trimming | Excellent for knits; edge trimming built-in |
| Edge finishing | Requires separate finishing for most edges | Edges finish automatically on many fabrics |
| Best for | Garment construction, precision sewing | Fast finishing, knit fabrics, professional edges |
| Setup and maintenance | Moderate setup; accessories common | More complex threading; needs regular attention |
| Price/value | Broad range; value grows with capabilities | Often a dedicated purchase; value tied to finishing needs |
Strengths
- Versatile for a wide range of garments and techniques
- Provides precise control over seams and topstitching
- Supports a strong accessory ecosystem and expansions
- This setup often yields durable, professional-looking results
Negatives
- Sergers require learning and can be a secondary investment
- Not a complete replacement for a sewing machine's capabilities
- Threading can be time-consuming and finicky at first
Start with a sewing machine; add a serger as finishing tasks grow
For most home sewers, the sewing machine covers construction and precision. A serger enhances edge finishing and knit work, speeding production. Together, they cover the full spectrum of common sewing needs.
Your Questions Answered
Can a serger replace a sewing machine for most tasks?
No. A serger excels at edge finishing but cannot reliably insert zippers, perform buttonholes, or handle topstitching with precision. A sewing machine remains essential for structural seams and detailed construction.
A serger isn’t a full replacement for a sewing machine. It’s great for edges, but you still need a sewing machine for zippers, buttonholes, and topstitching.
Is a serger necessary for beginners?
Not strictly. Beginners can start with a sewing machine to learn basic seams and hems. A serger becomes valuable as you tackle knits and projects that require fast, clean edge finishing.
A serger isn’t required at first—start with a sewing machine and add a serger later if you work with knits or want faster finishing.
Which fabrics benefit most from a serger?
Knits and fabrics prone to fraying benefit most from serger edge finishes. The overlock stitch provides durability and stretch-friendly edges, reducing wear at the seams.
Knit fabrics really shine with a serger because the edges stay neat and stretchy.
How should I plan tool usage for a new project?
Start by outlining seam construction in the sewing machine, then plan serger finishing for edges if your fabric requires it. A two-tool workflow often saves time and improves results.
Outline your seams first with the sewing machine, then add serger finishing if the fabric needs it.
What maintenance do both machines require?
Regular cleaning, proper threading, and using the correct needles and feet are essential for both machines. Oil should be applied as recommended, and professional servicing can extend lifespan.
Keep both machines clean and threaded correctly; service them as needed to maintain performance.
The Essentials
- Choose a sewing machine for building garments and precise seams
- Add a serger when edge finishing and knits are common
- Plan projects with a two-tool workflow for best results
- Invest in essential feet and practice to build skills
- Maintain both machines to ensure reliable performance